Excellent article from Tom Stirr
Tom Stirr is the man behind smallsensorphotography.com. In his latest blog post entitled, Investment Choices, he thoughtfully outlines a number of factors that photographers and photo-enthusiasts could/should consider prior to making equipment purchases.
He makes some very good points regarding sensor size, dynamic range, AI software and the many options available in computational photography that may supersede the old adage of ‘bigger is better’.
In particular, if people are really honest with themselves and their true needs as photographers, a 20MP camera system is likely the ideal sensor size—the sweet spot—and putting those 20MP onto a smaller sensor makes even more sense with the subsequent gain in image stabilization and focal length along with a reduction in gear weight.
Food for thought.
I encourage you to have a look at Tom’s article before your next gear purchase.
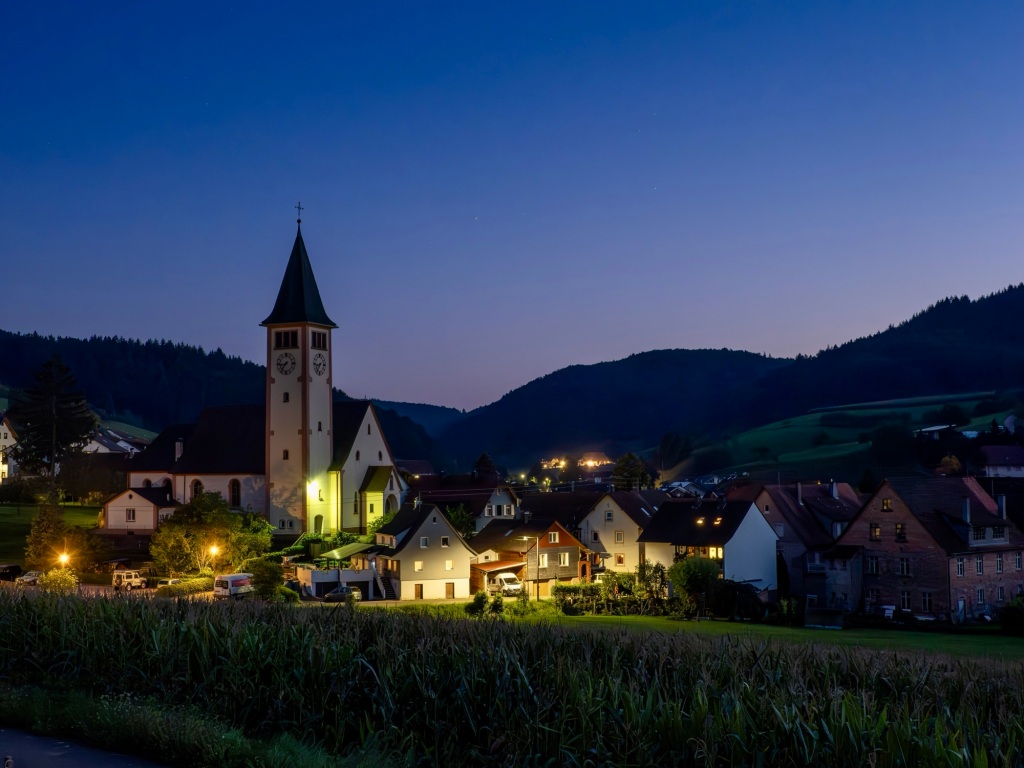
OM-1 w/ 12-100 ƒ4 @23mm (46mm efov); ƒ5.6 @ 1sec, handheld; ISO 3200
Raw image processed in Lightroom Classic
A photograph like this would have been impossible in the film days without a tripod and very challenging even today without superb sensor stabilization and post-process AI noise reduction.
OM System 2x Digital Teleconverter – How good is it?

Since I began using the OM system OM-1, I’ve been intrigued by the 2x Digital Teleconverter (2xDTC). It is one of the camera’s computational photography options and is easily accessed via the menus (2.2 Other Shooting Functions). When the camera is set to LSF+Raw (Large Super Fine JPEG + a Raw file), you get two files, both at the native resolution of 3188×5184 pixels: the original raw at the native focal length plus a JPEG produced from the cropped raw that is then re-sized and enhanced to be double the focal length.
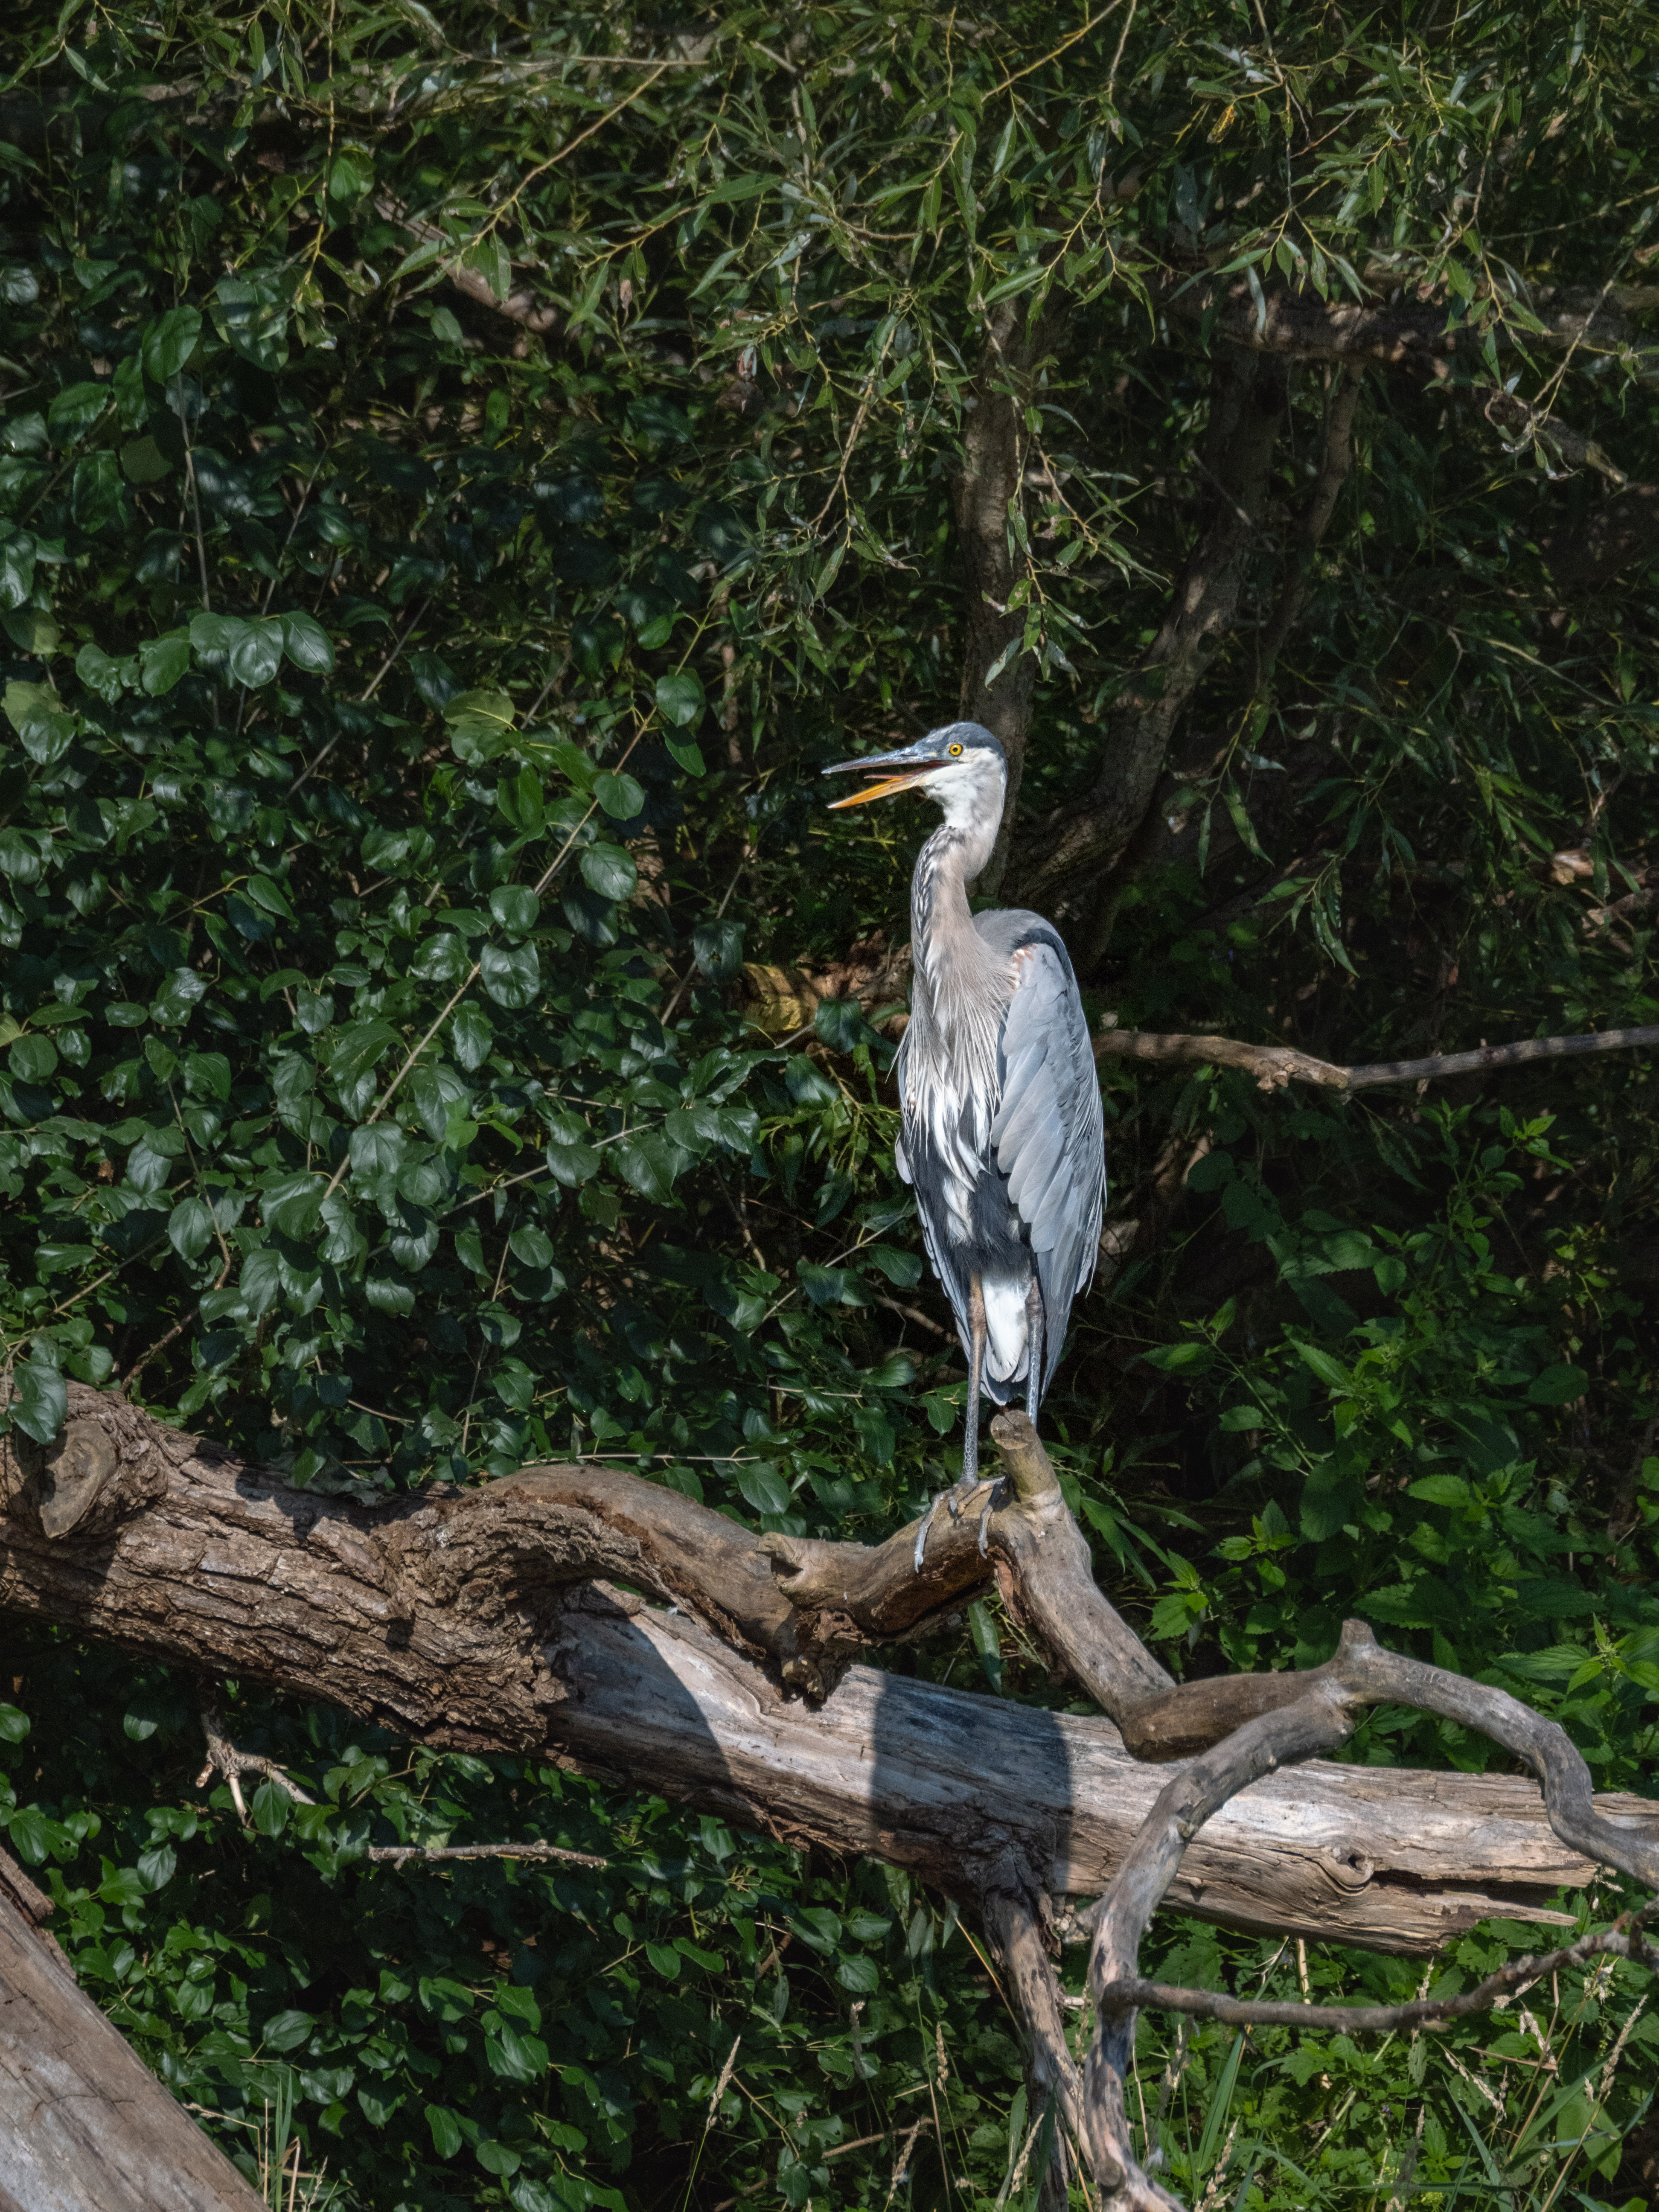
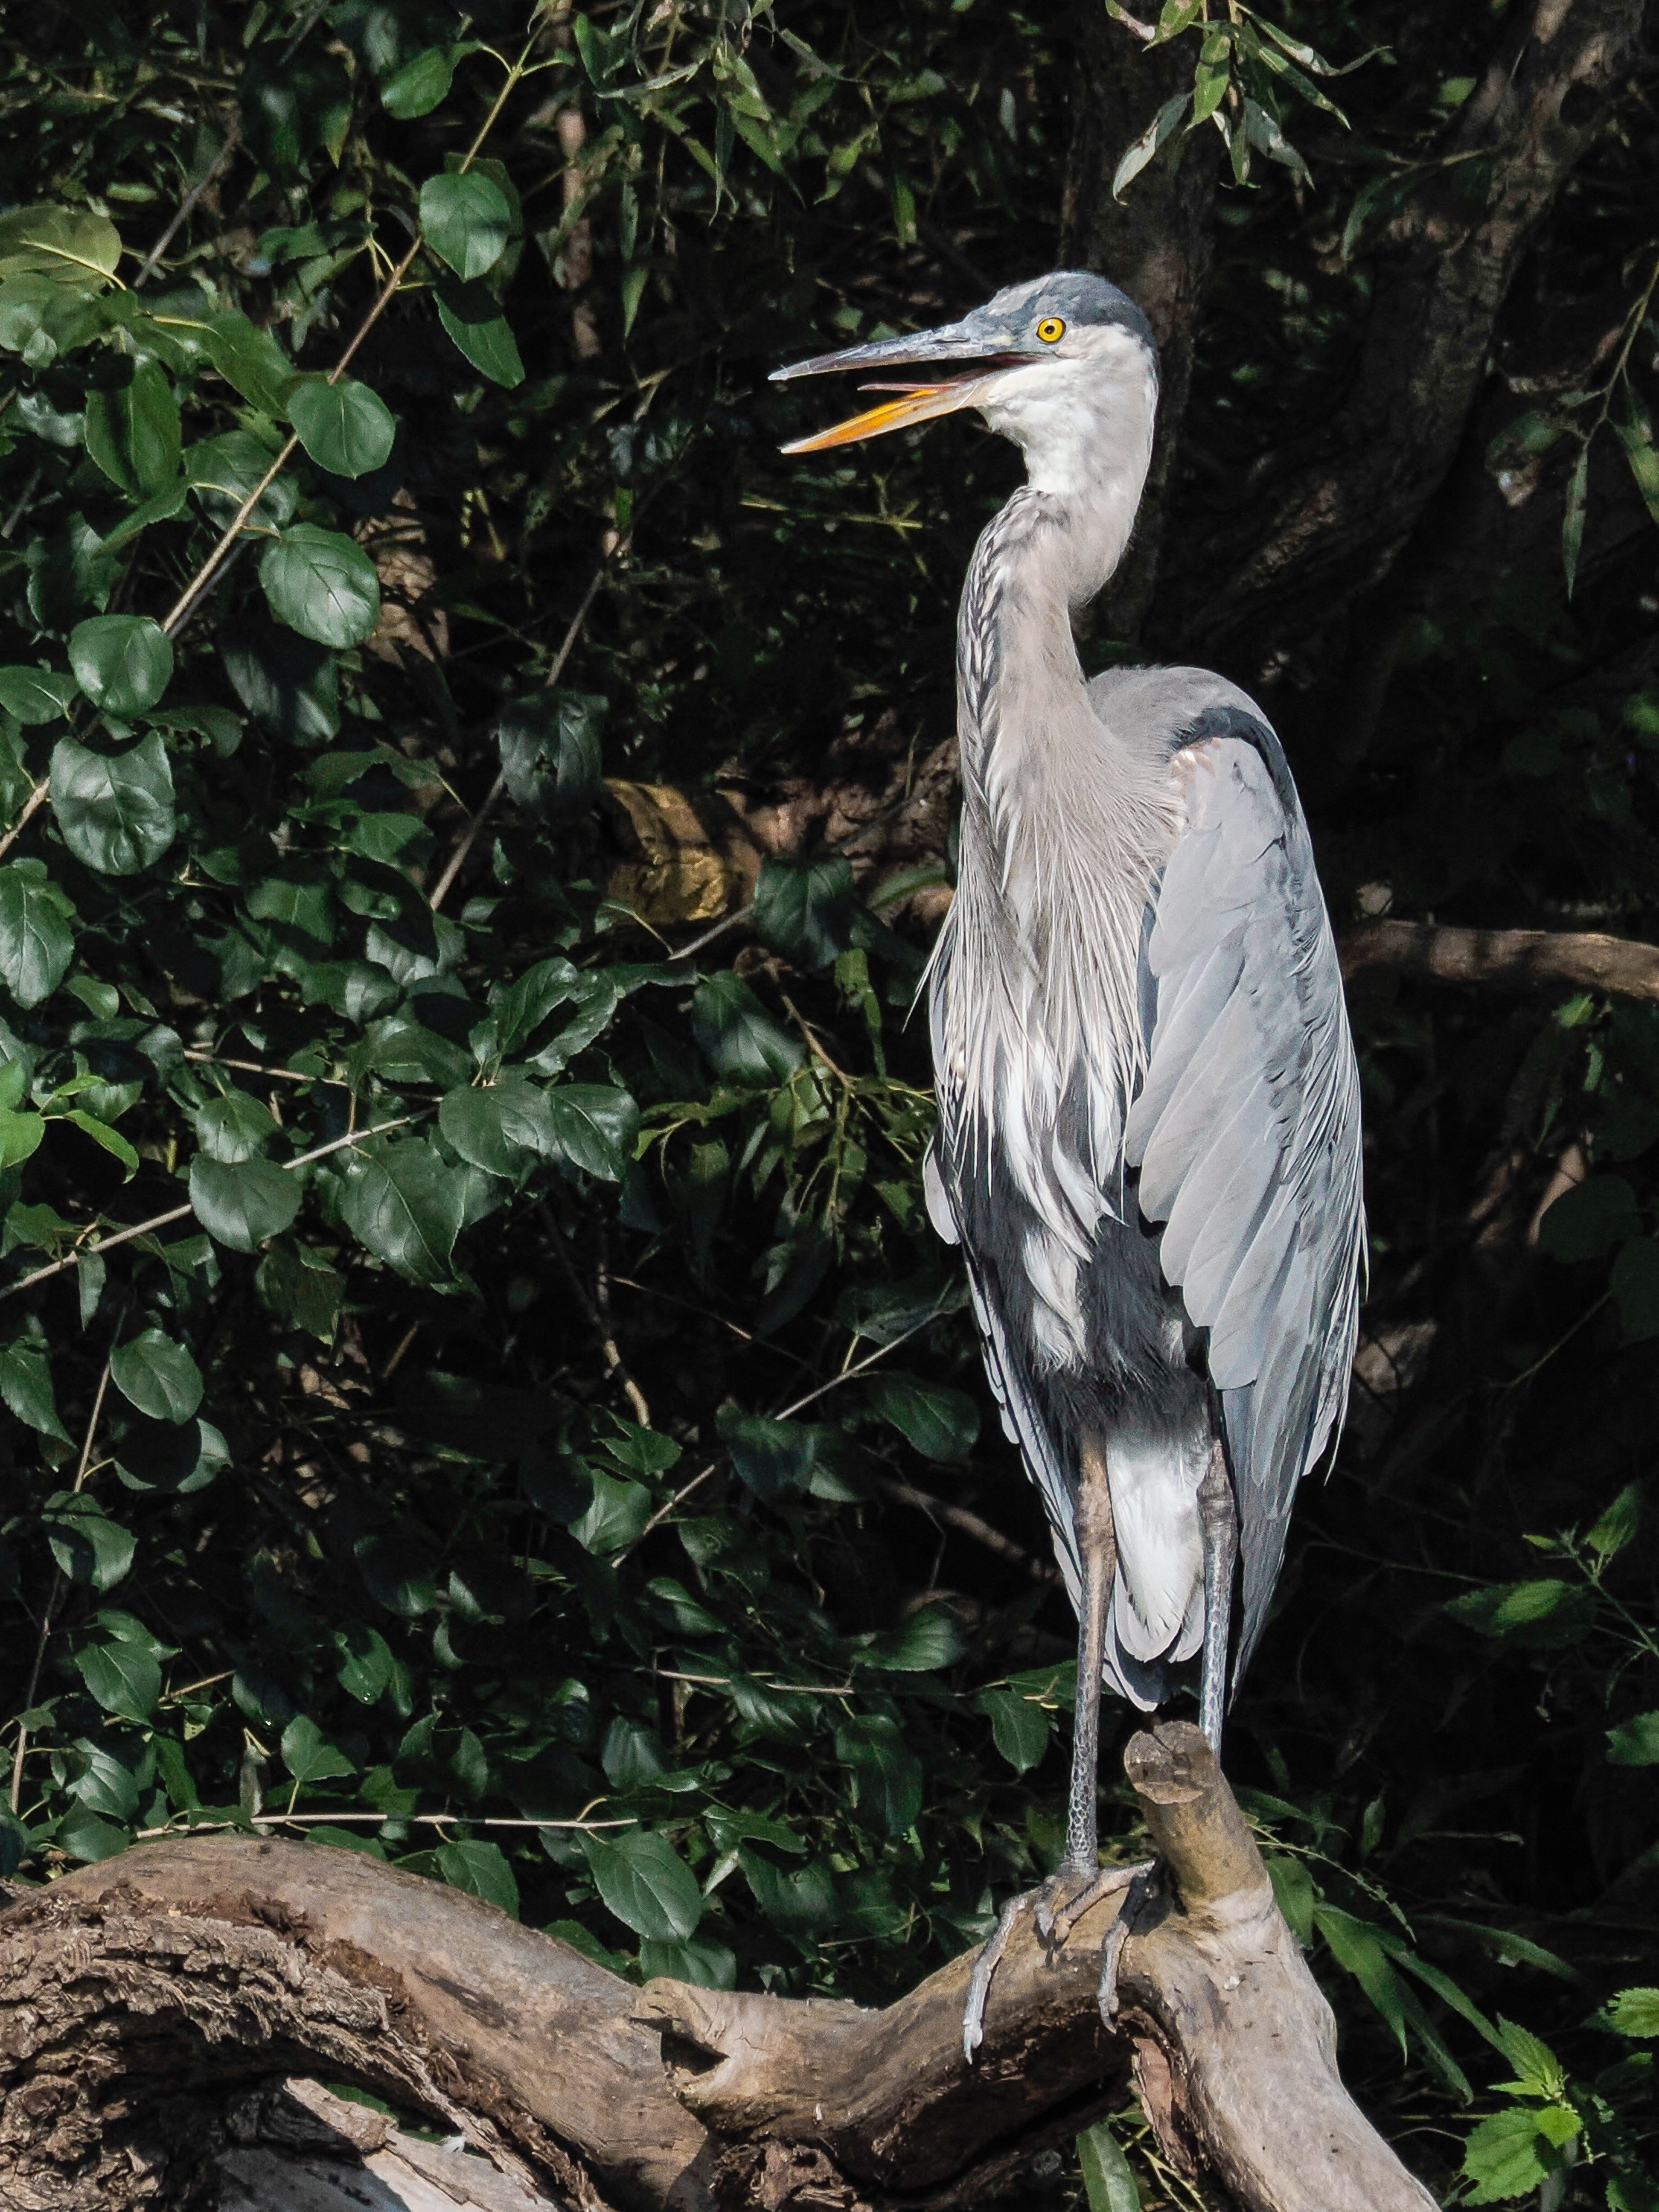
Left: the original Raw image; Right: the resulting 2xDTC JPEG produced in-camera.
OM-1 w/M.Zuiko Digital 100-400mm ƒ5-6.3 @ 400mm (evoke 800mm); ƒ8 @ 1/2500; ISO 800, handheld, which is the same shooting style I would use for this kind of photograph.
The 2xDTC image has an efov of 1600mm, with no loss of light!
I’ve read a number of posts and watched a few YouTube videos about the 2xDTC process and the jury seems to be out as to how useful it is. This post is meant to set the record straight.
The advantage is you get double the focal length without buying or having to carry an extra accessory and with no loss of light. A real teleconverter fits between the camera and the lens and magnifies 2x, but the downside is it reduces the light by 2 stops; ƒ5.6 @ 1/2000sec shutter speed suddenly becomes ƒ5.6 @ 1/500, potentially reducing the sharpness of the image when handholding long focal lengths. As with everything in photography, it’s a trade off; double the focal length but 1/4 the light. By the way, by all accounts, Olympus teleconverters are beautifully matched to the lenses that accept them, maintaining excellent image sharpness, but at a loss of 2 stops.
The 2xDTC doubles the focal length with no loss of light, but does the image quality hold up?
In this YouTube video professional British wildlife photographer Andy Rouse calls the 2xDTC ”a hidden gem” and says ”the results are quite actually amazing”. He feels that the quality from the JPEG is better than the quality from the raw file cropped then re-sized to the same size as the JPEG. In fact, he goes as far as saying the files are good enough for the stock agency he’s with. He recognises the shortcomings with regards to sharpness, but overall gives it a thumbs up.
Peter Forsgård, finds the 2xDTC ”helpful sometimes” as he explains in this YouTube video. However, unlike Andy Rouse, Peter Forsgård found that a cropped raw is better than the JPEG produced using the 2xDTC.
At the same time, Thomas Stirr at SmallSensorPhotography.com has some excellent out-of-the-camera JPEGs made using the 100-400 and the 2xDTC.
So what to do? How does the 2xDTC stack up?
Full Disclosure: Without even looking at the images, I must declare my bias against JPEGs. I’ve always disliked the fact that JPEGs are finished products. They’ve been processed, sharpened, and compressed by the camera. Call me a control freak, but the individual photographer can do little to further improve the base image quality (detail, sharpness, highlights, shadows) without stressing the file quality. Whereas with Raw, much can be done to improve the image beyond what a camera can do in creating a JPEG.
Warning: Pixel-peeping ahead. Since moving from full frame to Micro Four Thirds, I’ve come to realize there is little to be gained from continually pixel peeping every image, mainly because the people looking at photos and buying photos do not pixel peep. Other photographers pixel peep, but they don’t generally buy other photographers photos. People who love a photo are drawn in by the emotional connection with the photograph, not the sensor it’s made with. Yes, the image must be well-crafted with sharp focus and accurate exposure. And certainly tweaking the colour balance and shaping the light using masking all play a role, but people who like the photo do not stick their noses up against the photo to check out the pixels.
So why am I pixel peeping now? I’m assessing the file in terms of fine prints, not casual web scrolling. Rather than incurring the hefty cost of printing each of the test shots, I’ll look at them on-screen at 100%. Basically, I’m trying to answer two fundamental questions:
- Would the JPEG created by the Digital Teleconverter stand up to the requirements of a fine print made at native resolution, basically a 12 x16″ image that would print nicely on 13 x 19′ fine art paper? This kind of quality would also be acceptable for photo competitions and stock agencies.
- Is it possible to improve upon the JPEG by using a crop from the original raw file and properly sharpening and enlarging it?
I examined the images at 100% after making JPEGs of each the test images. Wait! JPEGs? Why JPEGs? Like it or not, JPEGs are the online currency of photographs. Once a raw image has been processed, it gets output as a JPEG for online print services and for stock agencies. Sometimes finished Raw files are output as TIFF files, but the file size is often 20 to 30 times larger; e.g. a 4.2mb JPEG versus a 121mb TIFF.
Needless to say, I wasn’t entirely enamoured with the in-camera JPEG made by the Digital Teleconverter. Comparison photos are shown below. The cropped and enlarged Raw file is worse – just as Andy Rouse said, so it will need a bit of work.


Right: The original Raw file cropped to the same image view, then resized to the same native resolution as the JPEG.
The Raw file is clearly mushy, but the JPEG isn’t really “better”. It’s sharper, especially in the feather detail of the breast, but around the head, it looks more like a paint-by-numbers picture. Neither is usable for a fine art print.
However, the question becomes, would the Raw file come out better if it was sharpened before or after enlarging? Here are two images – you tell me . . .


Lightroom > Detail: Sharpening=40; Radius=1.0; Detail=50; Masking=50
Right: Sharpening is applied AFTER resizing back to native resolution.
Lightroom > Detail: Sharpening=100; Radius=1.3; Detail=50; Masking=70.
To get this file even close to other, much more aggressive sharpening was required.
Perhaps like you, I’m not happy with the quality of either image. The ‘sharpening before’ image looks crisper, but there are artefacts and a real graininess to the image. The ‘sharpening after’ is just plain mushy. To be clear, I did not sharpen each image the same, as that would be unrealistic. Each photo was sharpened to achieve my subjective ‘ideal’ sharpness. I specifically tried to improve feather detail beyond what the original JPEG showed.
But I think there is more that can be done to the Raw file to improved it. One of the most important options would be to run it through Lightroom’s AI-powered Denoise. This is a recent feature that was not available to Andy Rouse or Peter Forsgård when they did their testing.
Can AI Denoise improve the Raw file?
In a word: YES! Big time! Have a look at these comparison images:

Lightroom > Detail: Sharpening=40; Radius=1.0; Detail=50; Masking=50
Right: A Denoise setting of 80 nicely cleaned this file, after which appropriate sharpening was applied.
Lightroom > Detail: Sharpening=60; Radius=1.0; Detail=50; Masking=50
The big difference between the original raw and the denoised version is how clean the smooth-textured areas are.Take a look at the eye, an important part of every wildlife photo. It is much cleaner after denoising. Also, compare the large feathers of the wing. The denoised feathers are gorgeous!
Overall, the detail is about the same. Check the really fine short feathery bits sticking out at the back of the neck and at the top of the back. The detail is the same, but the clarity of the surrounding background allows those details to stand out more clearly. As well, with the denoised image, there isn’t the distracting graininess through the neck and breast feathers.
But how does the the denoised, sharpened and resized raw compare to the original in-camera JPEG?
Right: The denoised, sharpened and resized Raw file.
The difference is clear!
So now we know the difference is clear. A better image can be made by denoising, sharpening and resizing the original Raw file. This is why I declared my bias against JPEGs early in the article! But, is the improvement great enough to make the added time and effort worth it? It depends:
- Do you have the time?
It only takes two minutes to Denoise, sharpen and crop, provided you have the app . . . - Do you have Lightroom Classic?
Denoise is only available in Lr Classic (Desktop), not LrMobile or LrWeb (yet!). Topaz Denoise and DxO PureRaw also have excellent AI denoise options. - Do you need a native resolution image file?
The cropped Raw would be 1944 x 2592 pixels – large enough for any web use and will provide a high quality 5×7 print; even an 8×10 is possible or an 11×14 canvas – all without upsizing. - Will you be printing the image or submitting it for competition or to a stock agency?
If it’s for web use, projection or small prints, the in-camera JPEG will do. Otherwise, the two minutes are well worth it.
Everything about the Denoised, sharpened and resized Raw file is superior to the in-camera JPEG. The Denoised-and-Sharpened Raw is sharper with fewer and smaller ‘paint-by-number’ areas. Overall, I feel it has a much more three-dimensional look with more realistic colours. It just looks more realistic.
So I think we’ve put to rest the Digital Teleconverter question. Bottom line: If you are after ultimate image quality, do not use it! That being said, I have two more comparisons to show you . . .

Once the original files are downsized, the differences become much less apparent. The above example is sized to print an 8×10″ fine print; i.e. at 300 pixels per inch. Other than the slight difference in colour balance and some mid-tone contrast (both of which are easily corrected in Lightroom), the difference in overall sharpness is minimal, though, the Denoised-and-Sharpened Raw file would still print better, as it retains the three-dimensionality referred to above.
However, when these same images are resized to 1600 pixels for web use (see below), the difference in apparent sharpness disappears completely, though still the Denoised-and-Sharpened Raw file has a presence to it not found in the JPEG (and that may vary with different subjects and scenes).

Final Verdict
In summary, the 2xDTC is a convenient way to double the focal length of any lens. The is especially true for those who regularly shoot JPEGS and are not interested in post-capture processing. My advice to you, though, is to set the file option to LSF+Raw as this will give you your JPEG but it will also save a Raw file, thereby future-proofing your work in case you take up processing at a later date.
The 2xDTC can be helpful when travelling, as it double the range of a ‘walkabout’ lens, such as the 12-100mm (efov of 24-200mm) without having to carry any extra gear. And, if the longest focal length in your kit is simply not long enough, you now have another option. Andy Rouse claims the quality is good enough for professional uses and I can’t argue with his success. But, to me, JPEGs from 2xDTC seem to lack sharpness, mid-tone contrast and three-dimensionality.
TIt is important to remember that though the 2xDTC does a fair job in a number of circumstances, it does not replace the quality provided by a real teleconverter, which for OM System cameras and lenses is excellent.
Furthermore, before using the 2xDTC, photographers should consider whether a full, native resolution image file is actually needed – which is surprisingly rare. By far the majority of images are used and viewed at considerably smaller sizes (e.g. for web, small prints, etc.) so, a simple crop of the raw file would suffice without using the 2xDTC. And, as shown above, if captured as a Raw file then processed properly, a higher quality image is possible.
The images presented here demonstrate that if you are inclined to capture Raw files and process them in an app like Lightroom Classic, Topaz PhotoAI or DxOPureRaw, it is in your best interest to extract a final photo by denoising, sharpening and (if needed) resizing the raw file. By all means, shoot using 2xDTC – I find it helpful for framing – but capture images using LSF+Raw so you can make the necessary improvements. As mentioned previously, processing takes no more than a couple of minutes and you are welcome to use the settings provided above as starting points. The little bit of time it takes, certainly pays dividends in image quality!
Try it out and let me know how it goes!
Thanks for reading!
If you have any questions or comments about OM System, the Digital Teleconverter option, raw capture, processing in Lightroom or anything else, please add it to the Comments section.
If you are not yet a subscriber, then consider adding your email in the form below to be instantly alerted to new blog posts. And I promise not to inundate your inbox.
Have a look at my work by visiting www.luxBorealis.com and consider booking a presentation or workshop for your Photo Club or a personal field and/or screen workshop at Workshops.
Mornings on the Speed River Trail
Finding nature in my own back yard.
Note: The photos in this blog were all made on August 9 and 10, during morning walks along the Speed River between the Hanlon Expressway and Edinburgh Road, Guelph, Ontario.
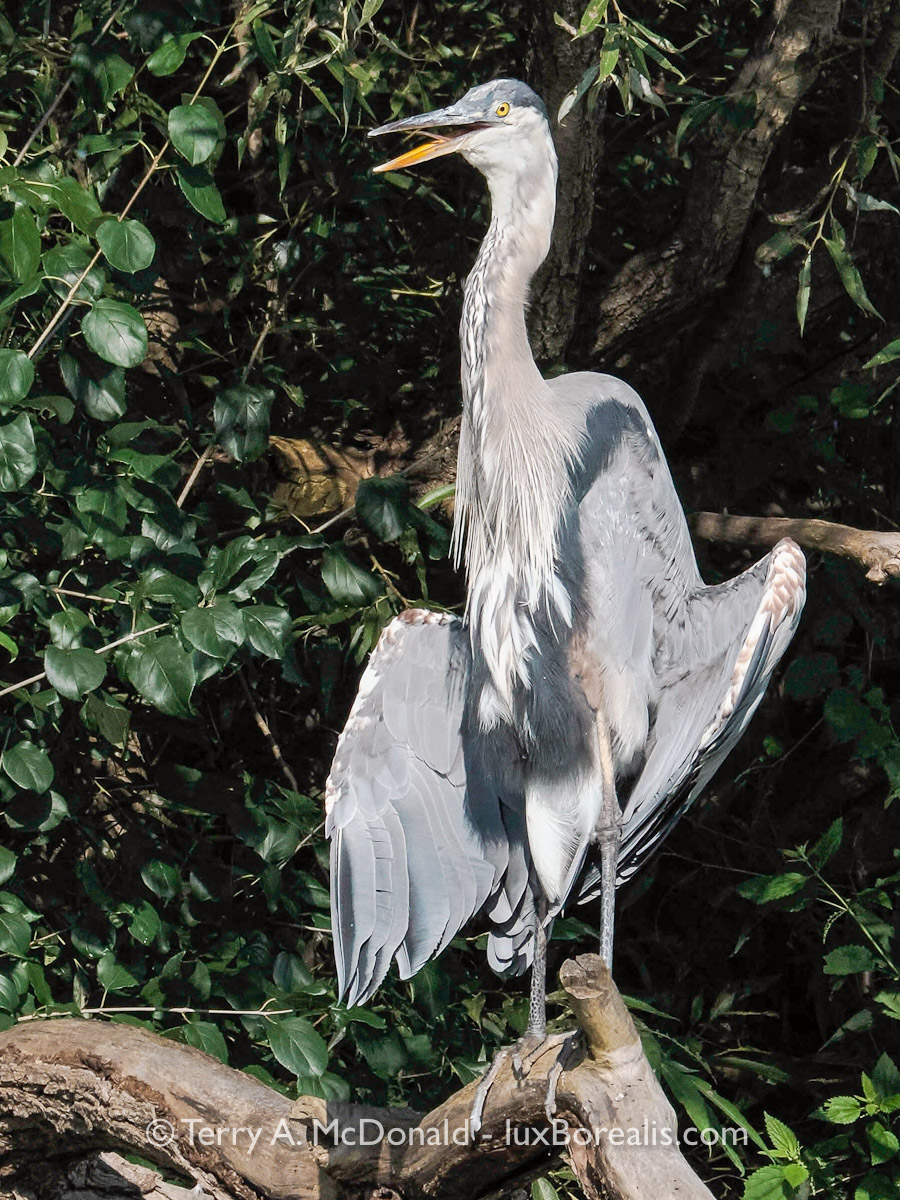
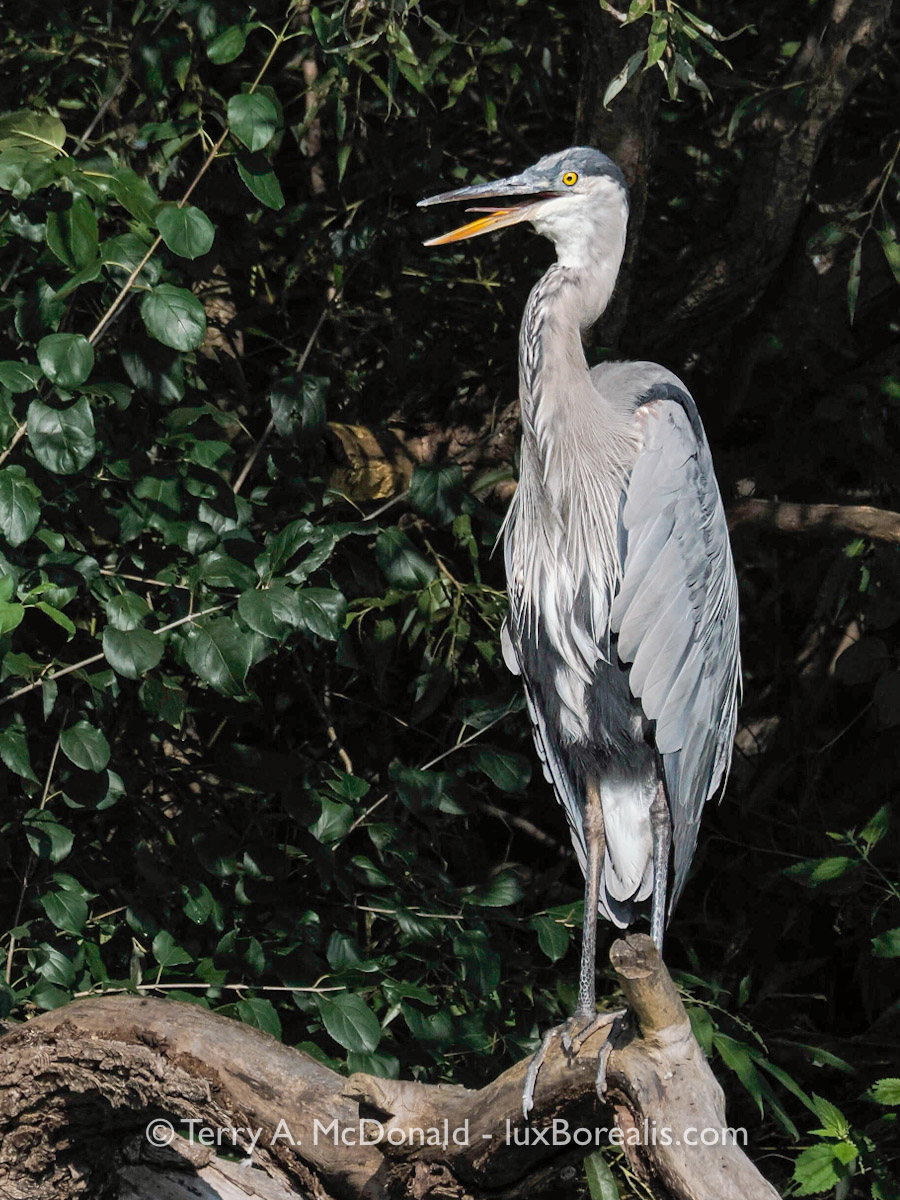
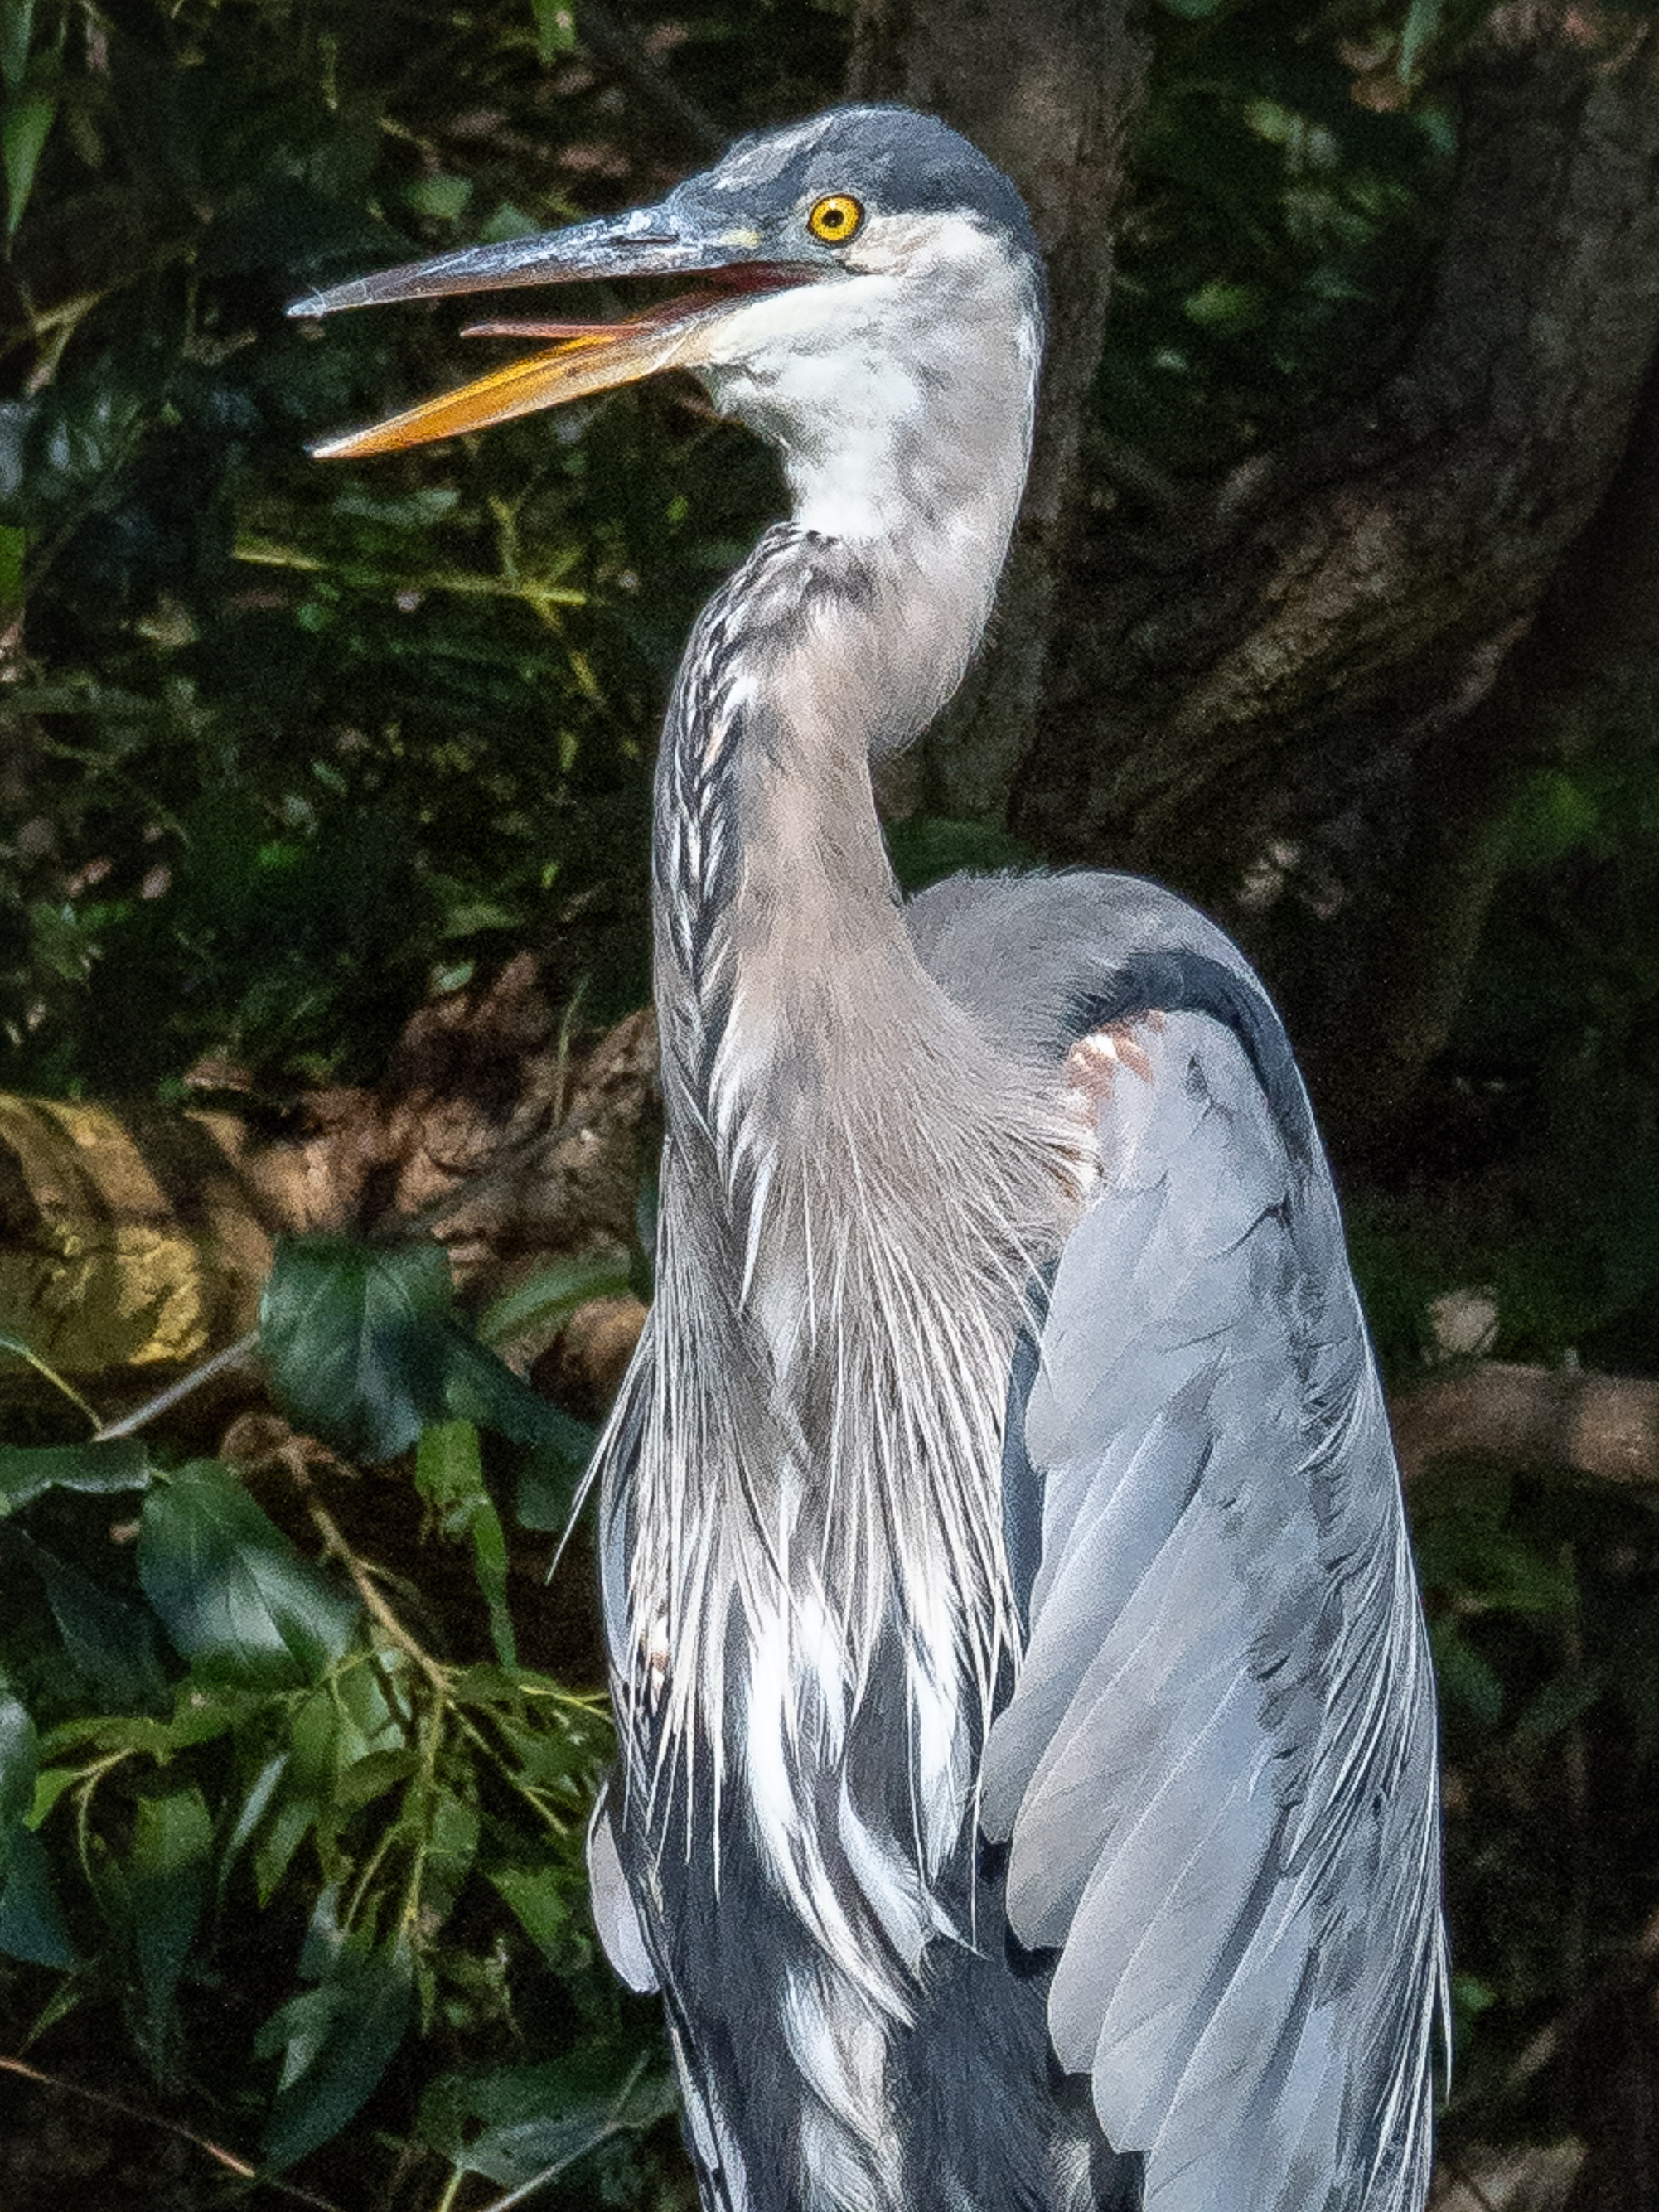
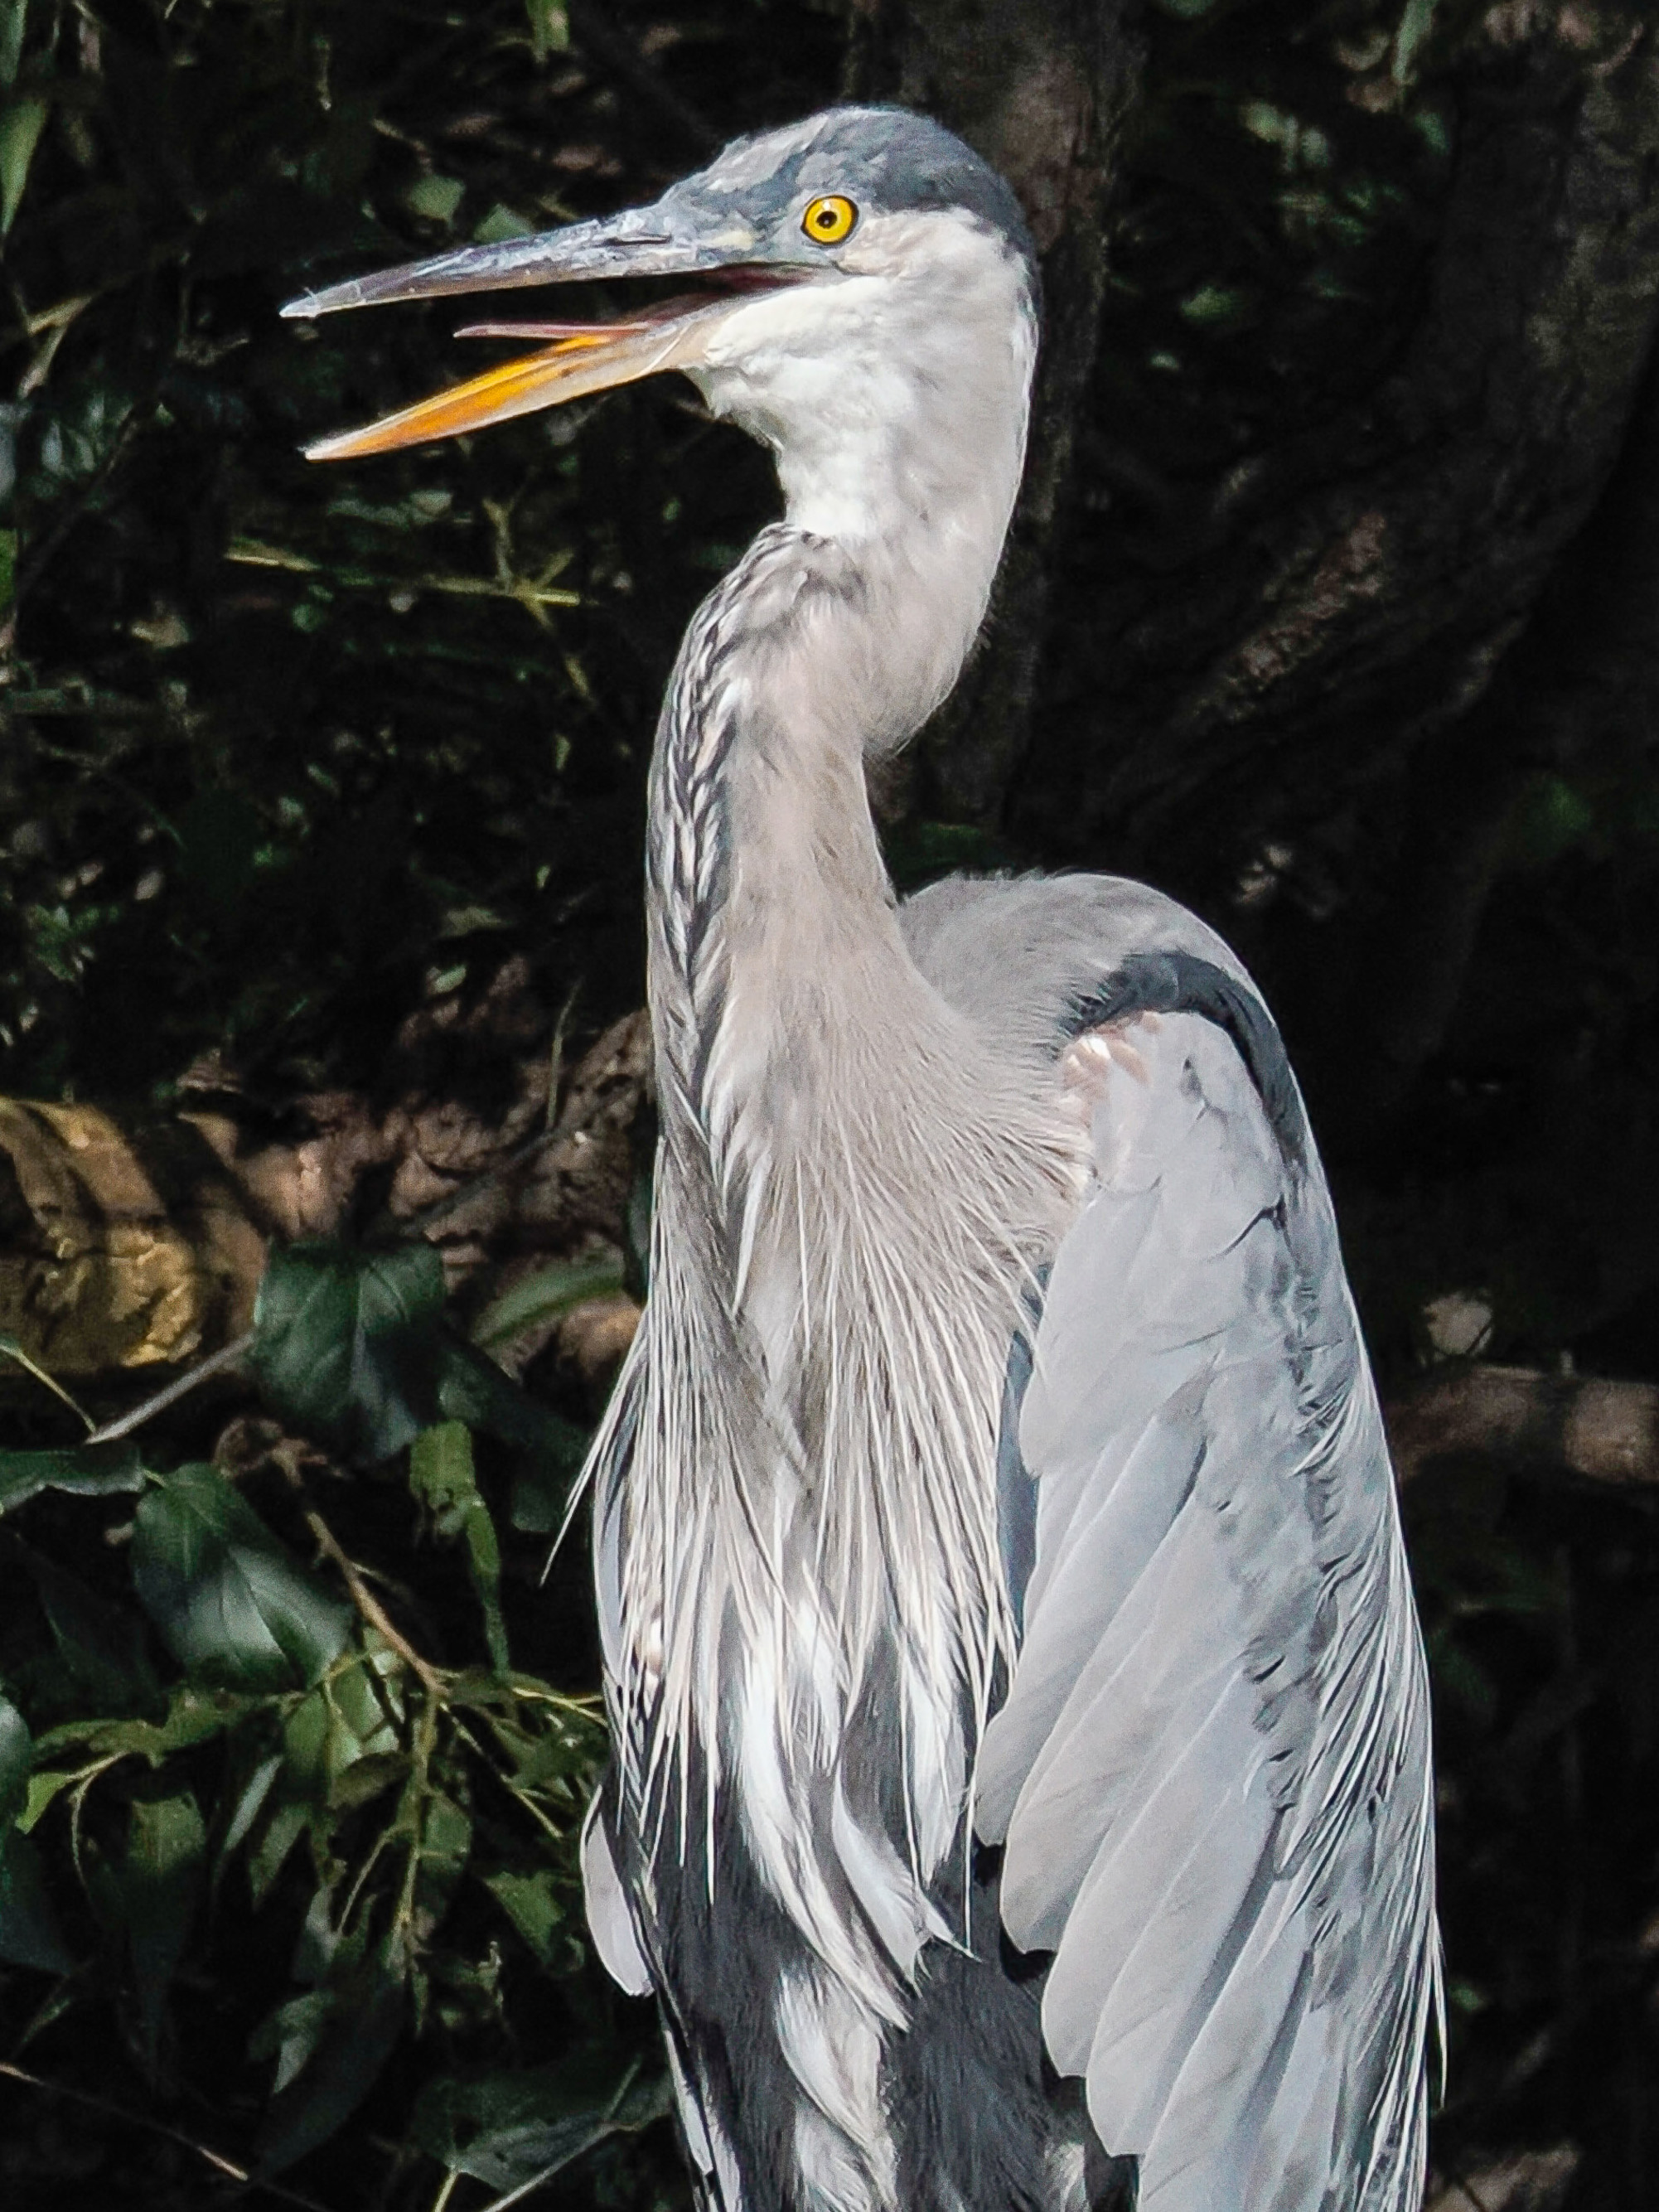
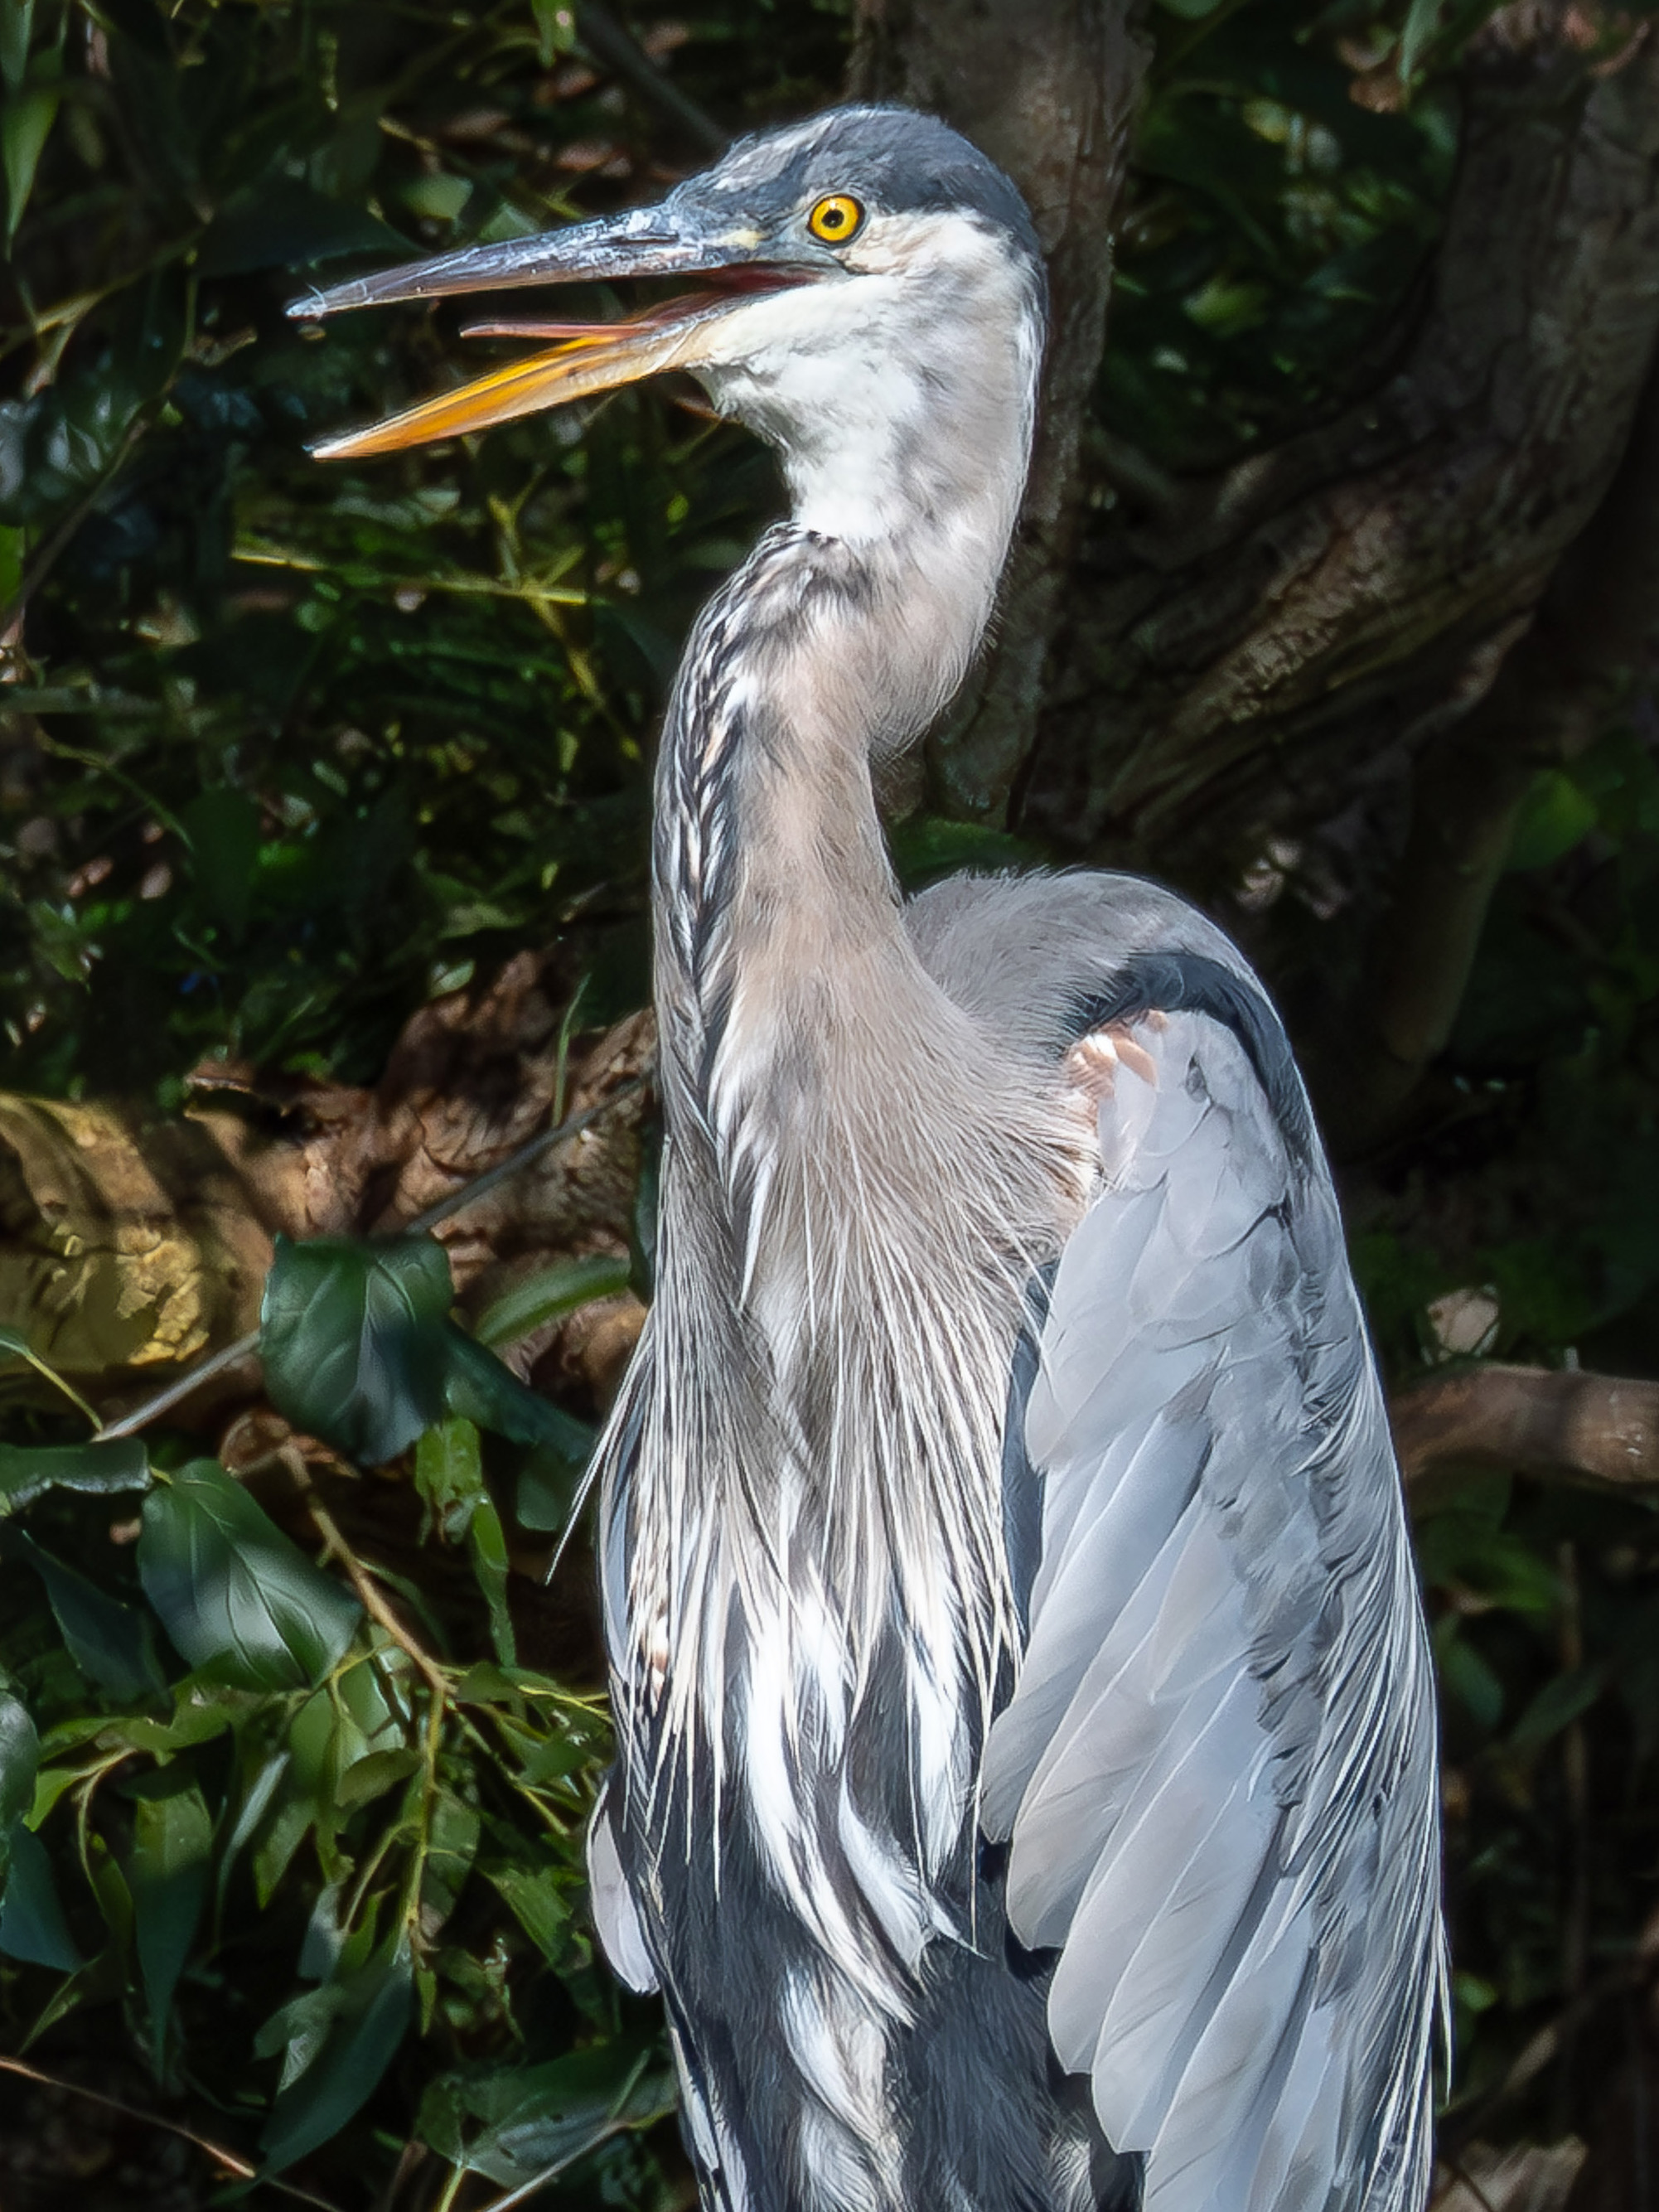
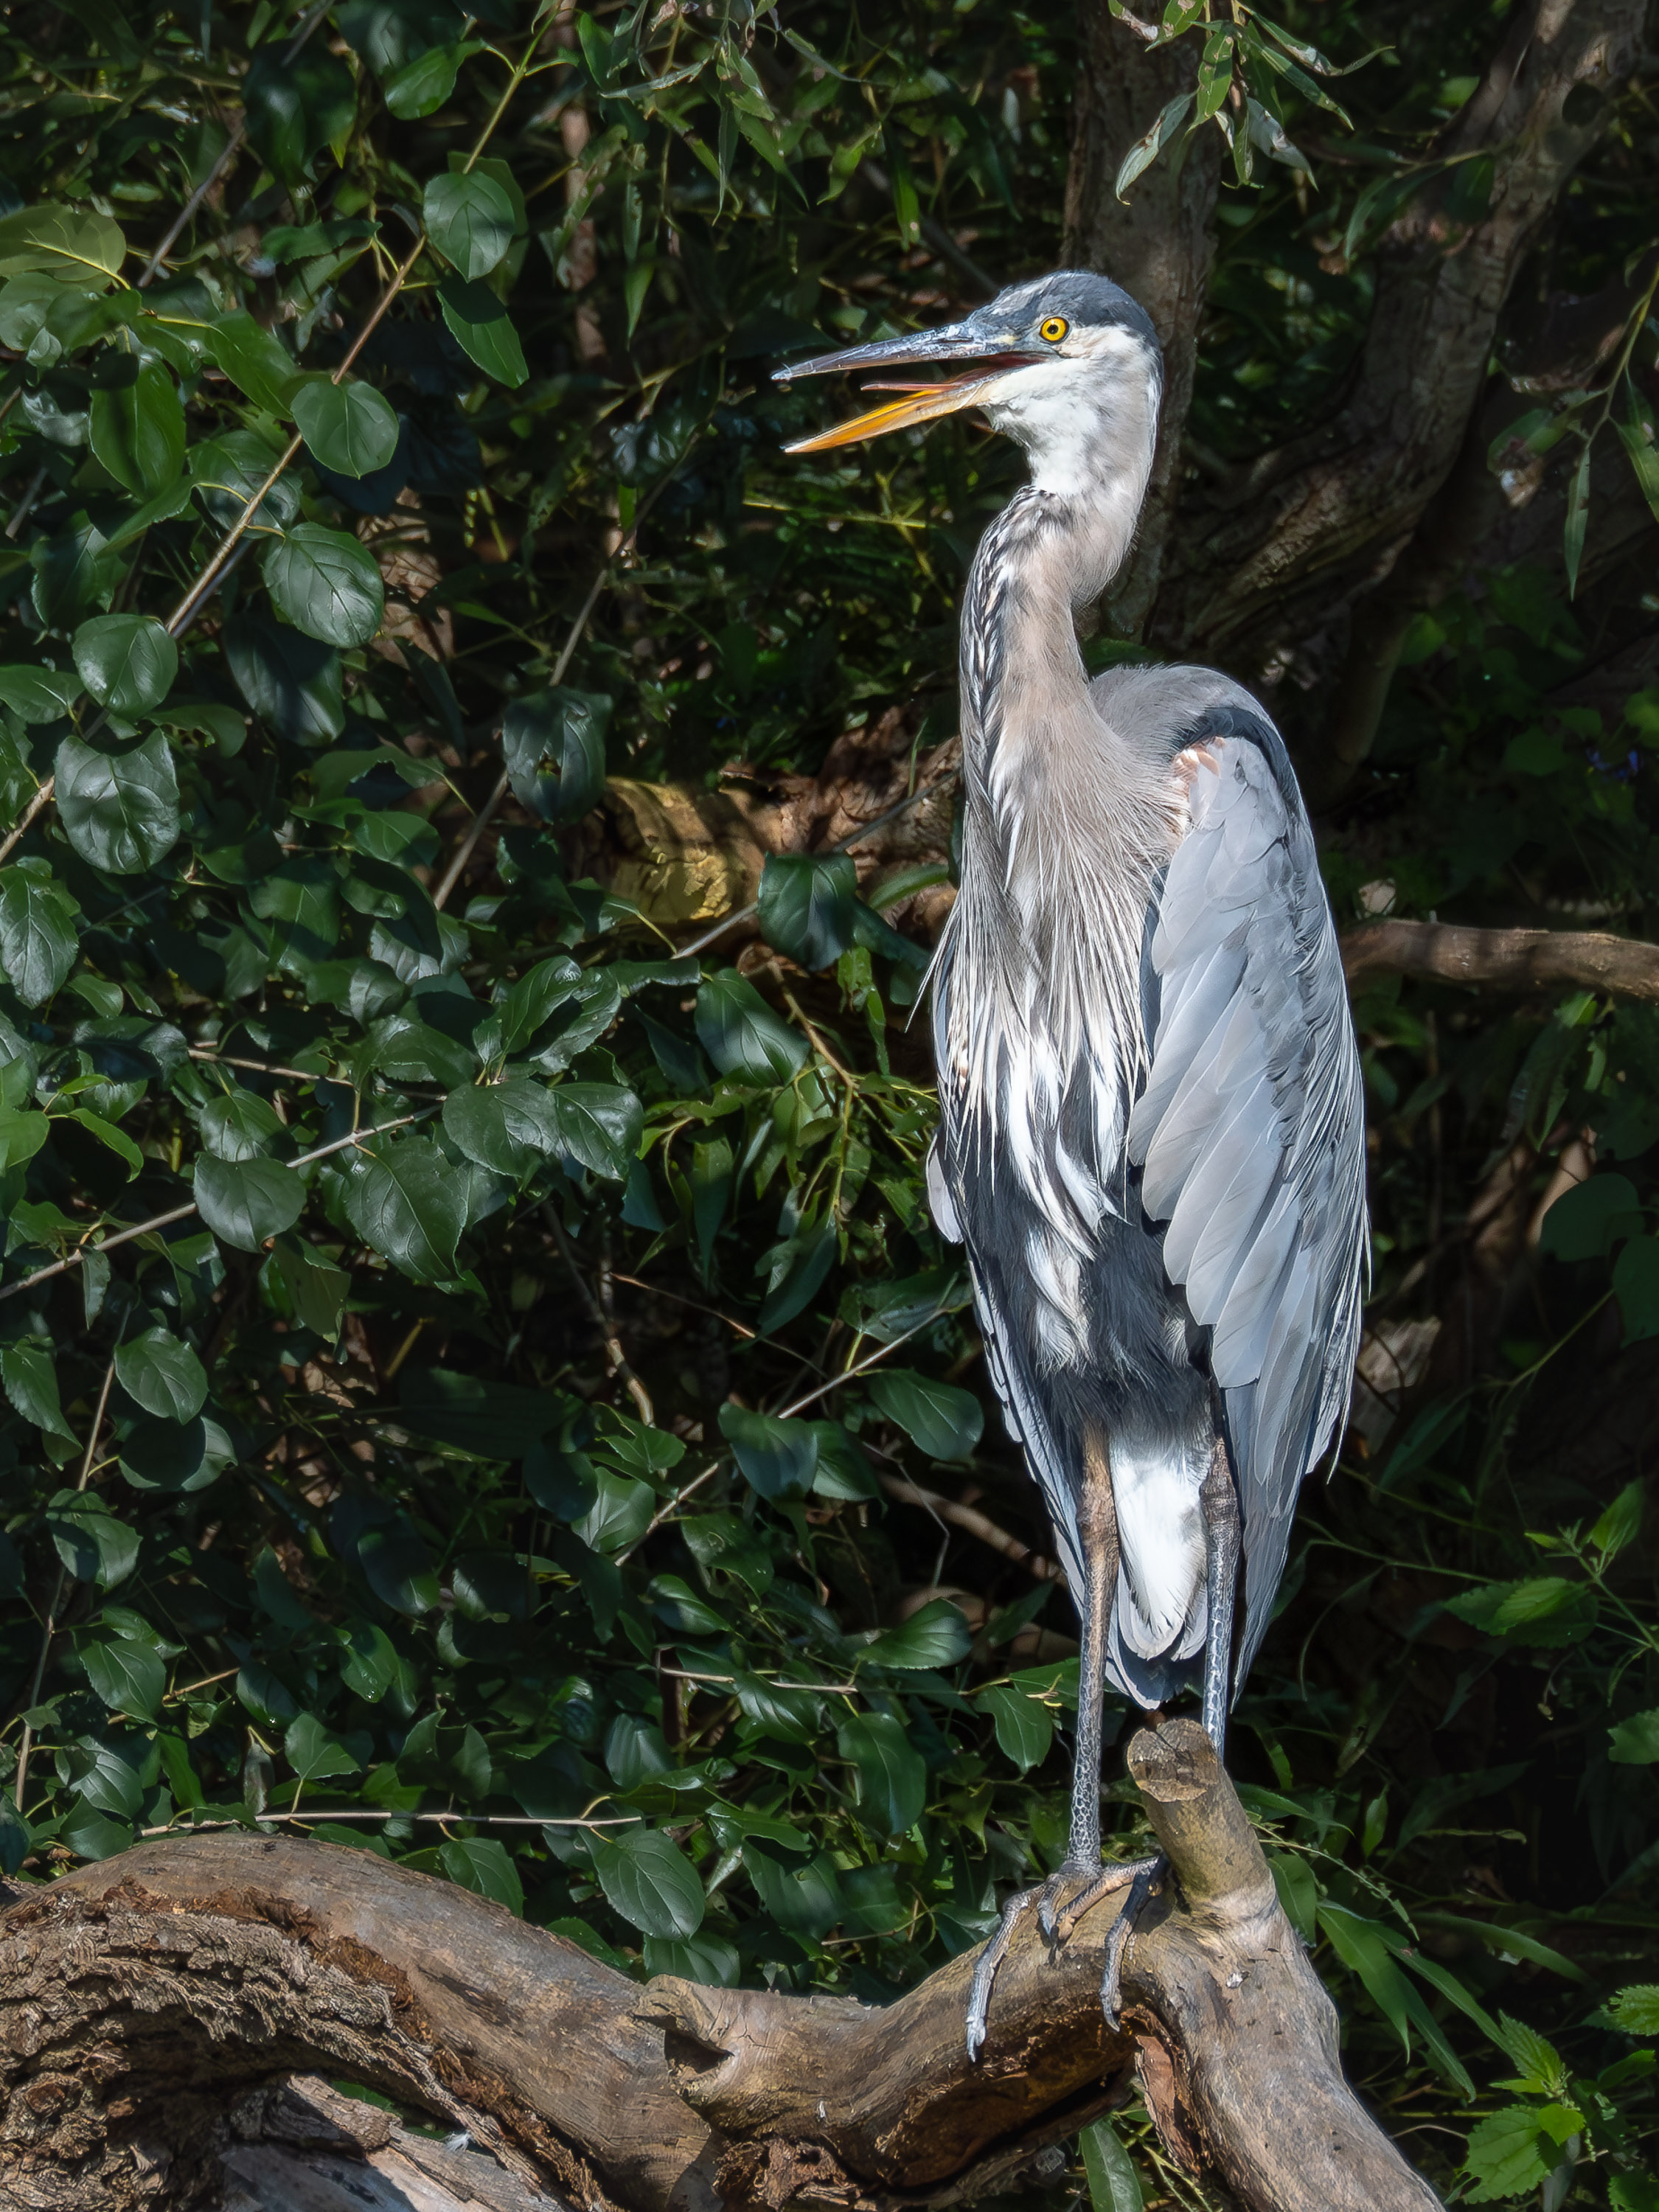
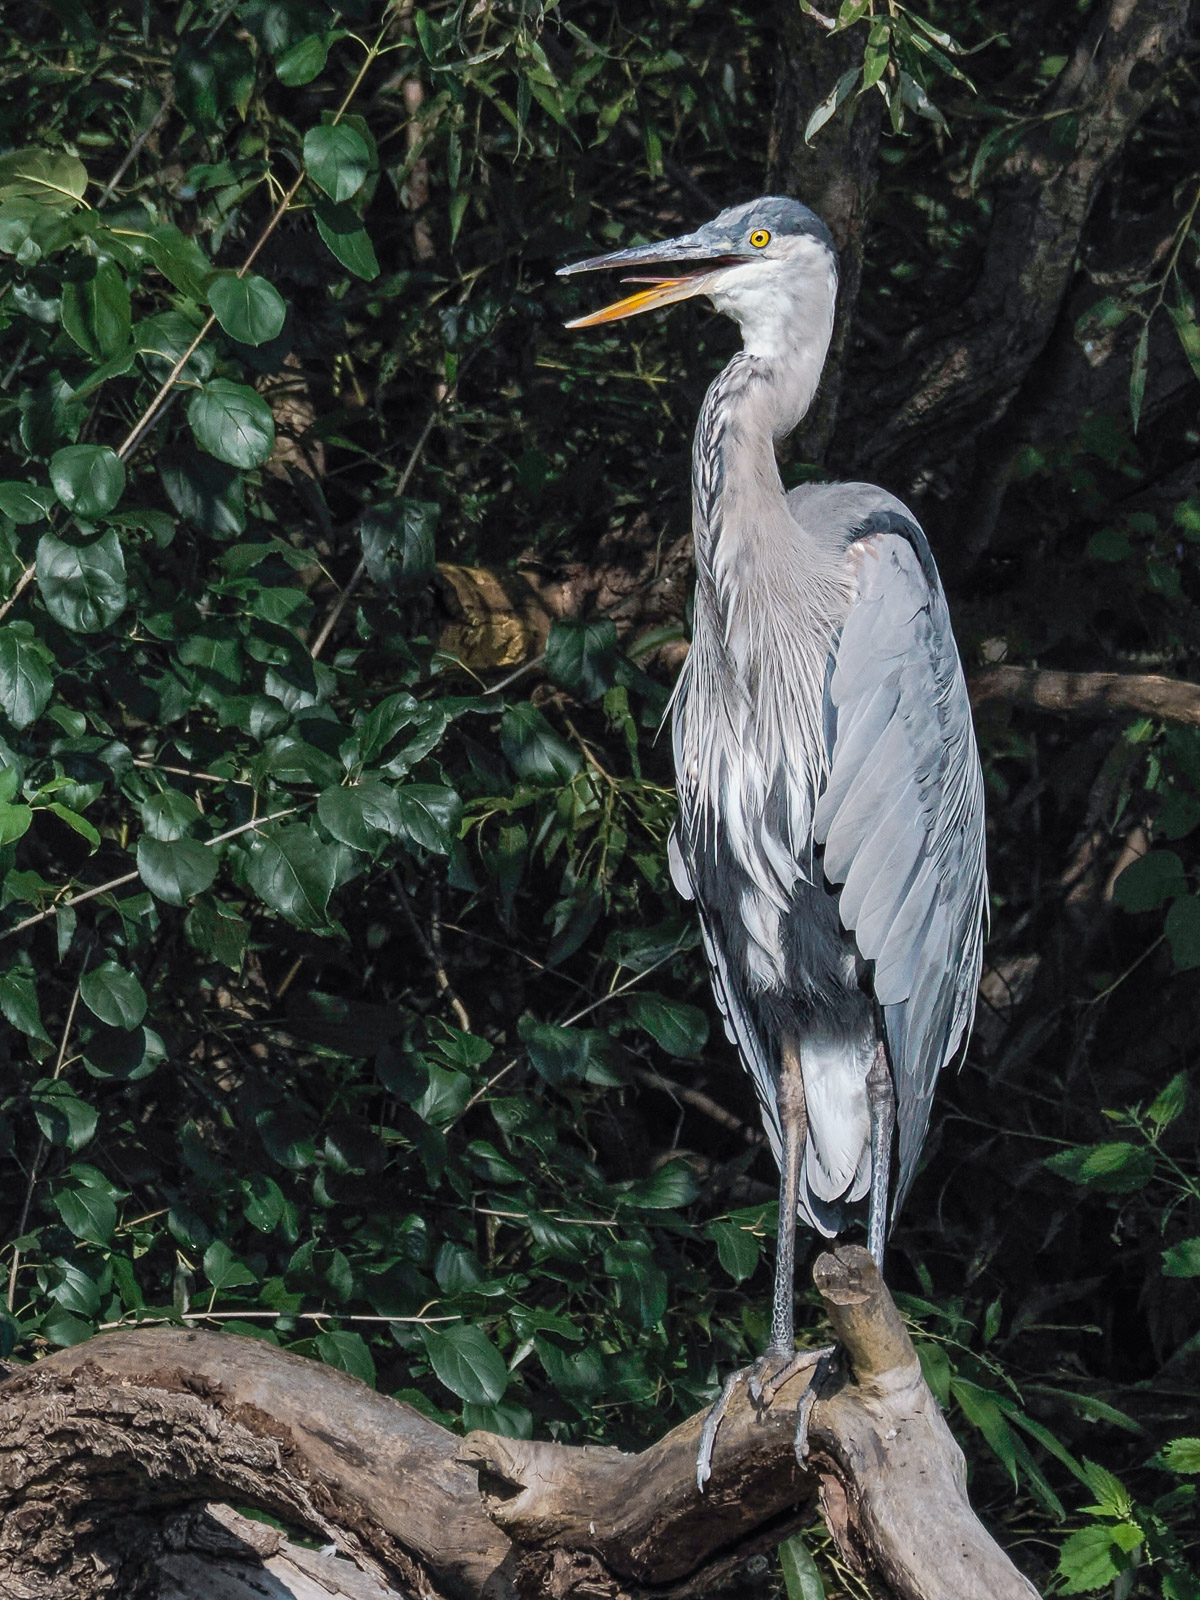
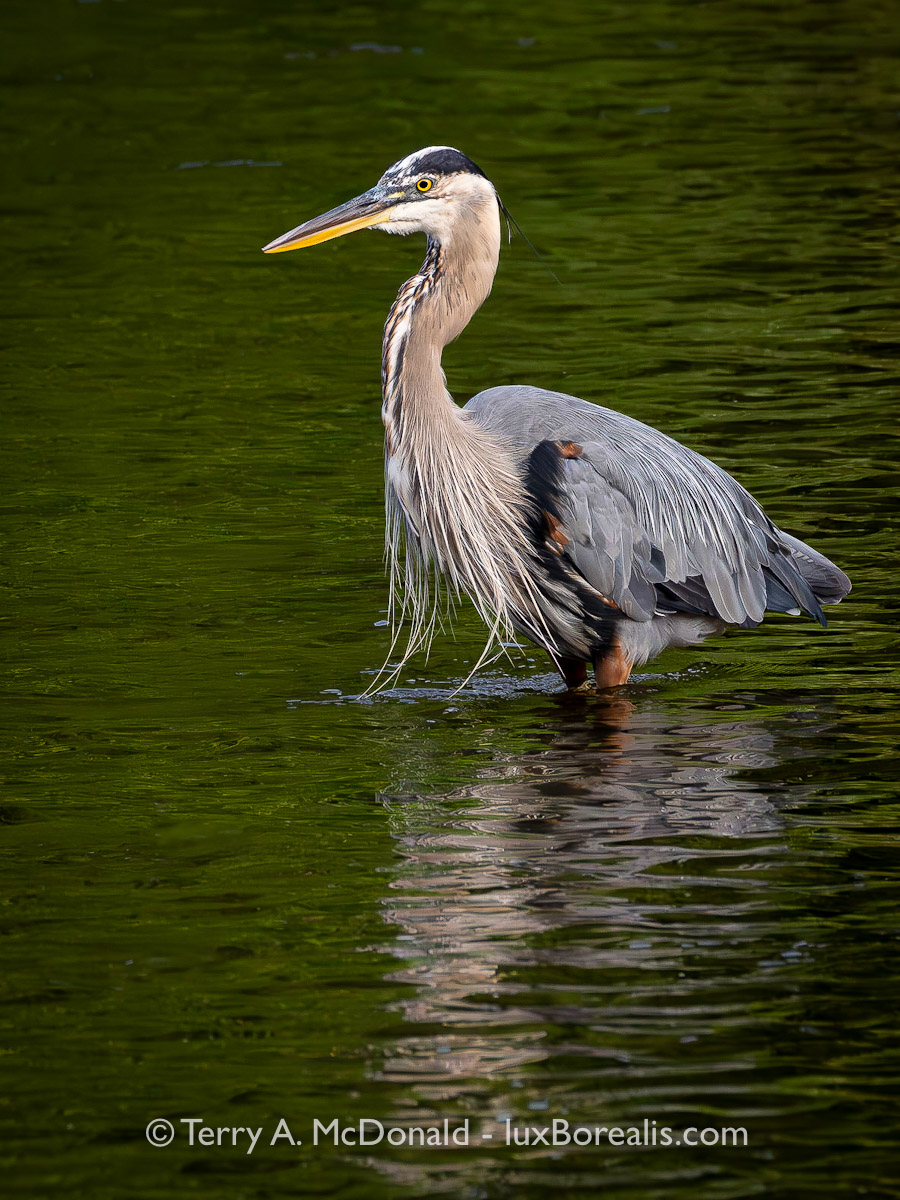
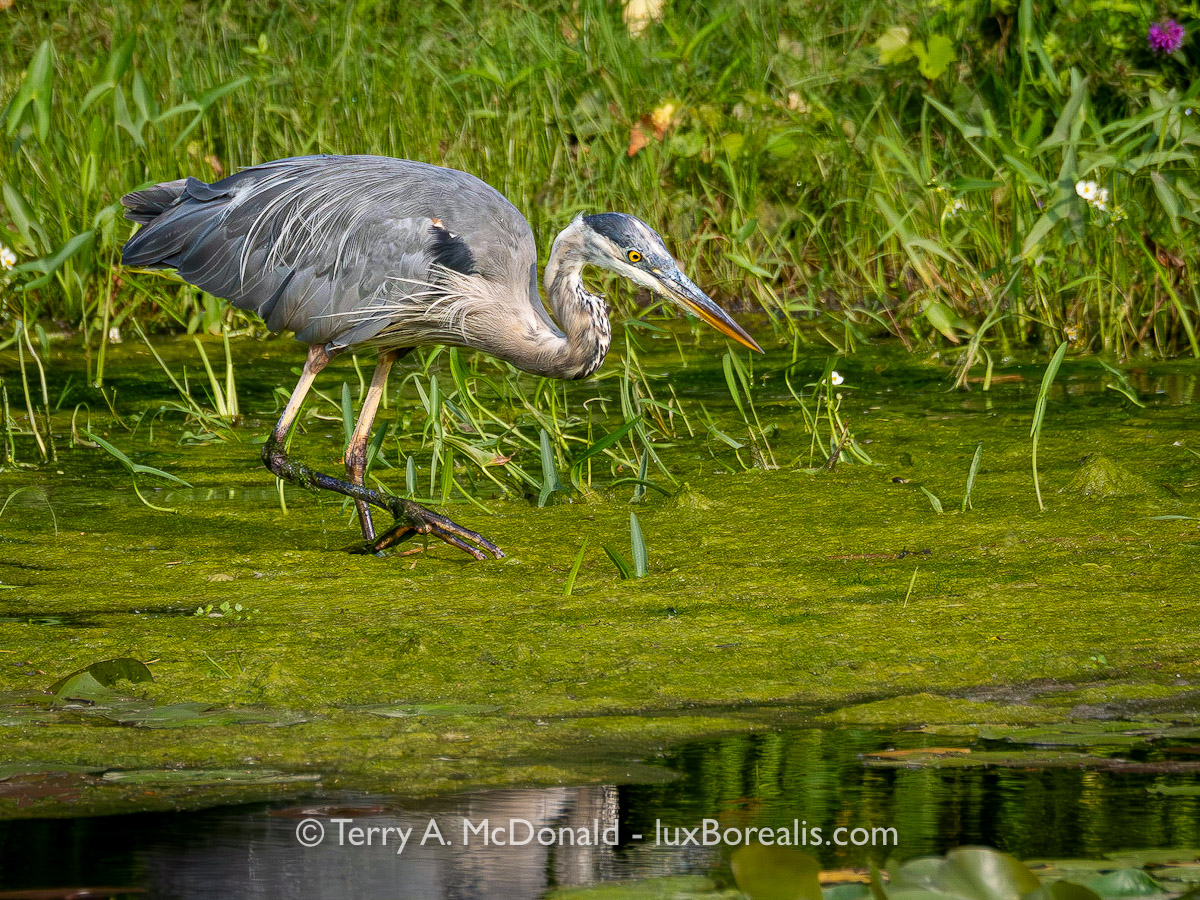
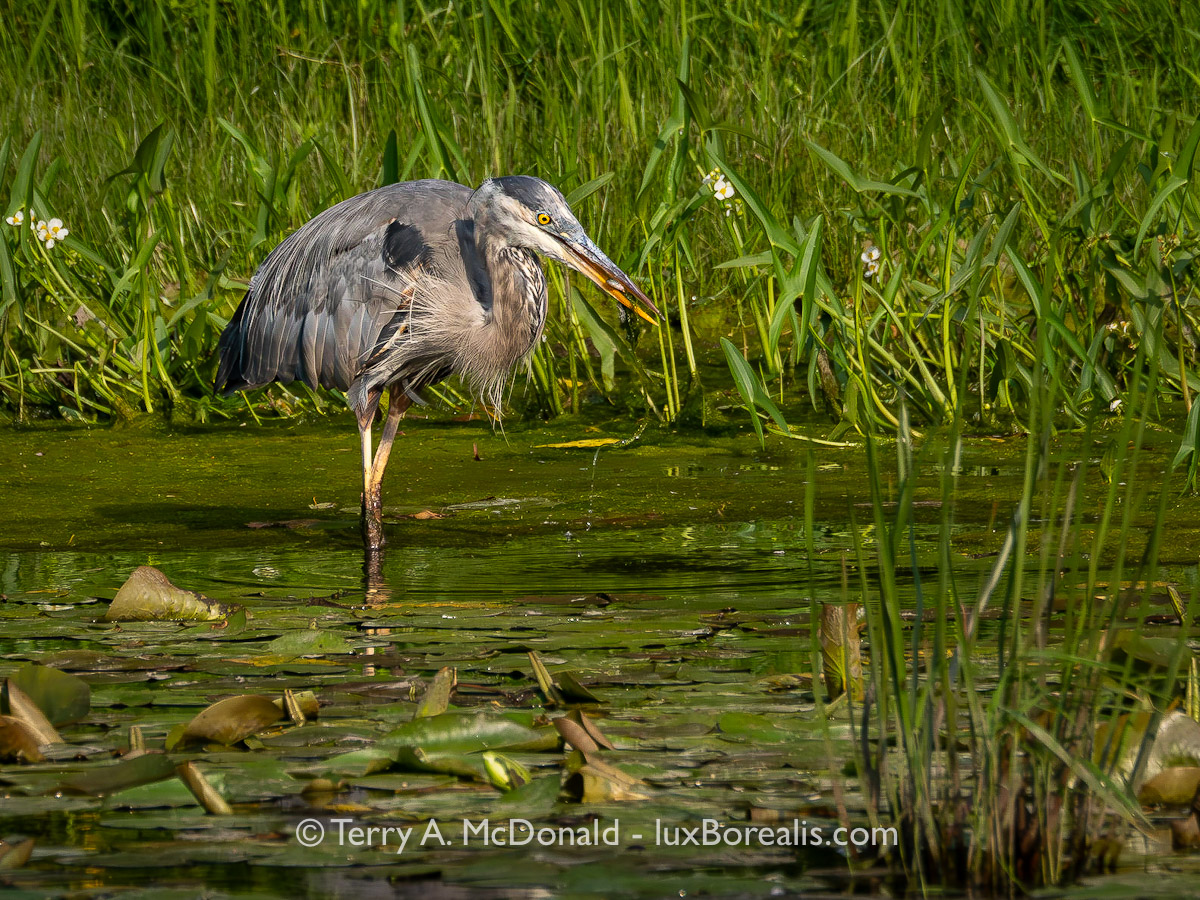
Great Blue Heron: splayed and dignified, Speed River, Guelph
OM-1 with Olympus 100-400mm f/5-6.3 at 400mm with Digital Teleconverter (efov 1600mm); f/11 @ 1/1600; ISO 1600; from jpeg files processed in Lightroom Classic. I’ve been pleasantly surprised by the quality that can be achieved with the OM System 2x Digital Teleconverter. The finest feather detail is not quite there, but otherwise, it is surprisingly good. It would certainly pass a ‘screen test’, considering that 99% of photographs are only ever viewed on screen. While the quality won’t meet the standards of a stock agency or the detail needed for a fine art print for framing, a canvas enlargement would be fine.
Living in a city has its conveniences, but as a landscape and nature photographer, I often feel claustrophobic surrounded by the necessary evils of pavement and traffic and suburbia and commercial-industrial strips. In Guelph, we are fortunate to have a few naturalized green spaces including the Speed and Eramosa River corridors through the city.
I’m always pleasantly surprised by the amount of wildlife found along the rivers. There are the usual characters such as Canada geese and mallards, but they are found just about anywhere, fair or foul. There are also a number of common songbirds, such as song sparrows, cardinals, robins, goldfinches, downy woodpeckers, catbirds, and in spring and early summer, orioles. In spring and fall, some of the migrants wander through making things a little more interesting.
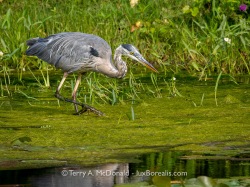
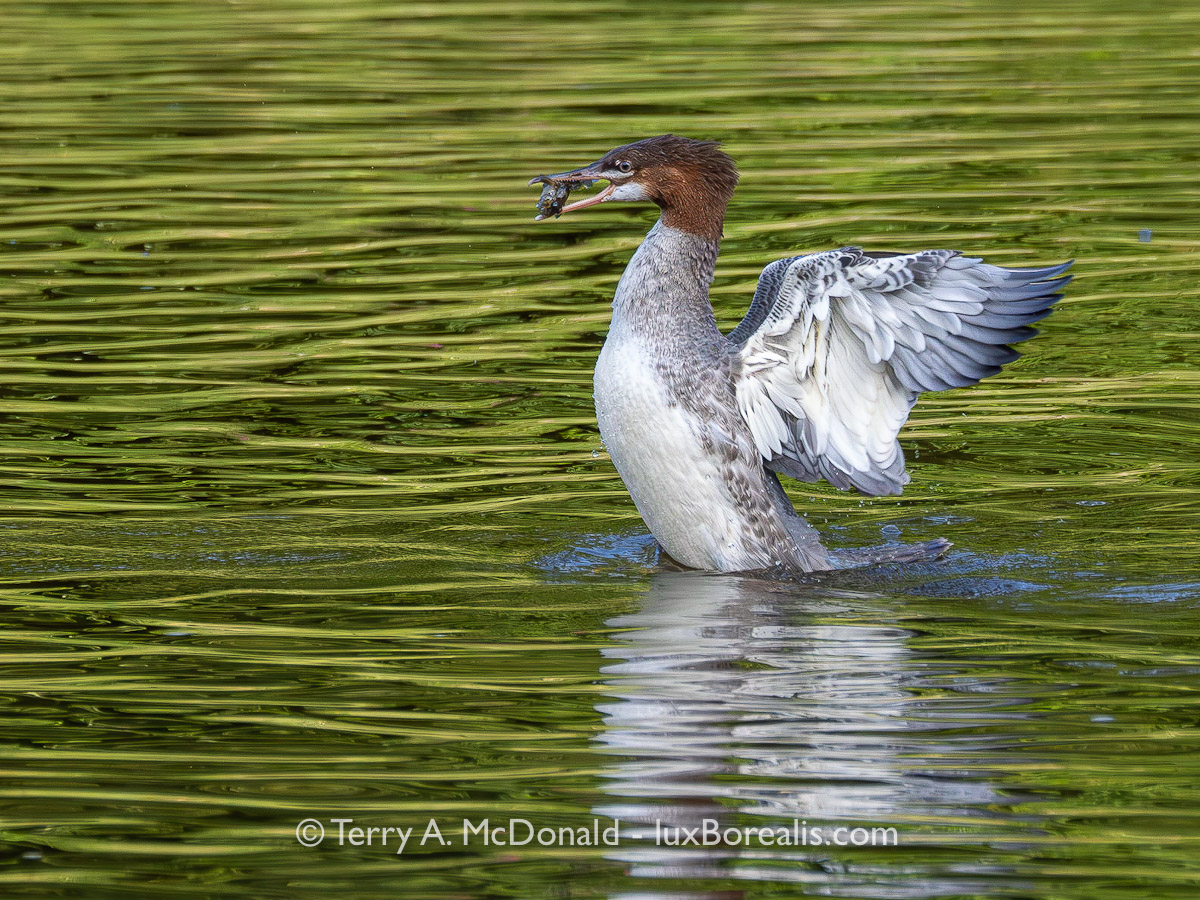
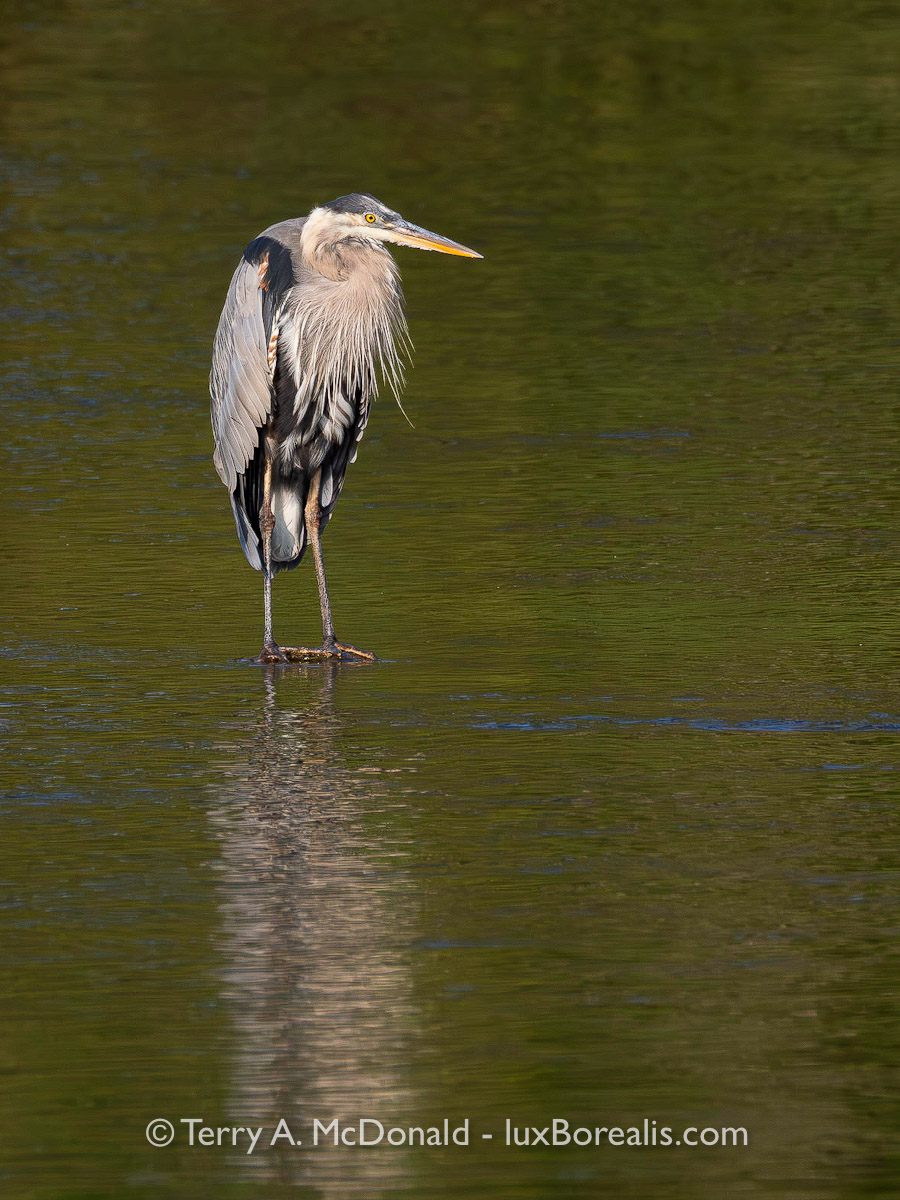
What I find especially encouraging is seeing our resident great blue heron, two or three kingfishers and a couple of families of mergansers. These species tell me there must be healthy populations of frogs, tadpoles, and fish in the river to keep their bellies full. We even have an osprey that frequents the corridor west of Edinburgh Road – a real bonus. And, when I’m out early enough, I sometimes hear the splash of a beaver’s tail. In fact, the city has had to cage a number of trees to prevent them from becoming food and dam-building material. This is a good thing!
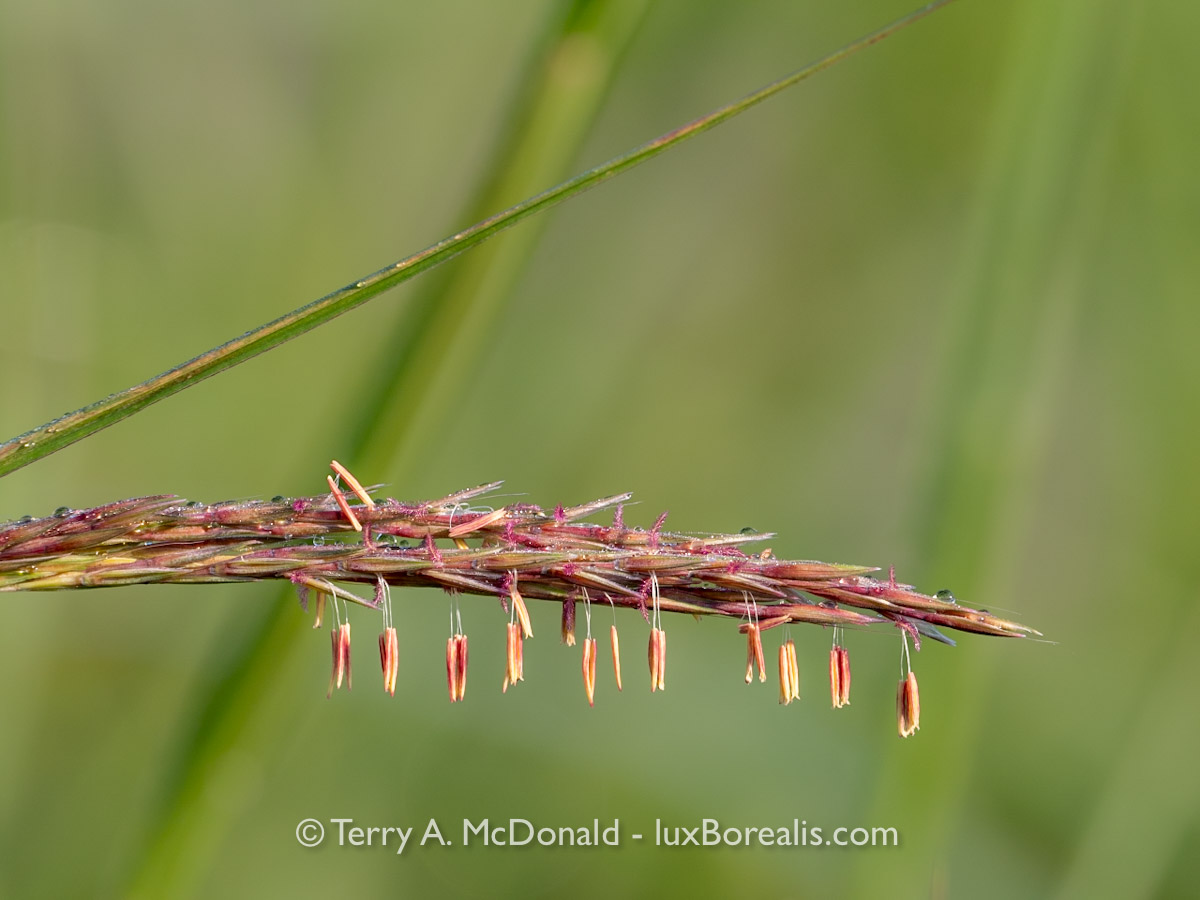
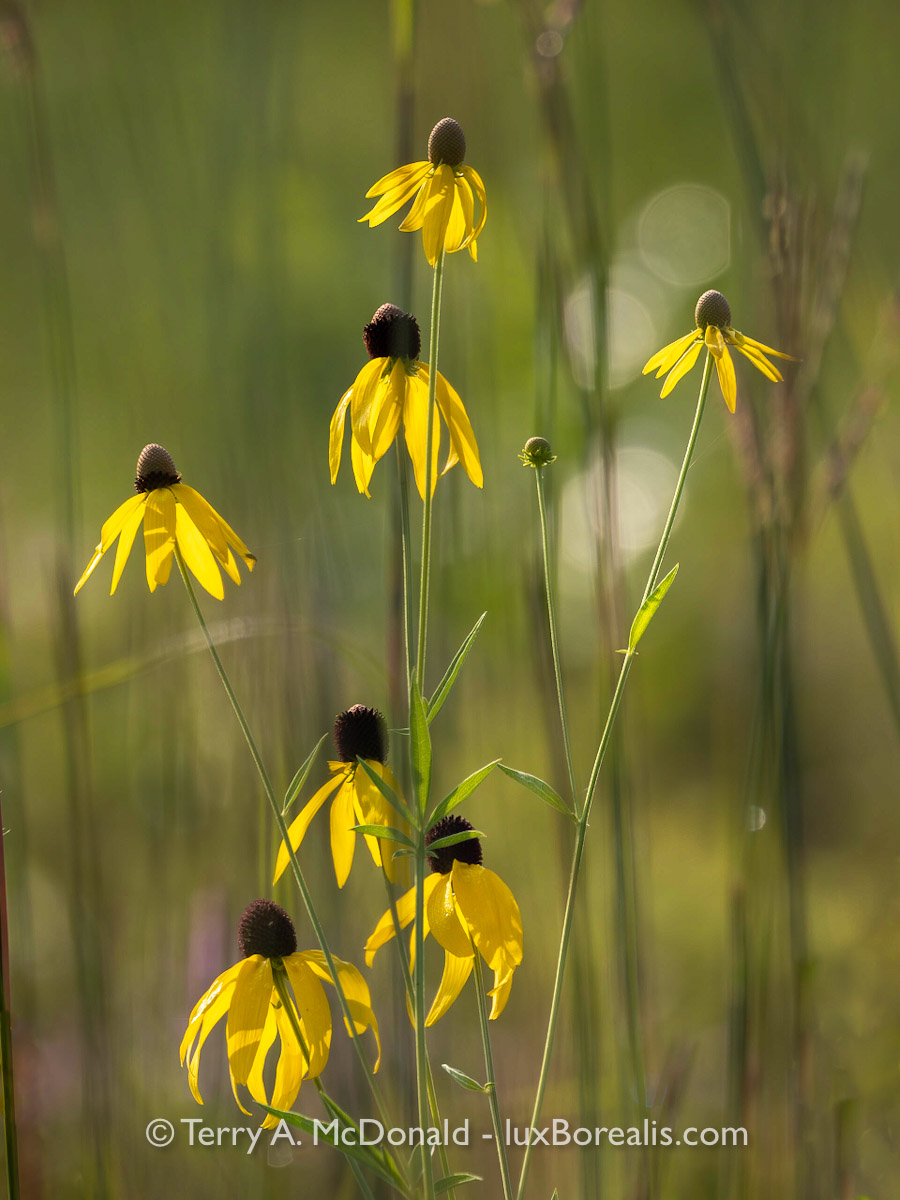
But, I’m not just looking for wildlife. There are a number of species of indigenous wildflowers through the seasons. The varied habitats of the tall grass prairie in the hydro corridor past Water Street and the riverine habitats along the Speed and Eramosa increase the overall biodiversity, another bonus for nature photographers.
The trouble is, I’m going for a walk to get some exercise. Going as far as Edinburgh and back is about 4km; to Gordon and back it’s 7k. The idea is to walk fast enough to increase the heart rate, but when a photo beckons, I need to stop.
Some mornings, I’ll take the 12-100/4 (efov 24-200mm). This gives me a moderately wide focal length for landscapes all the way to a medium telephoto for capturing natural details. It’s really the ideal walkabout lens.
Lately though, with the all the activity on the water, I’ve been bringing the 100-400/5-6.3. Despite the added bulk of a longer lens, it carries very well and is completely comfortable slung under my arm at the end of a ‘quick draw’ shoulder harness. More importantly, the lens handles well. Combined with the in-camera stabilization, I can comfortably and confidently shoot handheld at 400mm (efov 800mm). Perfect!
Now, I need to concentrate more on getting in a decent walk! But how can I with scenes and subjects calling out to me to be photographed! Furthermore, as the seasons progress, so too do the species on offer.
Thanks for reading!
If you have any questions or comments about the Speed River, naturalized areas in Guelph, OM System, raw capture, processing or anything else, please add it to the Comments section.
If you are not yet a subscriber, then consider adding your email so you are instantly alerted to new blog posts. And I promise not to inundate your inbox.
Have a look at my work by visiting www.luxBorealis.com and consider booking a presentation or workshop for your Photo Club or a personal field and/or screen workshop at Workshops.
Some thoughts on Focus Stacking using the OM-1
Finally, I have some time to really delve into some of the computational features of OM-1, in this case Focus Stacking. I won’t blab on about what it is and all that since it has already been covered well by a number of photographers such as:
- Chris McGinnis (YouTube 3min);
- Peter Baumgarter (OM Photo Tips);
- Thomas Stirr (a variety of helpful blog posts); and
- Rob Trek (YouTube 13min)
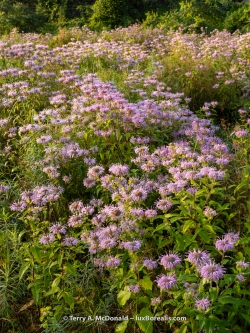
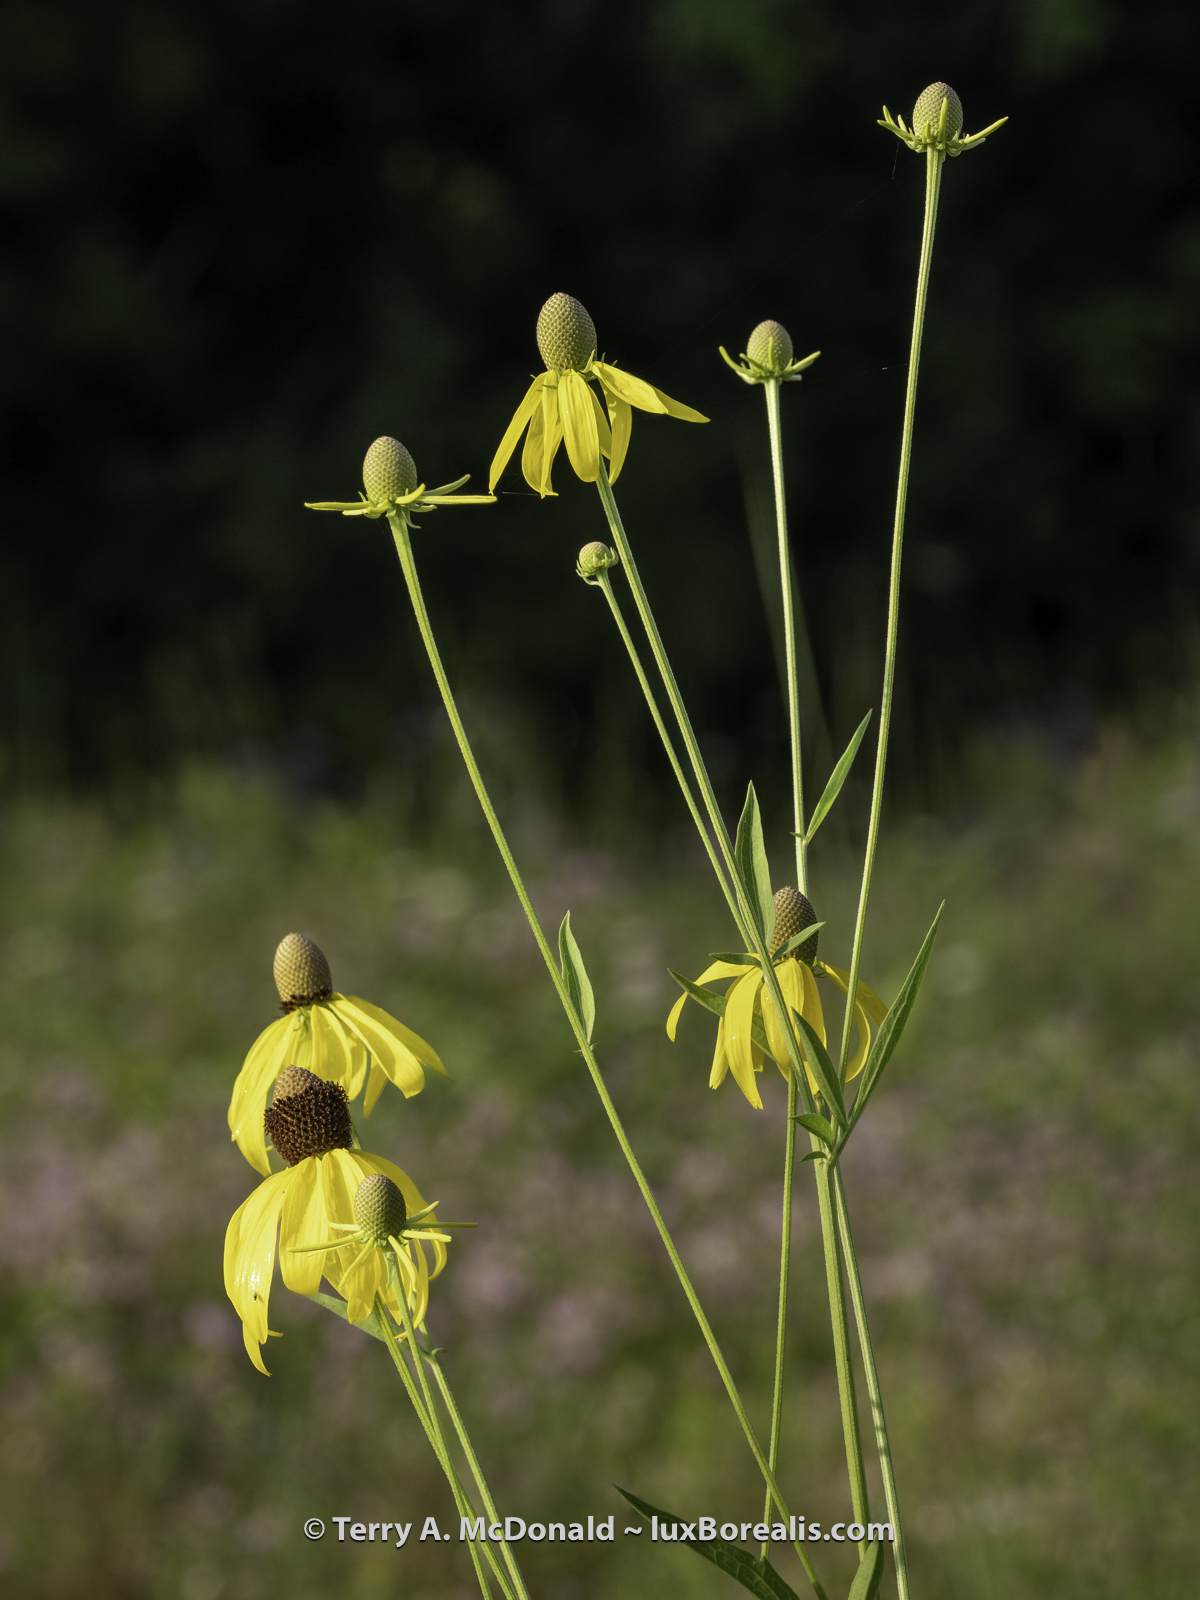
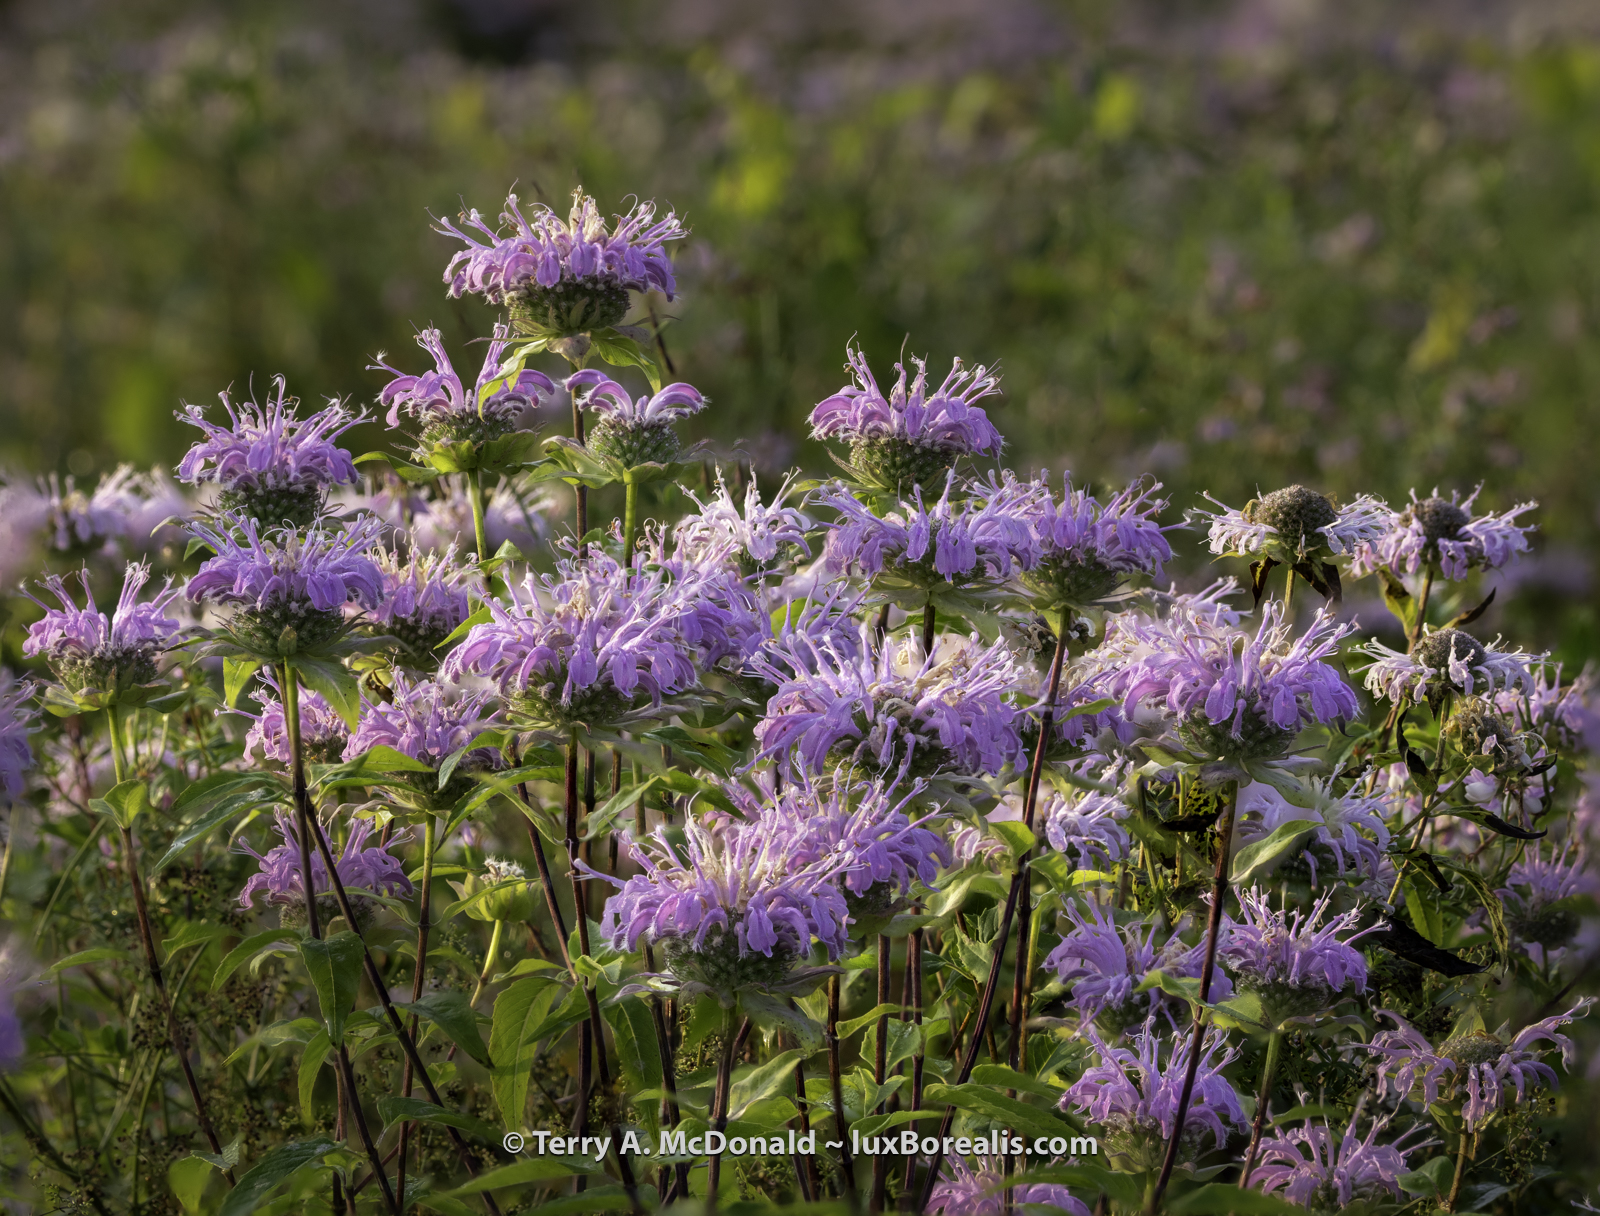
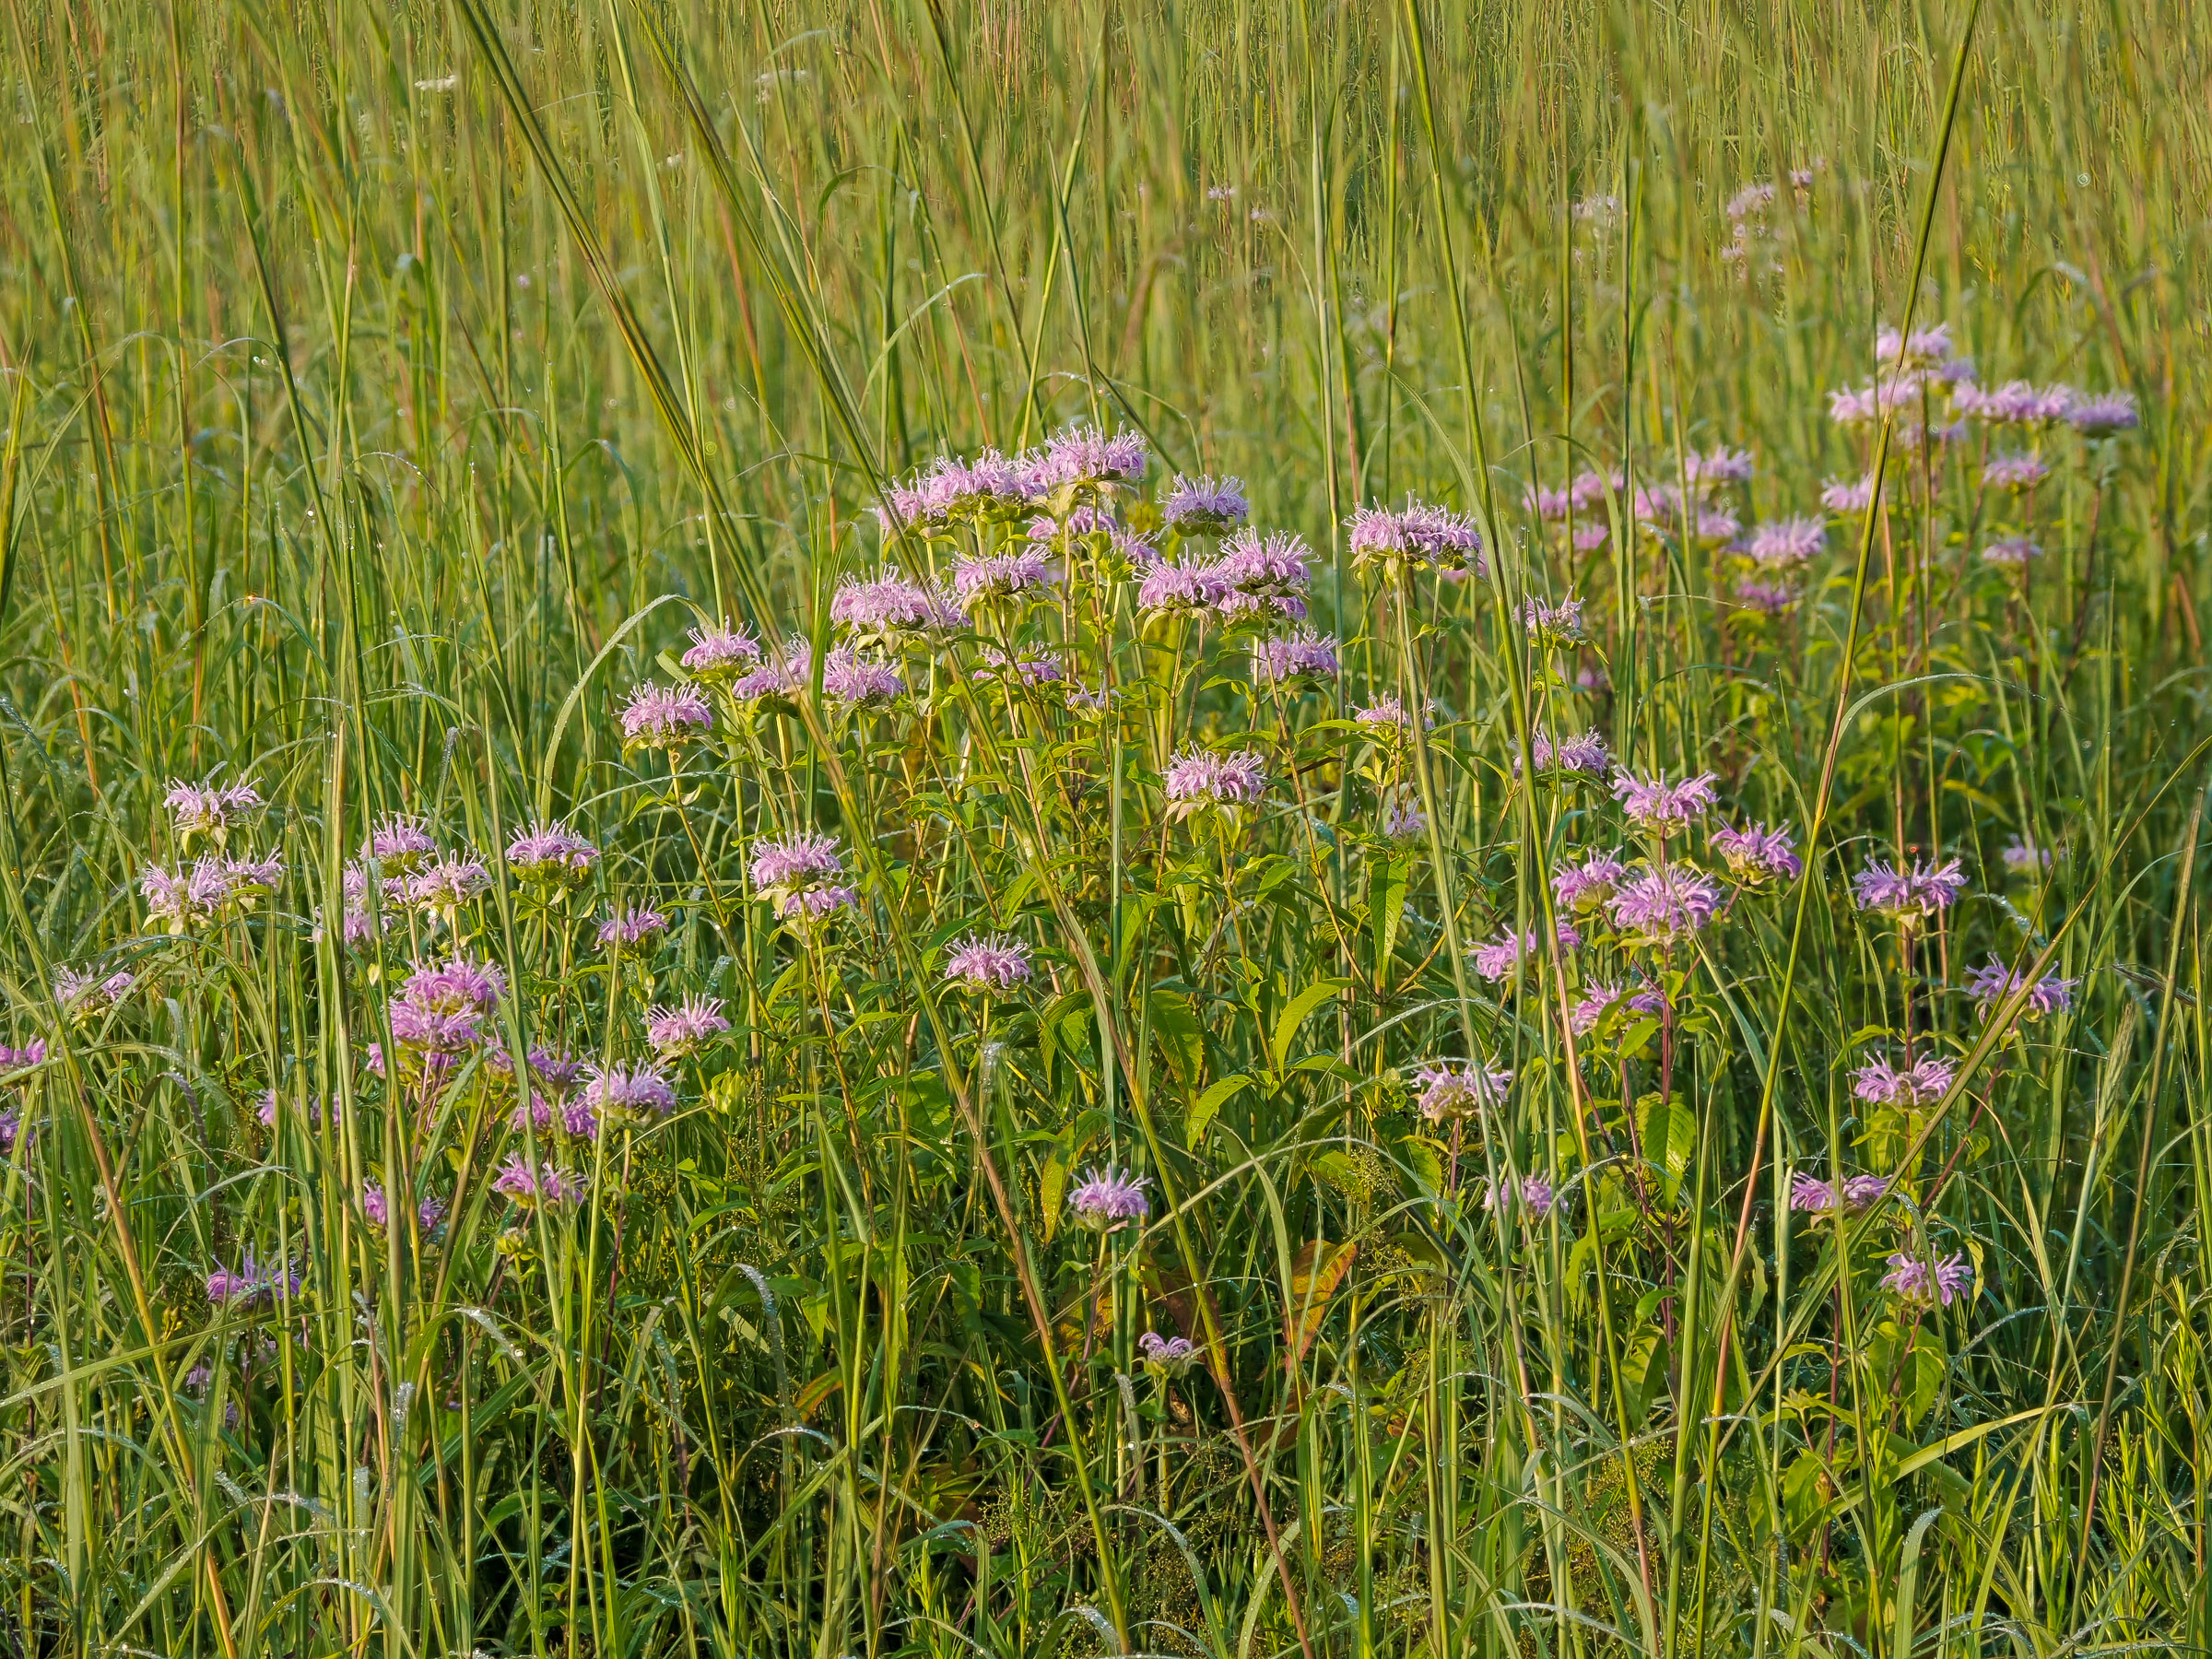
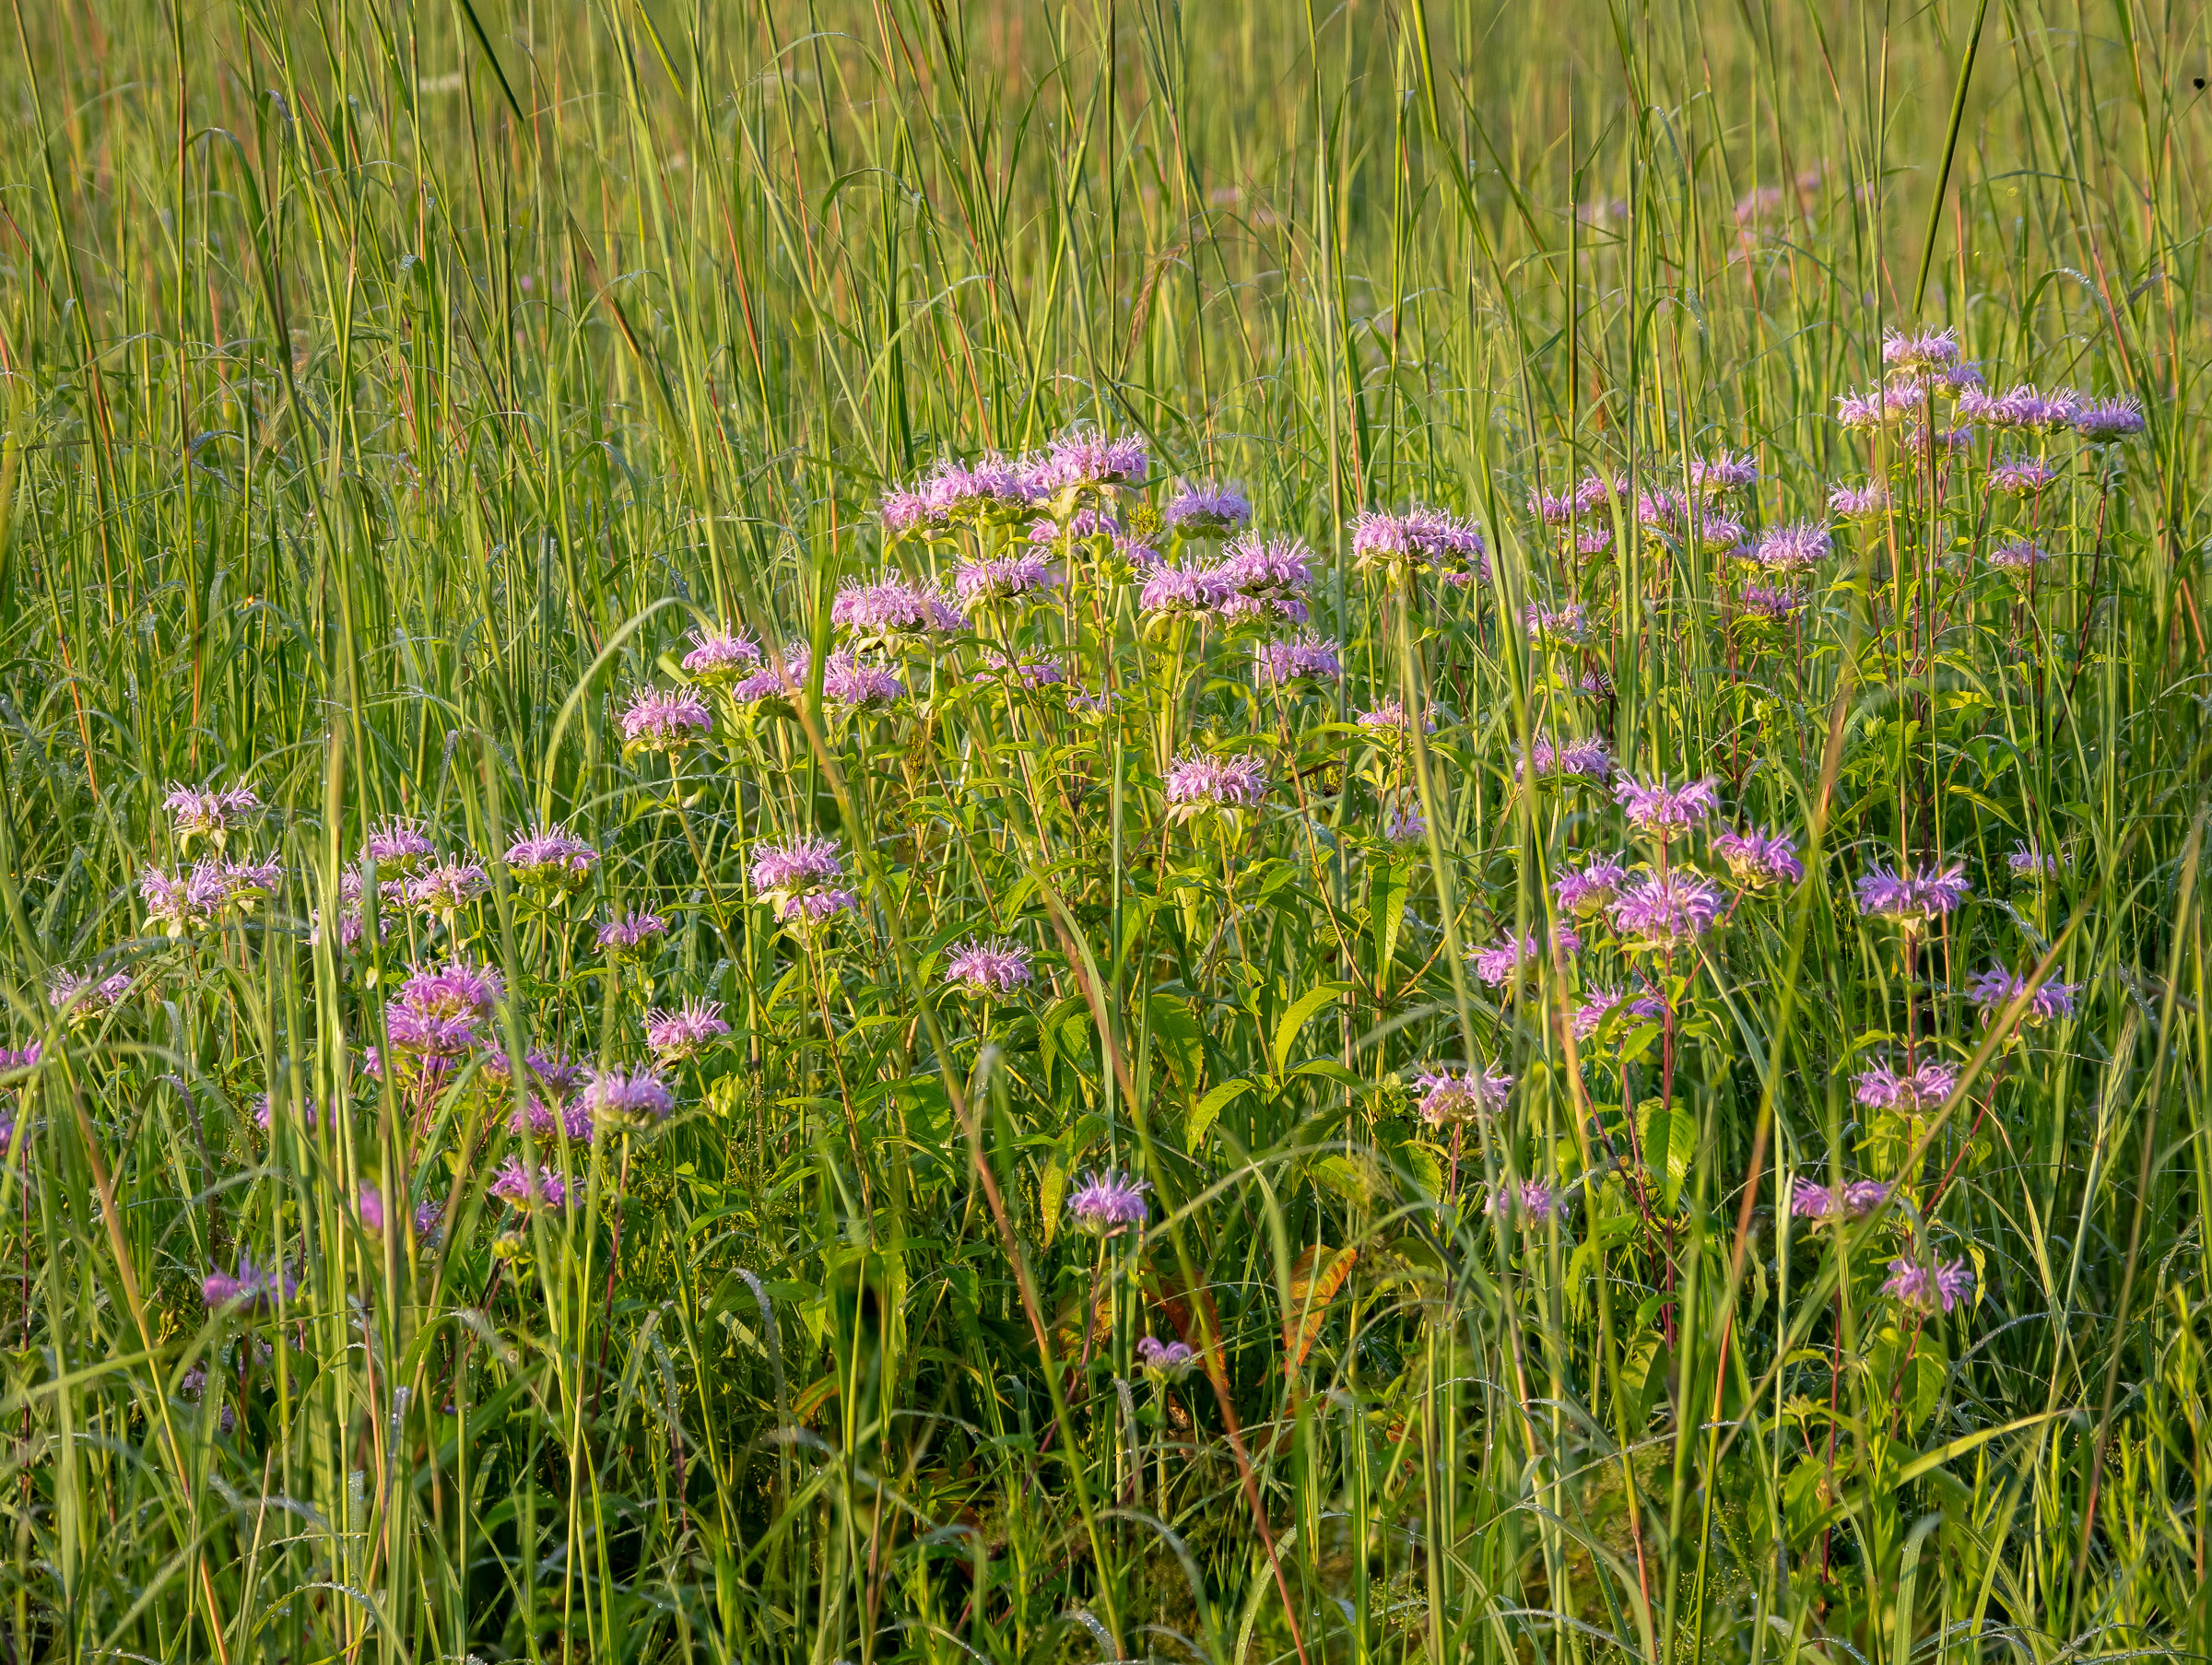
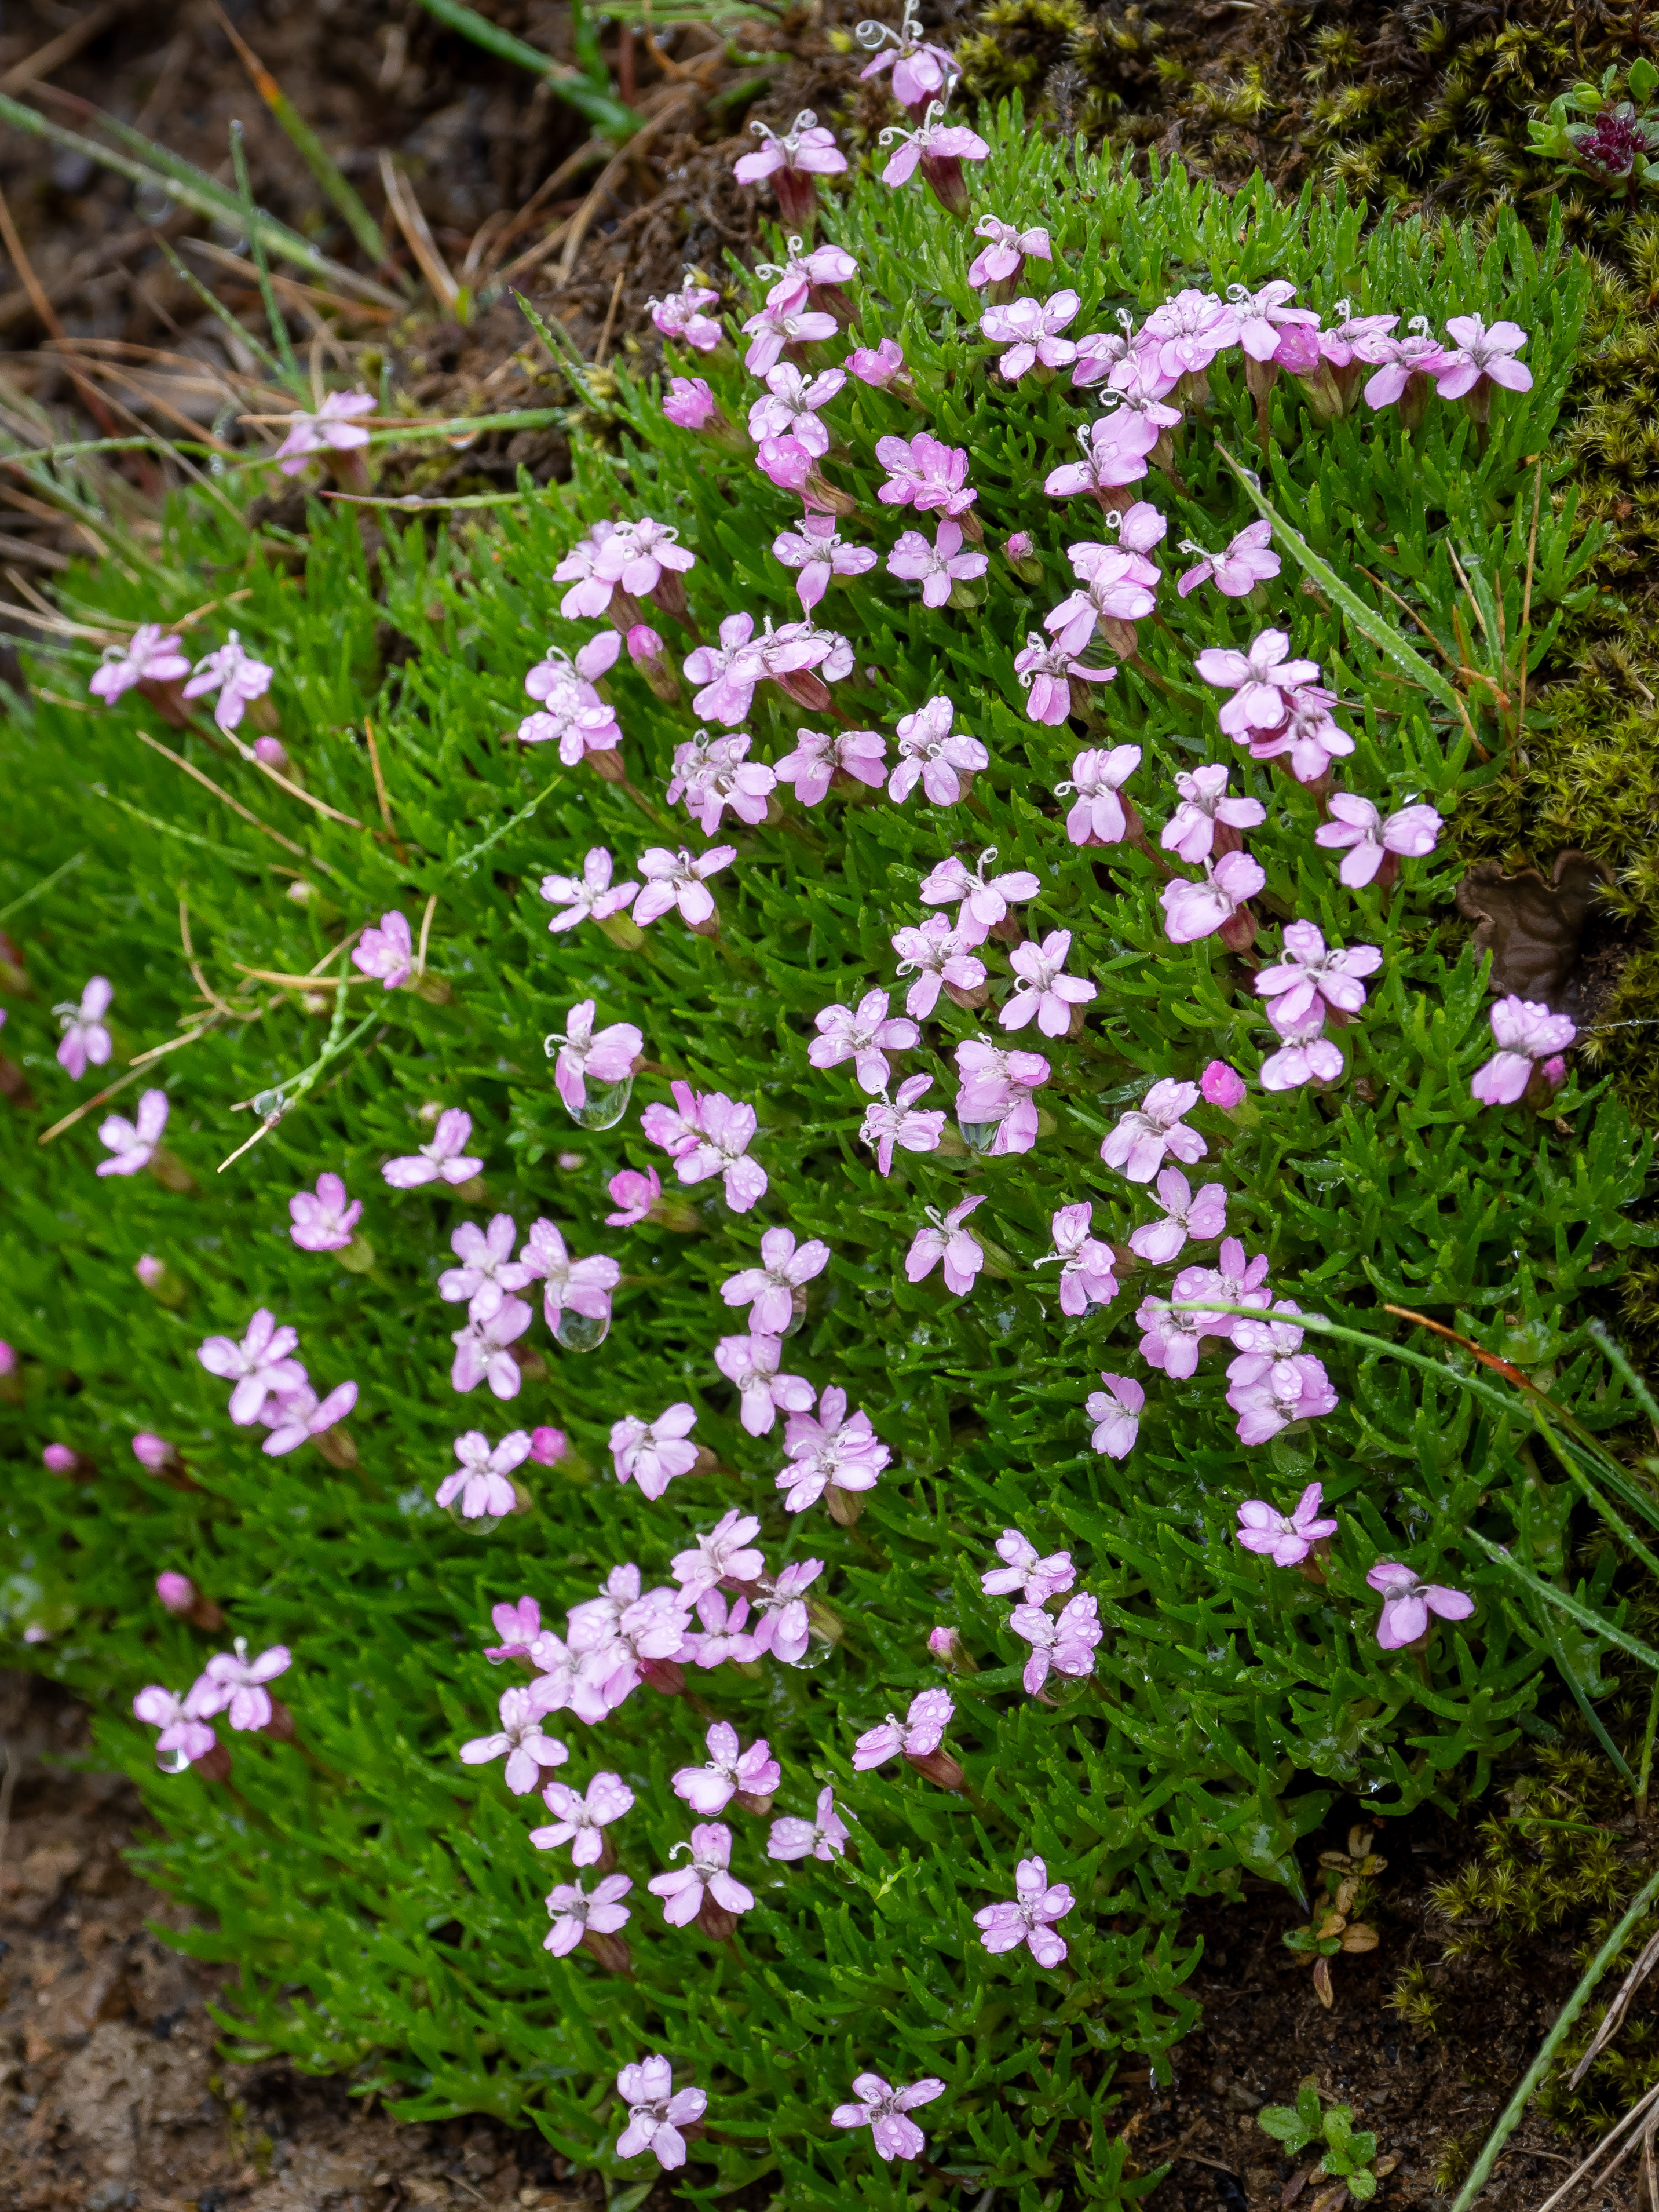
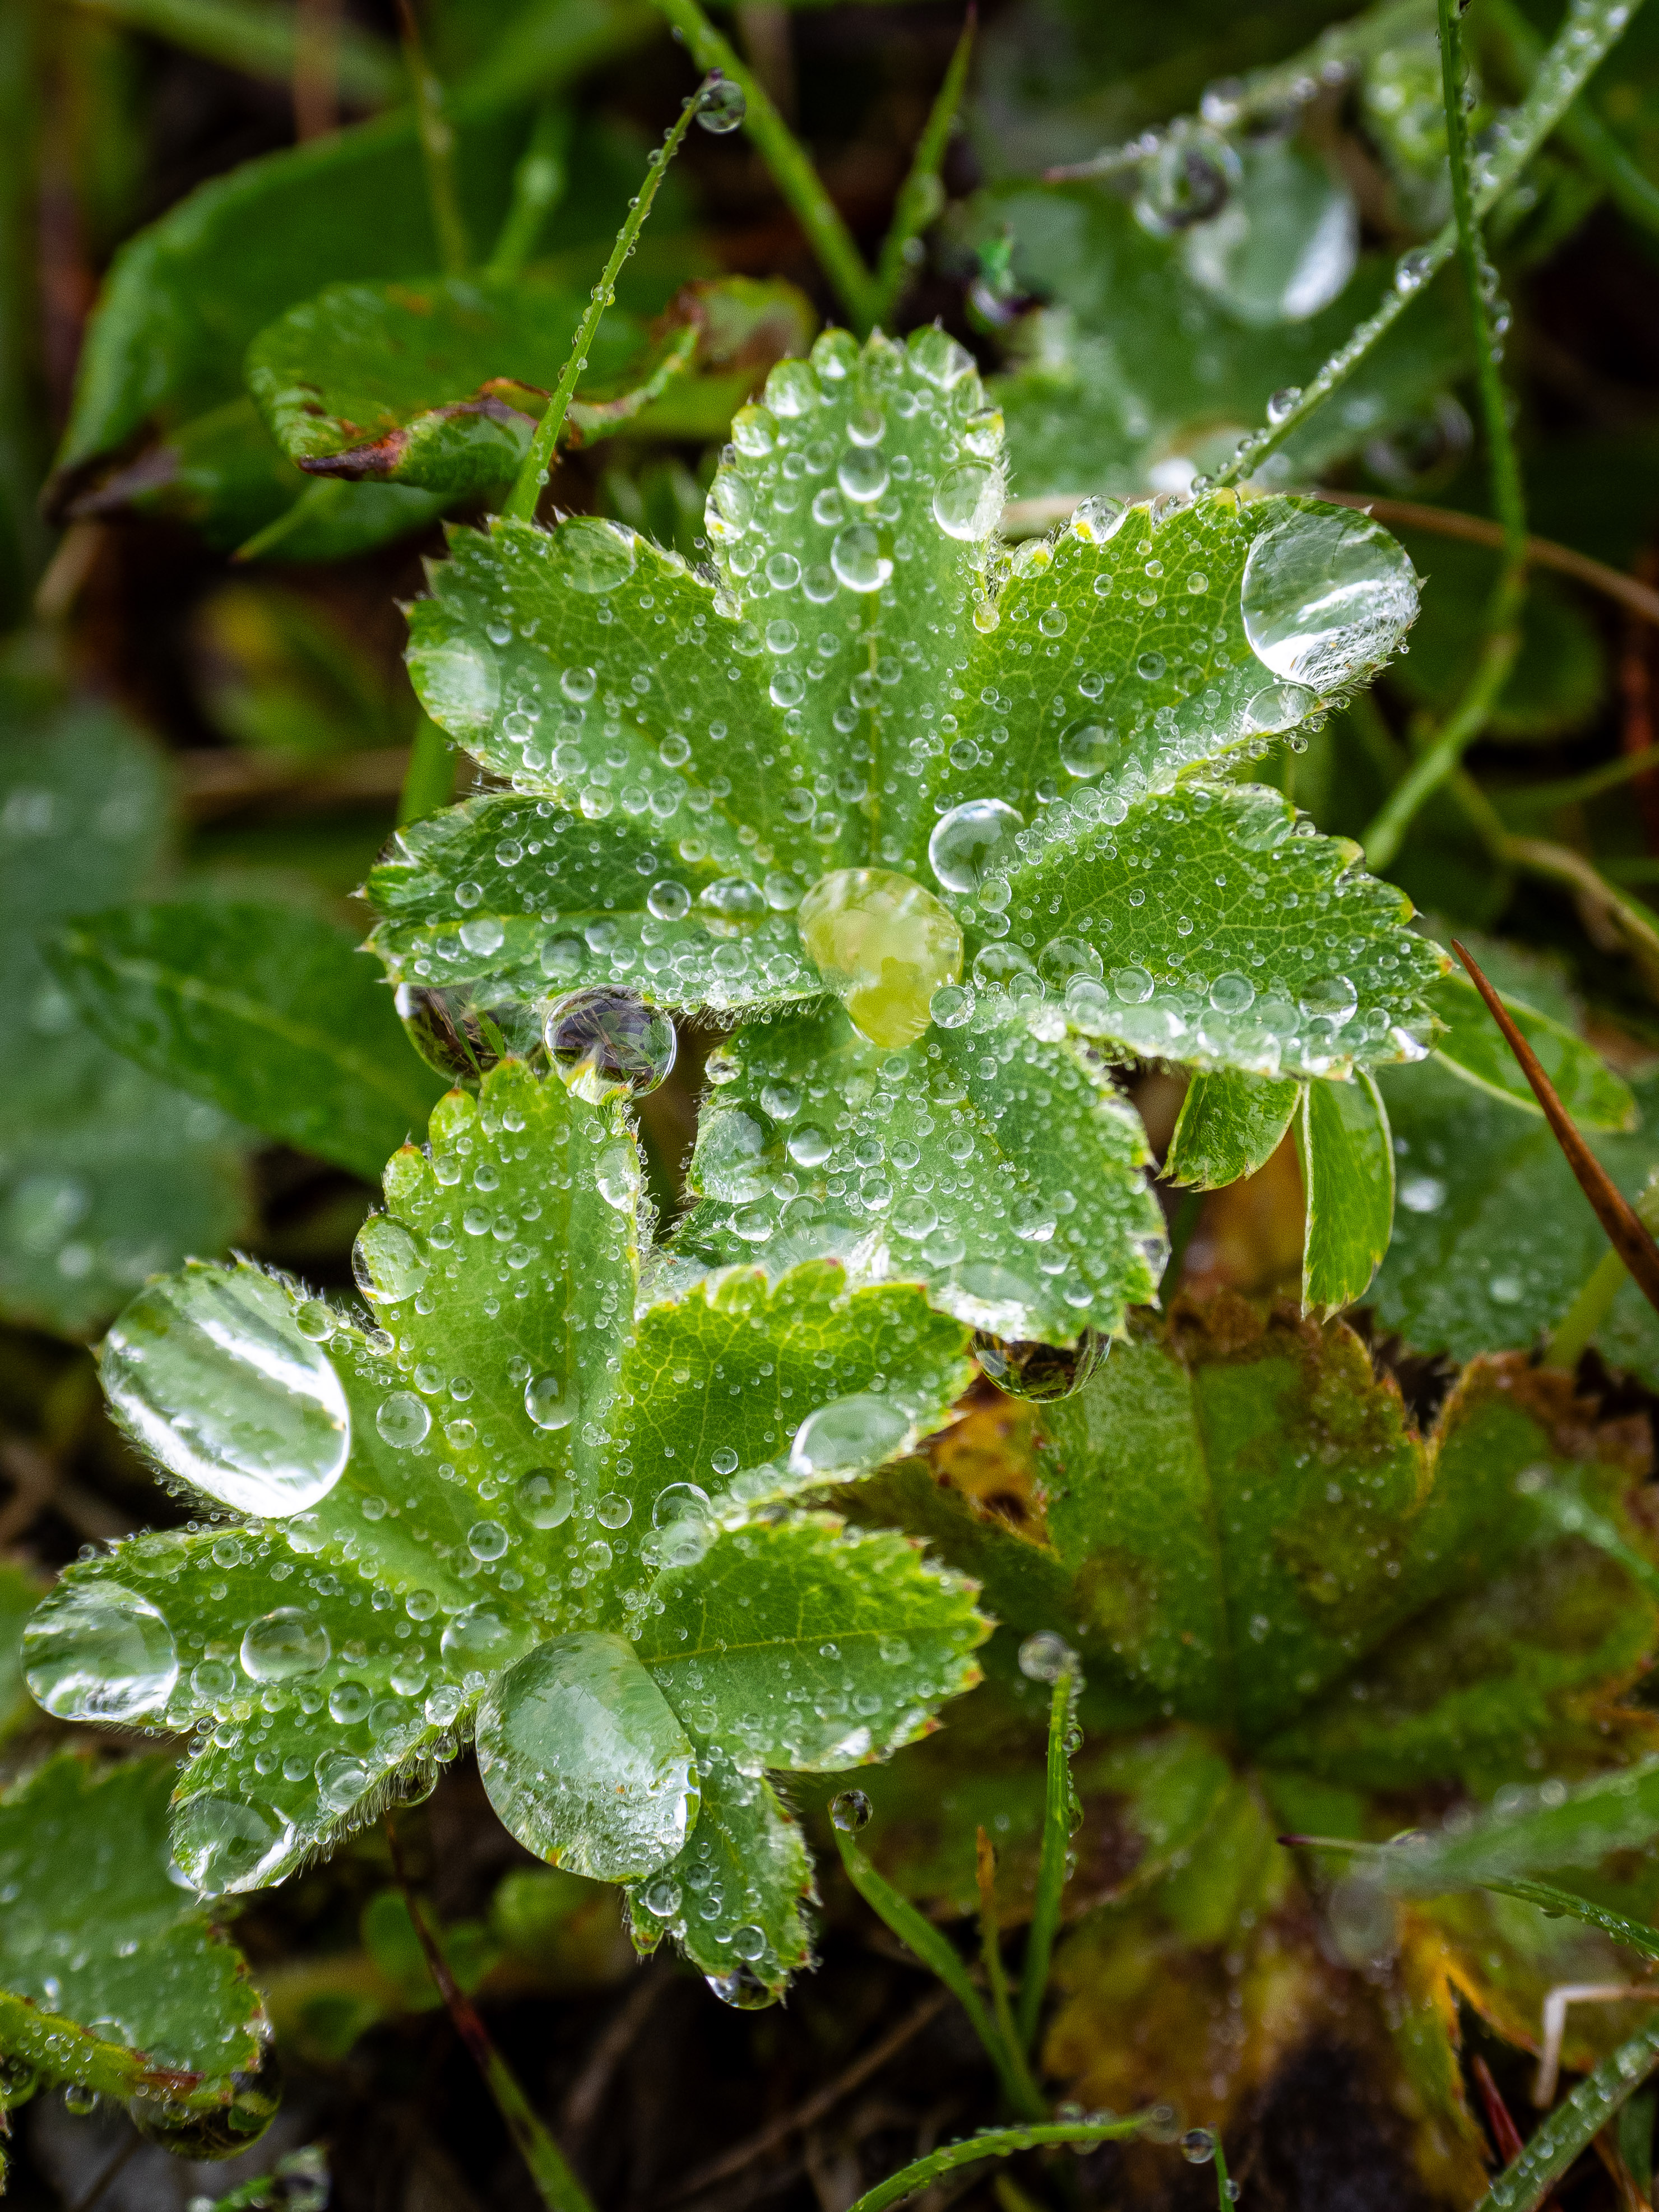
This morning, I was walking along the hydro corridor at the end of Water Street, here in Guelph. This area was converted to a tall grass prairie habitat about 5 years ago and the city is working to maintain it as such. As a result, a number of wildflower species indigenous (native) to Ontario are now becoming established: foxglove beardtongue, wild bergamot, grey-headed (prairie) coneflower, Culver’s root, giant sunflower, black-eyed Susan, and tall coreopsis (tickseed).
OM-1 with M.Zuiko ED 12-100mm ƒ4.0 IS PRO at 100mm (efov 200mm);
ƒ8 @ 1/400; ISO 200; EV–1⅓; processed in Lightroom Classic
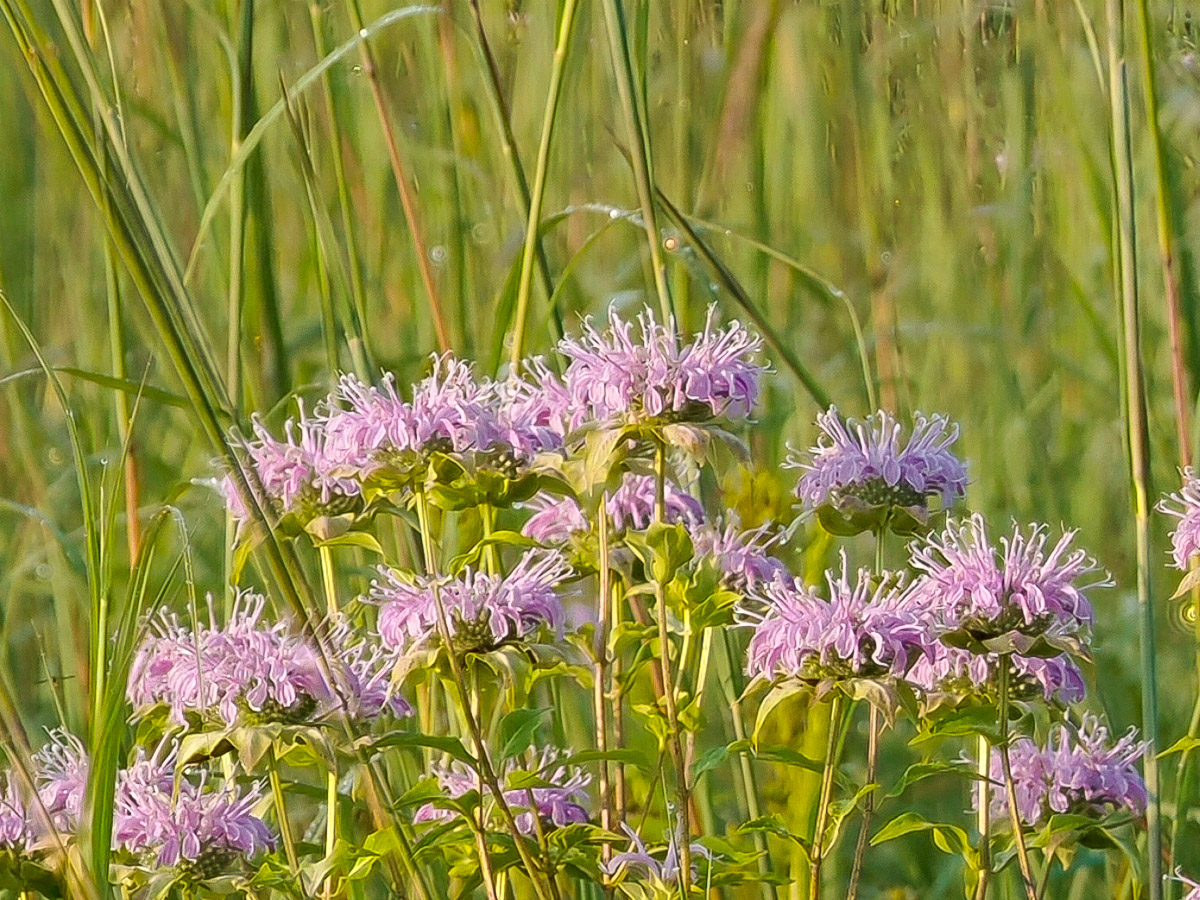
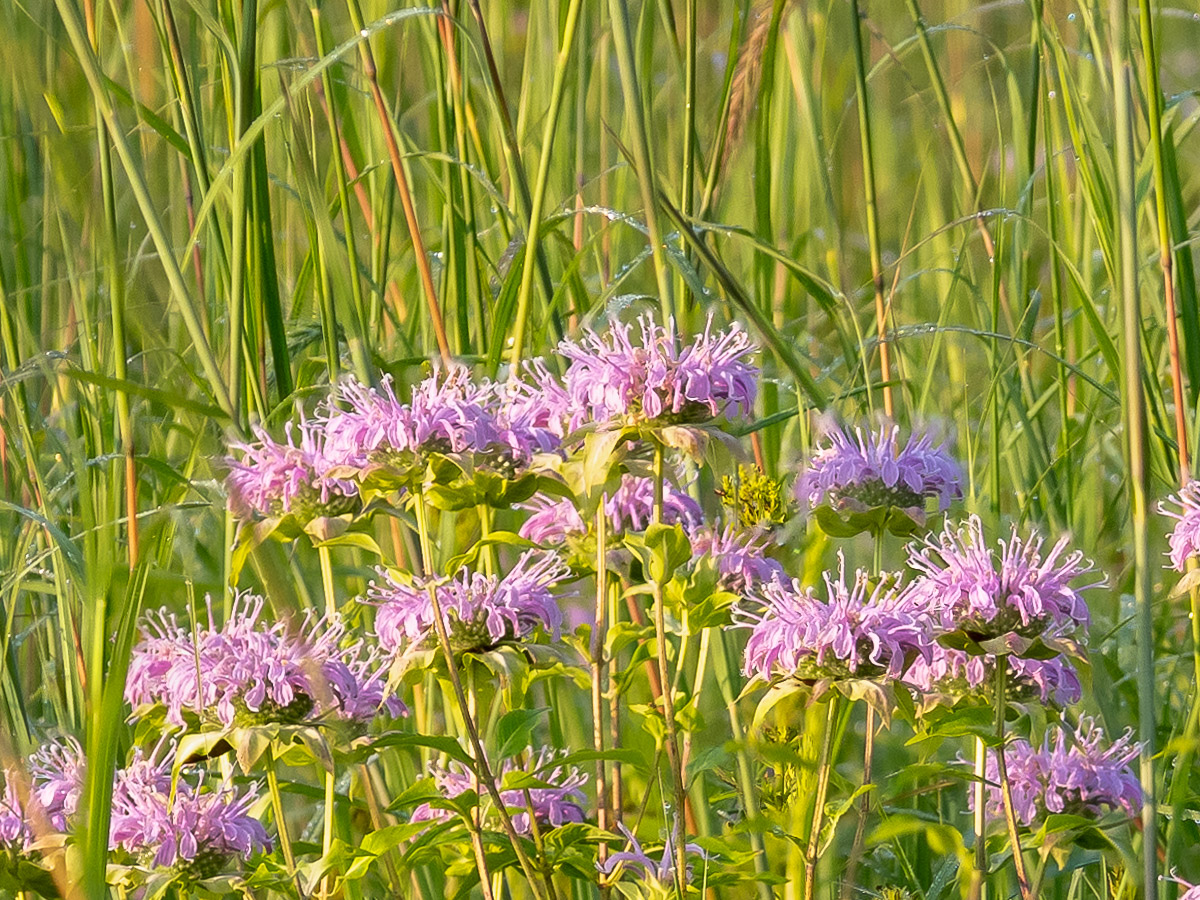
The wild bergamot was in full bloom with carpets of them covering the open area. My goal was to capture the light pink flowers and green foliage lit by the warm early morning light. Traditionally, I would have used a small aperture like ƒ11 or ƒ16 to achieve maximum depth-of-field, or even ƒ22 with a full frame camera. But small apertures increase the risk of defraction leading to a softening of details. This happens with all cameras, but with Micro Four Thirds sensors, it kicks in at about ƒ8.
No worries. I still shot at ƒ11 and ƒ16, just to see how far I could push the system, also knowing that some of that lost detail may be recoverable with appropriate sharpening of the raw file. However, this was also a great opportunity to try the in-camera ‘computational photography’ mode called Focus Stacking. For that, I set the lens to ƒ4 and Focus Stacking to 10 shots with a focus differential of 4. These settings are what Thomas Stirr recommended in one of his recent articles, so it seemed like a good place to start. I focussed on the closest part I wanted in focus and presses the shutter release. The 10 photos were made in quick succession, then processed in-camera. In about 20 seconds I had a finished JPEG.
Let’s get to some comparisons. All images were processed in Adobe Photoshop Lightroom Classic. One is a straight shot at ƒ11, the second at ƒ16. Of the two Focus Stacked images, one was made using in-camera Focus Stacking, which is automatically saved as a JPEG; the fourth was created manually in Photoshop using the same series of Raw images the camera used:
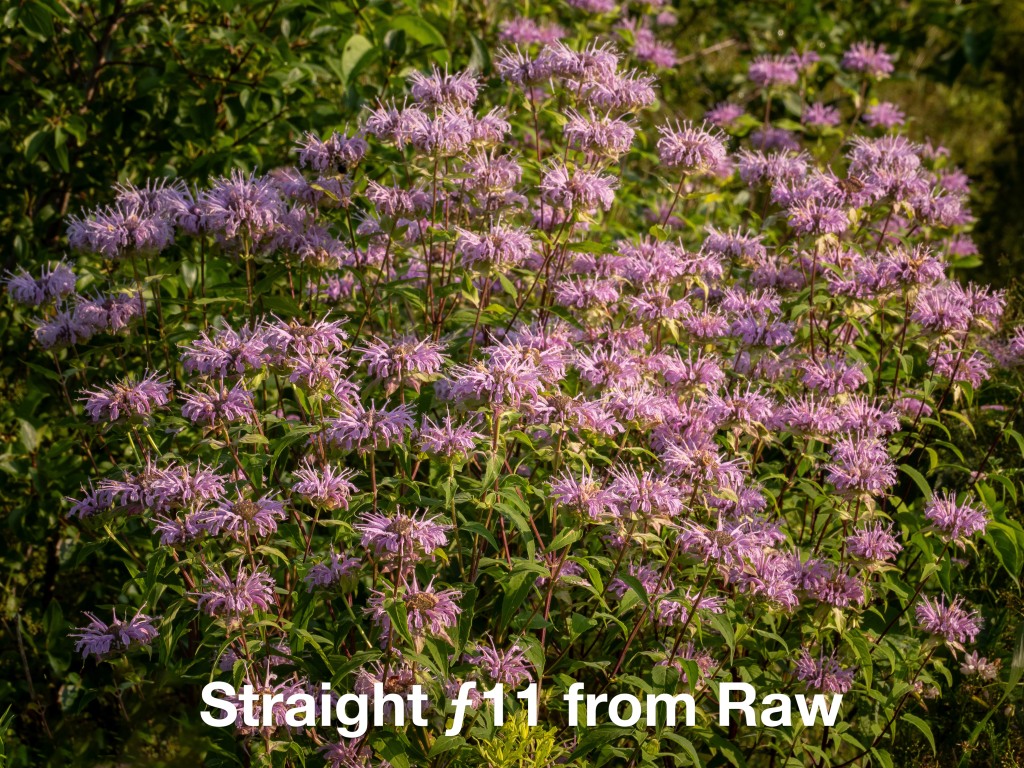

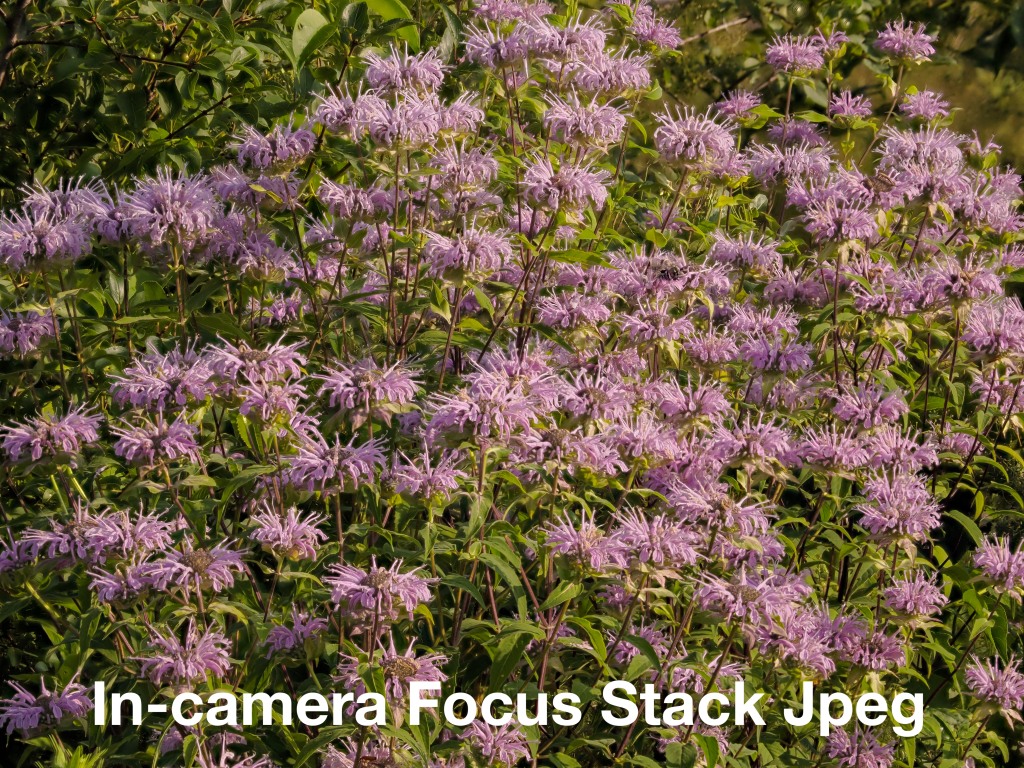
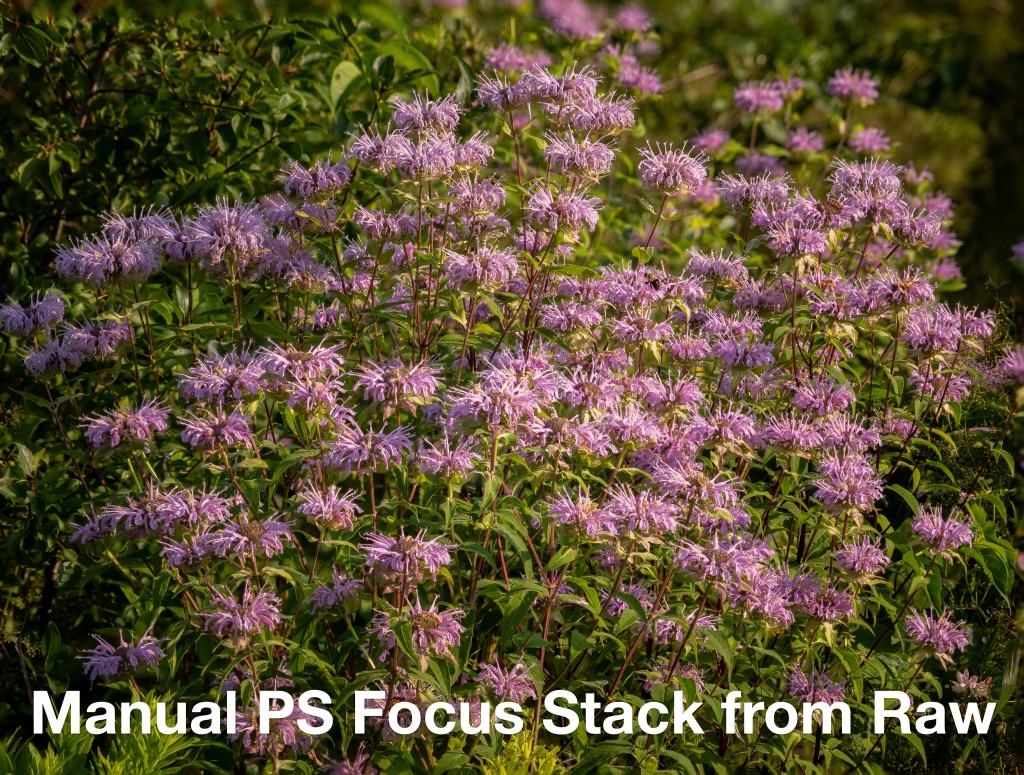
Take a moment to have a look at each image:
- Tap or click on on any image above to open the Gallery to that image. I recommend starting with the ƒ11 image.
- Scroll through the Gallery looking at each in turn.
- While the Gallery is open, double tap on an image to see it zoomed in. Then scroll through again, looking at each image zoomed in.
What do you think? What did you notice?
If you’re like me, aside from the JPEG being slightly soft, there is not a lot of difference. The ƒ11 and ƒ16 images look surprisingly good, even zoomed in. All three images made from directly Raw files look perfectly fine when viewed without zooming. And, let’s face it, that’s how most images are viewed – on screen, at screen size or smaller. Here are the same 4 images re-sized to 2400px on the longest side. I think you’ll find the differences virtually disappear; even the JPEG looks great.

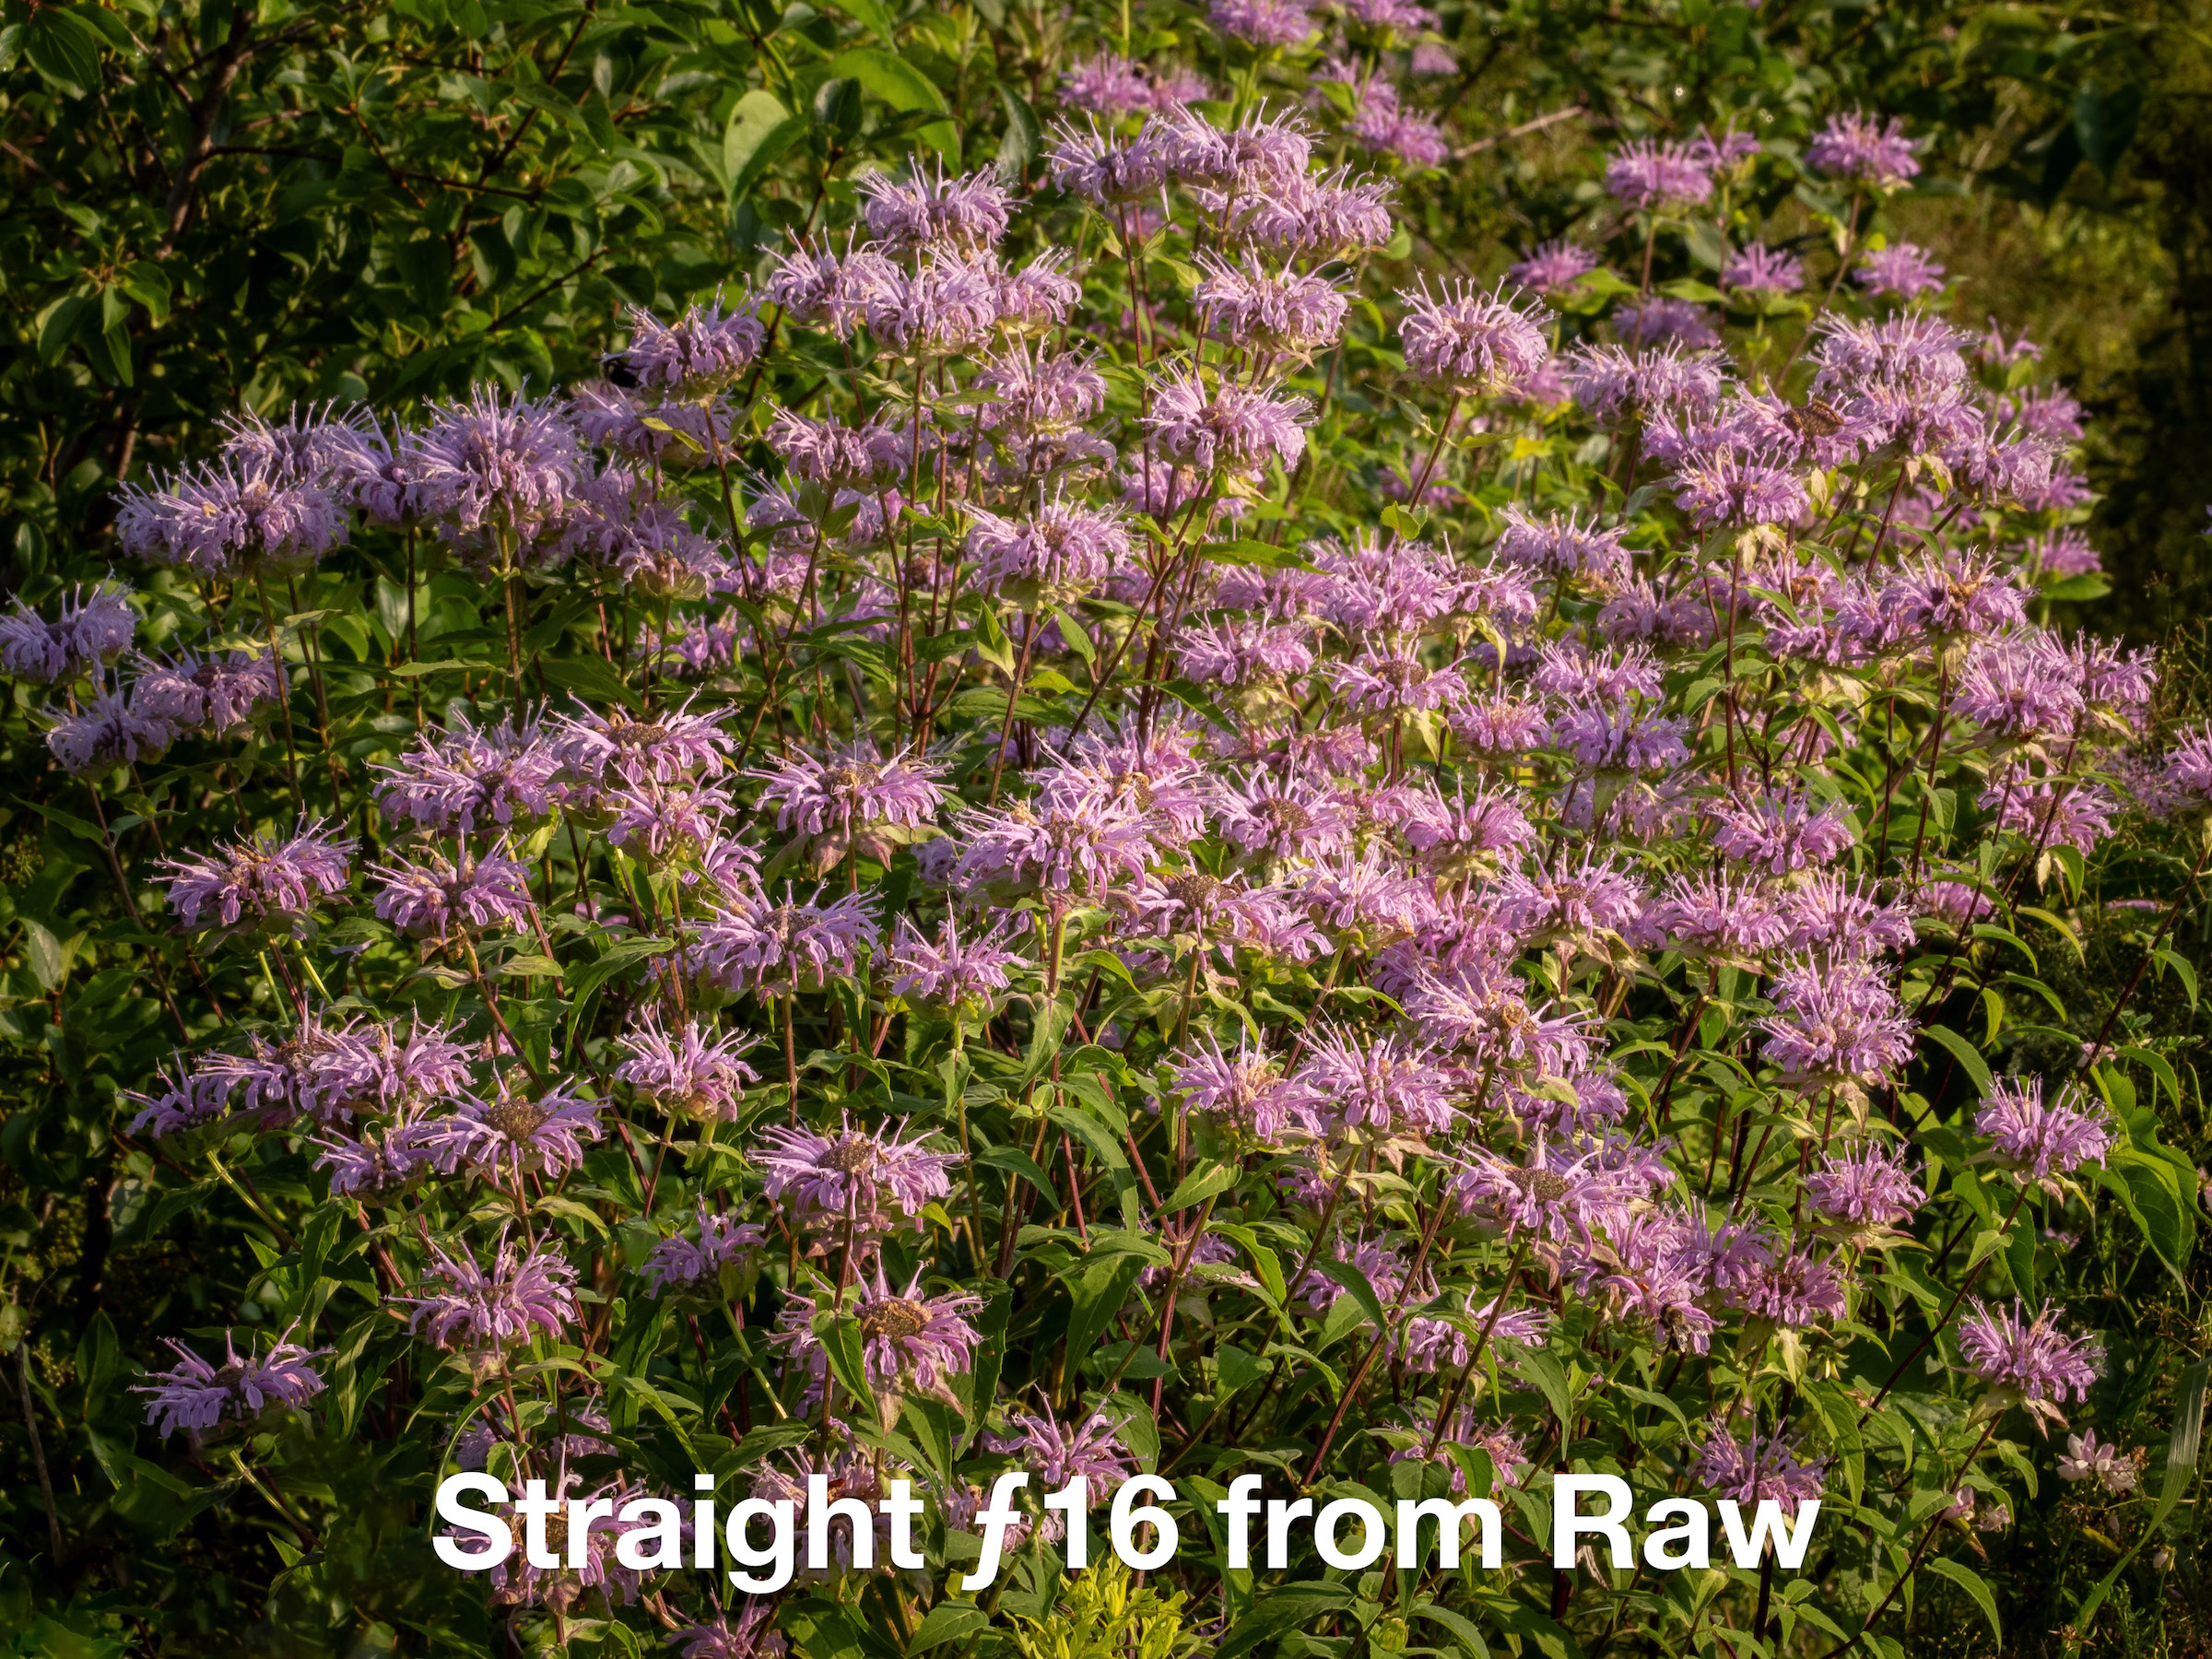


A note about the JPEG. In-camera JPEGs from the OM-1 are touted as being some of the best in the business. Originally, my JPEG looked like like crap. I only realized why as I was writing this blog. I have my in-camera ‘Picture Settings’ set to ‘Muted’ with saturation at –2. I never shoot JPEGs, so this is done to get more accurate-looking previews of my Raw files on the LCD, which are only ever shown at JPEGs on the LCD. Originally, the colours of the JPEG did not accurately reflect the quality possible, so the file underwent a little more adjustment than is typical. HOWEVER, perhaps like you, I am disappointed with the sharpness of the JPEG,. Despite having sharpening added in Lightroom, it is not a crisp and lively as the image made from Raw files. I think I will stick with capturing Raw files for the foreseeable future!
JPEG vs Raw aside, upon closer examination with a more critical eye, slight differences between the four images become apparent :
- The manually created focus stack using Photoshop is sharper and more lively-looking. It also includes the whole frame, versus the in-camera JPEG which is cropped, and t appears to have less noise. It is definitely a superior product.
Note: Each of the images that are automatically made and saved as Raw files by the OM-1 were shot at ƒ4 @ 1/800 at the OM-1’s optimal ISO of 200. - The ƒ11 capture was made at 1/100 at ISO 200; the ƒ16 image was made at 1/50. This highlights one of the advantages of Focus Stacking: each image is made at a more optimal (sharper) aperture – ƒ4 – with no fear of diffraction. Furthermore, a faster shutter speed virtually eliminates any concern for blur from camera shake or a wind-blown subject. That being said, focus stacking really must be done with static subjects as subject movement between frames will degrade the stacked image.
- One further advantage of manually stacking the images is the opportunity for fine-tuning. For example, I did not send all 10 images to Photoshop for stacking. Of the 10, I selected only 5 in the middle range that captured the area I wanted in sharp focus. The result shows up in the very top of the image: you’ll note the background flowers and foliage are far more out of focus than in any of the other photographs. Subtle, but there. This is done on purpose to focus the viewer on the grouping of flowers in the foreground. Further editing of the layer masks in Photoshop is also possible, though I can’t see tackling anything like that any time soon.

The images above are re-sized to 1600px on the long side.Tapping or clicking on any one of them will open the gallery.
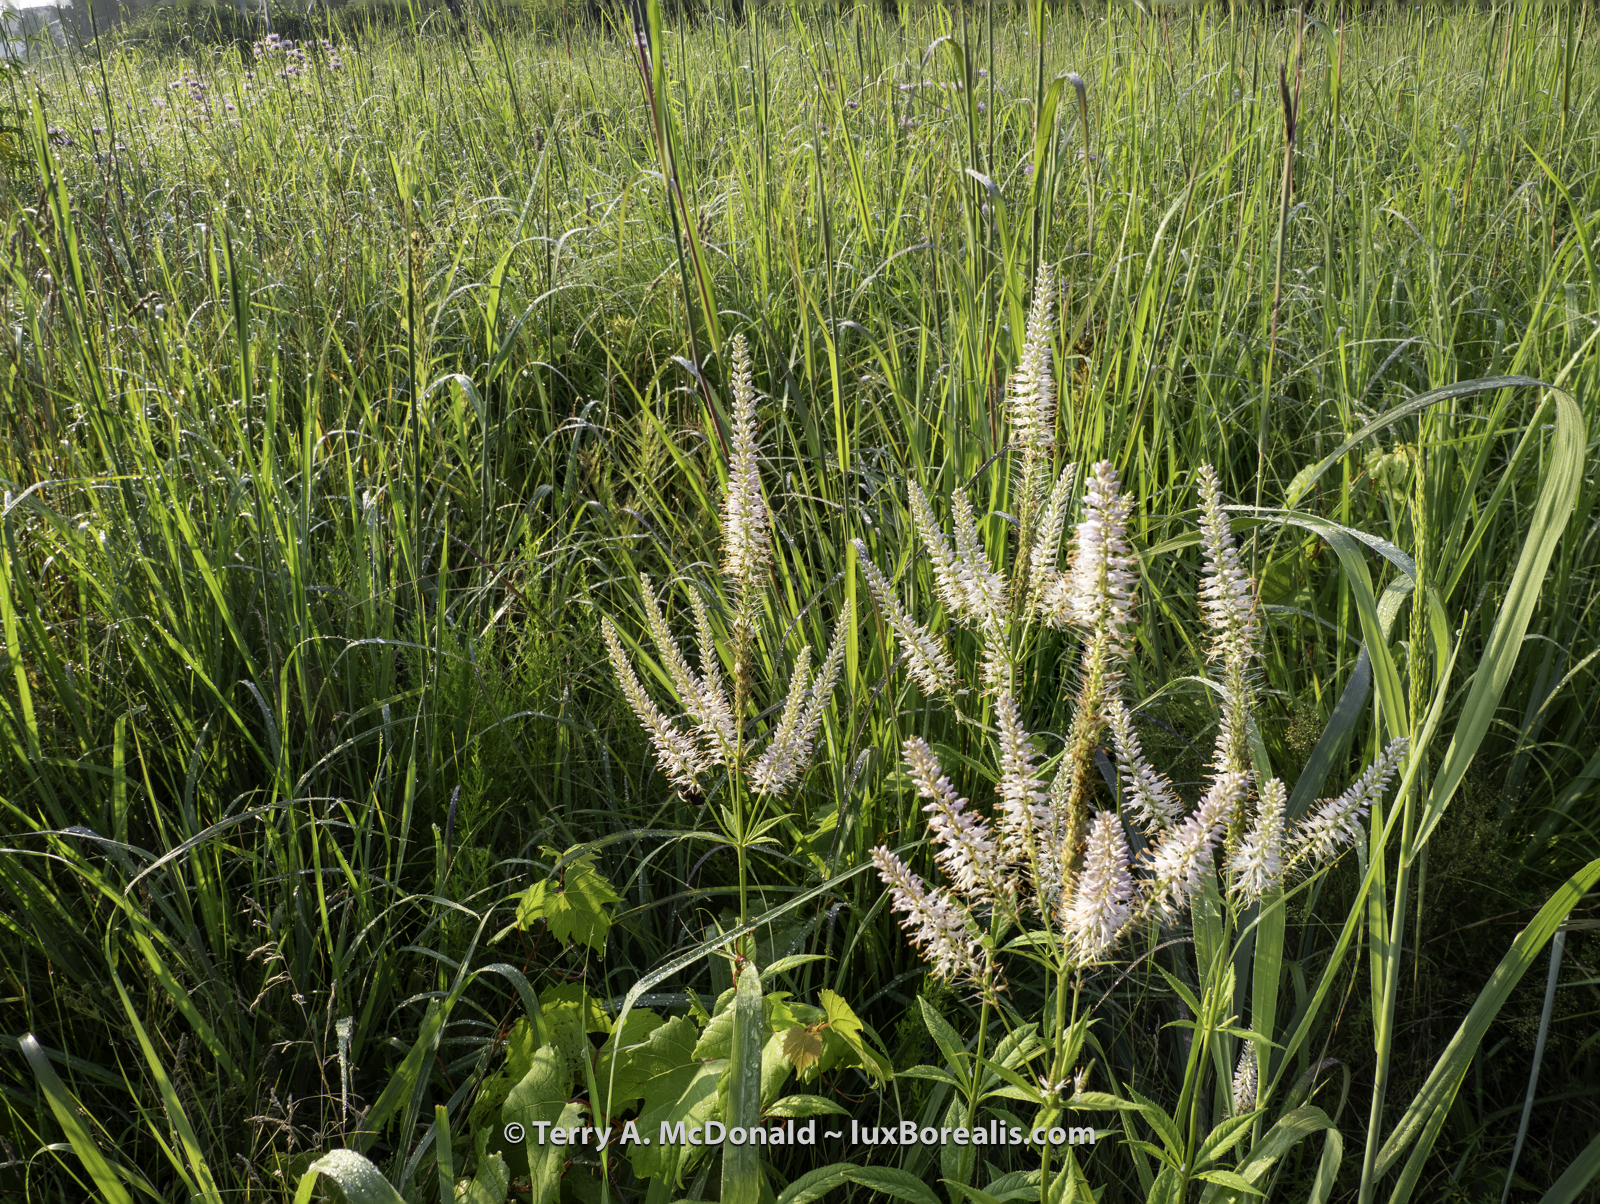
All three photographs were made in Photoshop by processing the in-camera Focus Stack Raw files. Prior to that, each set of files was processed in Lightroom. The first two are of Wild Bergamot; the third is Culver’s root. With the Culver’s root thoroughly surrounded by a sea of grasses, I would normally try to isolate such a complicated flower from the background, but that was impossible. Going the other way by including that sea of grass seemed like the best option.
So, what have I learned?
- I feel Raw files stacked are still better than the in-camera JPEG, which to me isn’t all that surprising. However, the difference is less than what I expected (see below).
- Using ƒ11 in a “straight” photograph (e.g. without Focus Stacking) provides more than adequate image quality after thoughtful sharpening is applied (even ƒ16 in a pinch), though Focus Stacking provides a consistently higher-quality result;
- Focus Stacking requires:
- a large aperture, such as ƒ4 or even ƒ2.8, which is a good thing, as it allows a faster shutter speed;
- fairly still conditions, though that’s the case for most serious detail work in nature. Shooting full frame at, for example, ƒ22 would have lowered the shutter speed to 1/25, meaning little tolerance for wind.
- Focus Stacking, both in-camera and with Photoshop, struggles with more visually complex scenes such as thin stalks of grass in the foreground. This is an area I will need to explore further, perhaps with a smaller differential and more images being captured. But I also think that with narrow blades of grass in front of narrow blades of grass,Photoshop struggles with identifying what’s sharp and what’s not and masking accordingly.
- I don’t really need to use in-camera Focus Stacking as capturing a series of files using Focus Bracketing is available on the OM-1. That way, only raw images are captured for later assembly using Photoshop. (For some reason, the OM-1 is saving both Raw and JPEG files of each exposure, even though I have Raw only selected as a file type.)
- Focus Stacking allows up to 15 images to be captured; Focus Bracketing is more flexible, allowing up to 999 (!) sequential captures – far more than I could ever imagine working with, but it would certainly make a great future project!
Focus Stacking using Photoshop is a quick and viable way to further increase image quality and to customize the out-of-focus areas of the image. My workflow is very straightforward:
- Import files into Lightroom;
- When dealing with a lot of images, I set-up an Auto-Stack:
- Photo > Stacking > Auto-Stack by Capture Time and set it to 3 seconds as, typically, all the files are created within that time frame;
- Select and delete unnecessary JPEG;
- Choose one of the raw image file for processing and apply the adjustments I typically make to ‘breathe life back into the machine-made file’, including Basic, Colour, Detail, Adjustment Masks, etc.;
- Sync changes to the others;
- Select the Raws to stack;
- Photo > Edit in > Open as layers in Photoshop . . .;
- In Photoshop:
- Select all the layers;
- Edit > Auto-Align Layers > Auto;
- Edit > Auto-Blend Layers . . . > Stack Images;
- Layer > Flatten Image;
- File > Save As . . → Here I replace “Edit’ in the filename with as FS to indicate focus-Stack. The file is immediately visible in Lightroom.
- I select the PSD file and choose Photo > Stacking > Move to top of Stack;
- Photo > Collapse Stack. Job done, usually in a minute or so, after processing.
That’s 12 steps more than my normal workflow, but other than the processing, the steps are all very mechanical. The Photoshop steps could be saved as an Action (which I have done).
Here is another example. The image below is of a very complicated scene for successful Focus Stacking. There are many thin blades of grass overlapping, both in the foreground and in the background. One image is the in-camera JPEG; the other was produced using Raw files and Photoshop. Drag the centre button to compare the two. Which is which? Which one do you like better?
The complexity of the scene above fooled both the camera and Photoshop during stacking. However, the point of showing this image is to demonstrate just how good an in-camera Focus Stacked JPEG can be. I’m impressed. BOTH images have been processed in Lightroom prior to being re-sized to 2400px on the long side. The image on the LEFT is the JPEG produced in-camera; on the RIGHT is the Photoshop-made Focus Stack. Here is a 100% crop to compare more precisely:
I am greatly looking forward to pursuing Focus Stacking, or rather Focus Bracketing and Stacking. The OM-1’s implementation of these features using computational photography provides the necessary precision and repeatability for proper testing and predictable results. Given my interest in natural details and landscape photography, Focus Stacking has become an essential addition to my ‘photographic toolkit’, It is a reliable method of improving image quality with very little increase in effort.
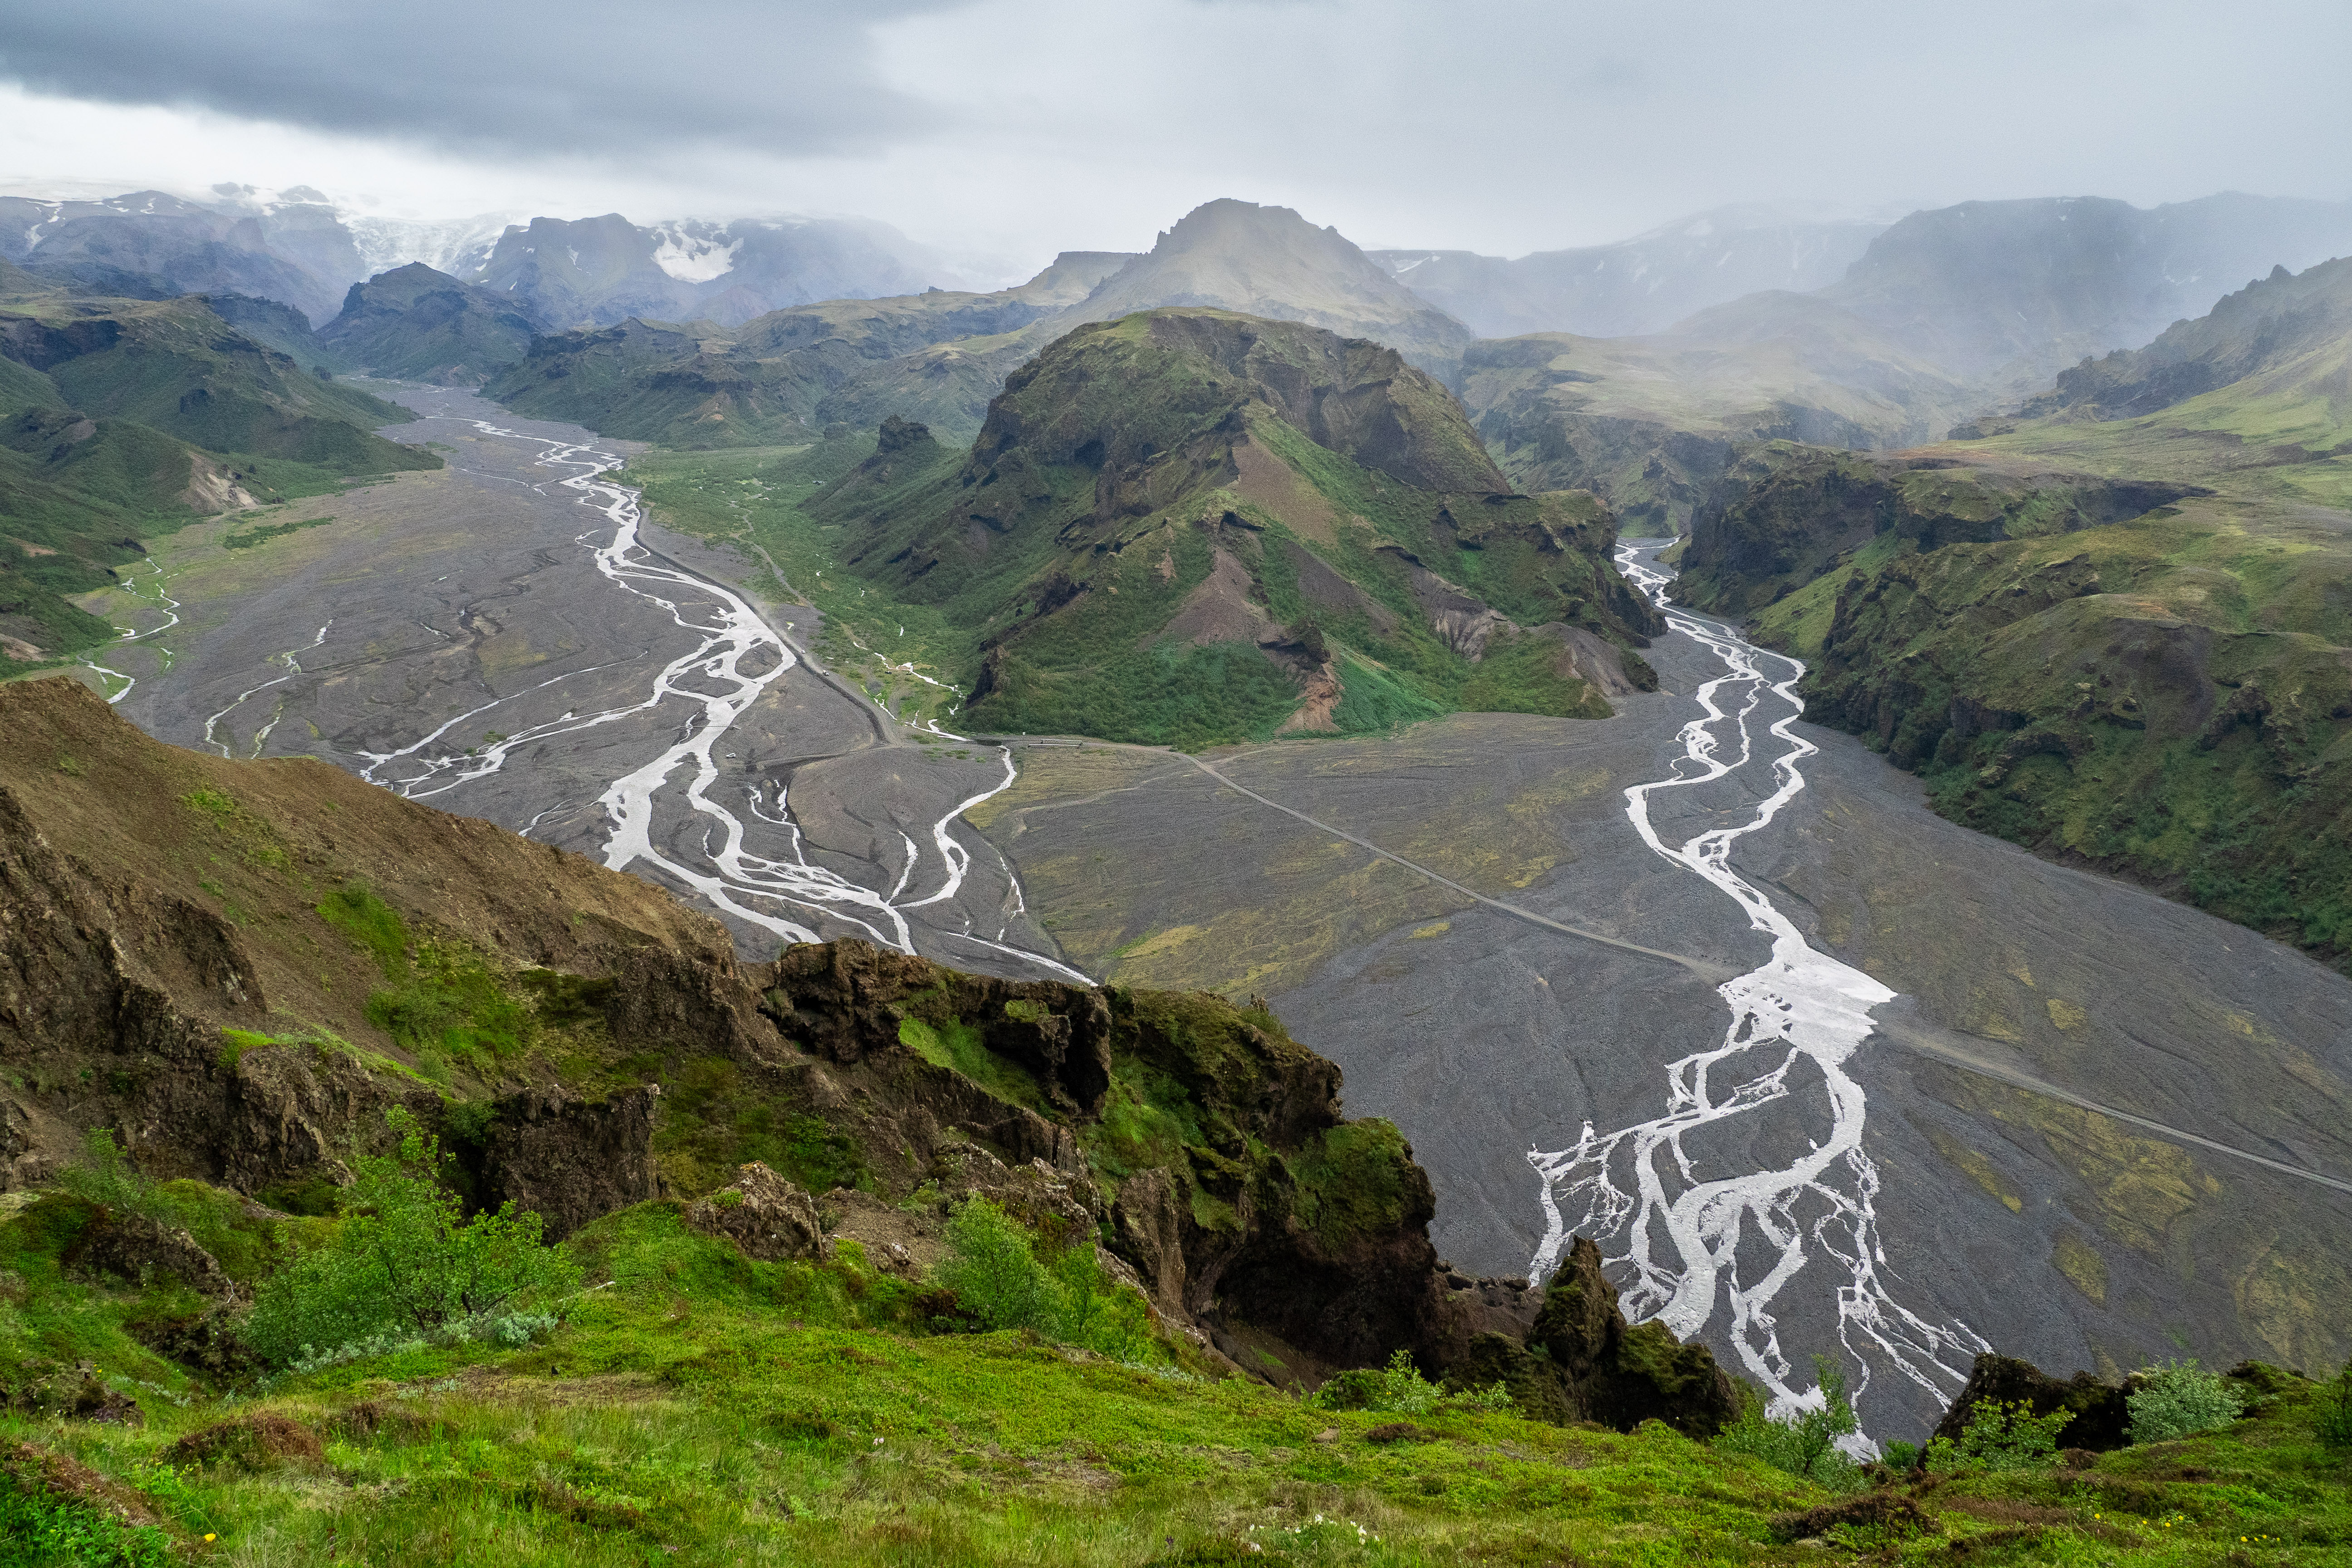
Iceland Follow-up – Photo assessments
I had a difficult time preparing the Iceland blog, mostly because of the photos. While I was generally pleased with the results, if I were to objectively assess the photos, I would give many of them a C, a few a B, only 1 or 2 an ‘A’, with only 1 A* / A+ photo.
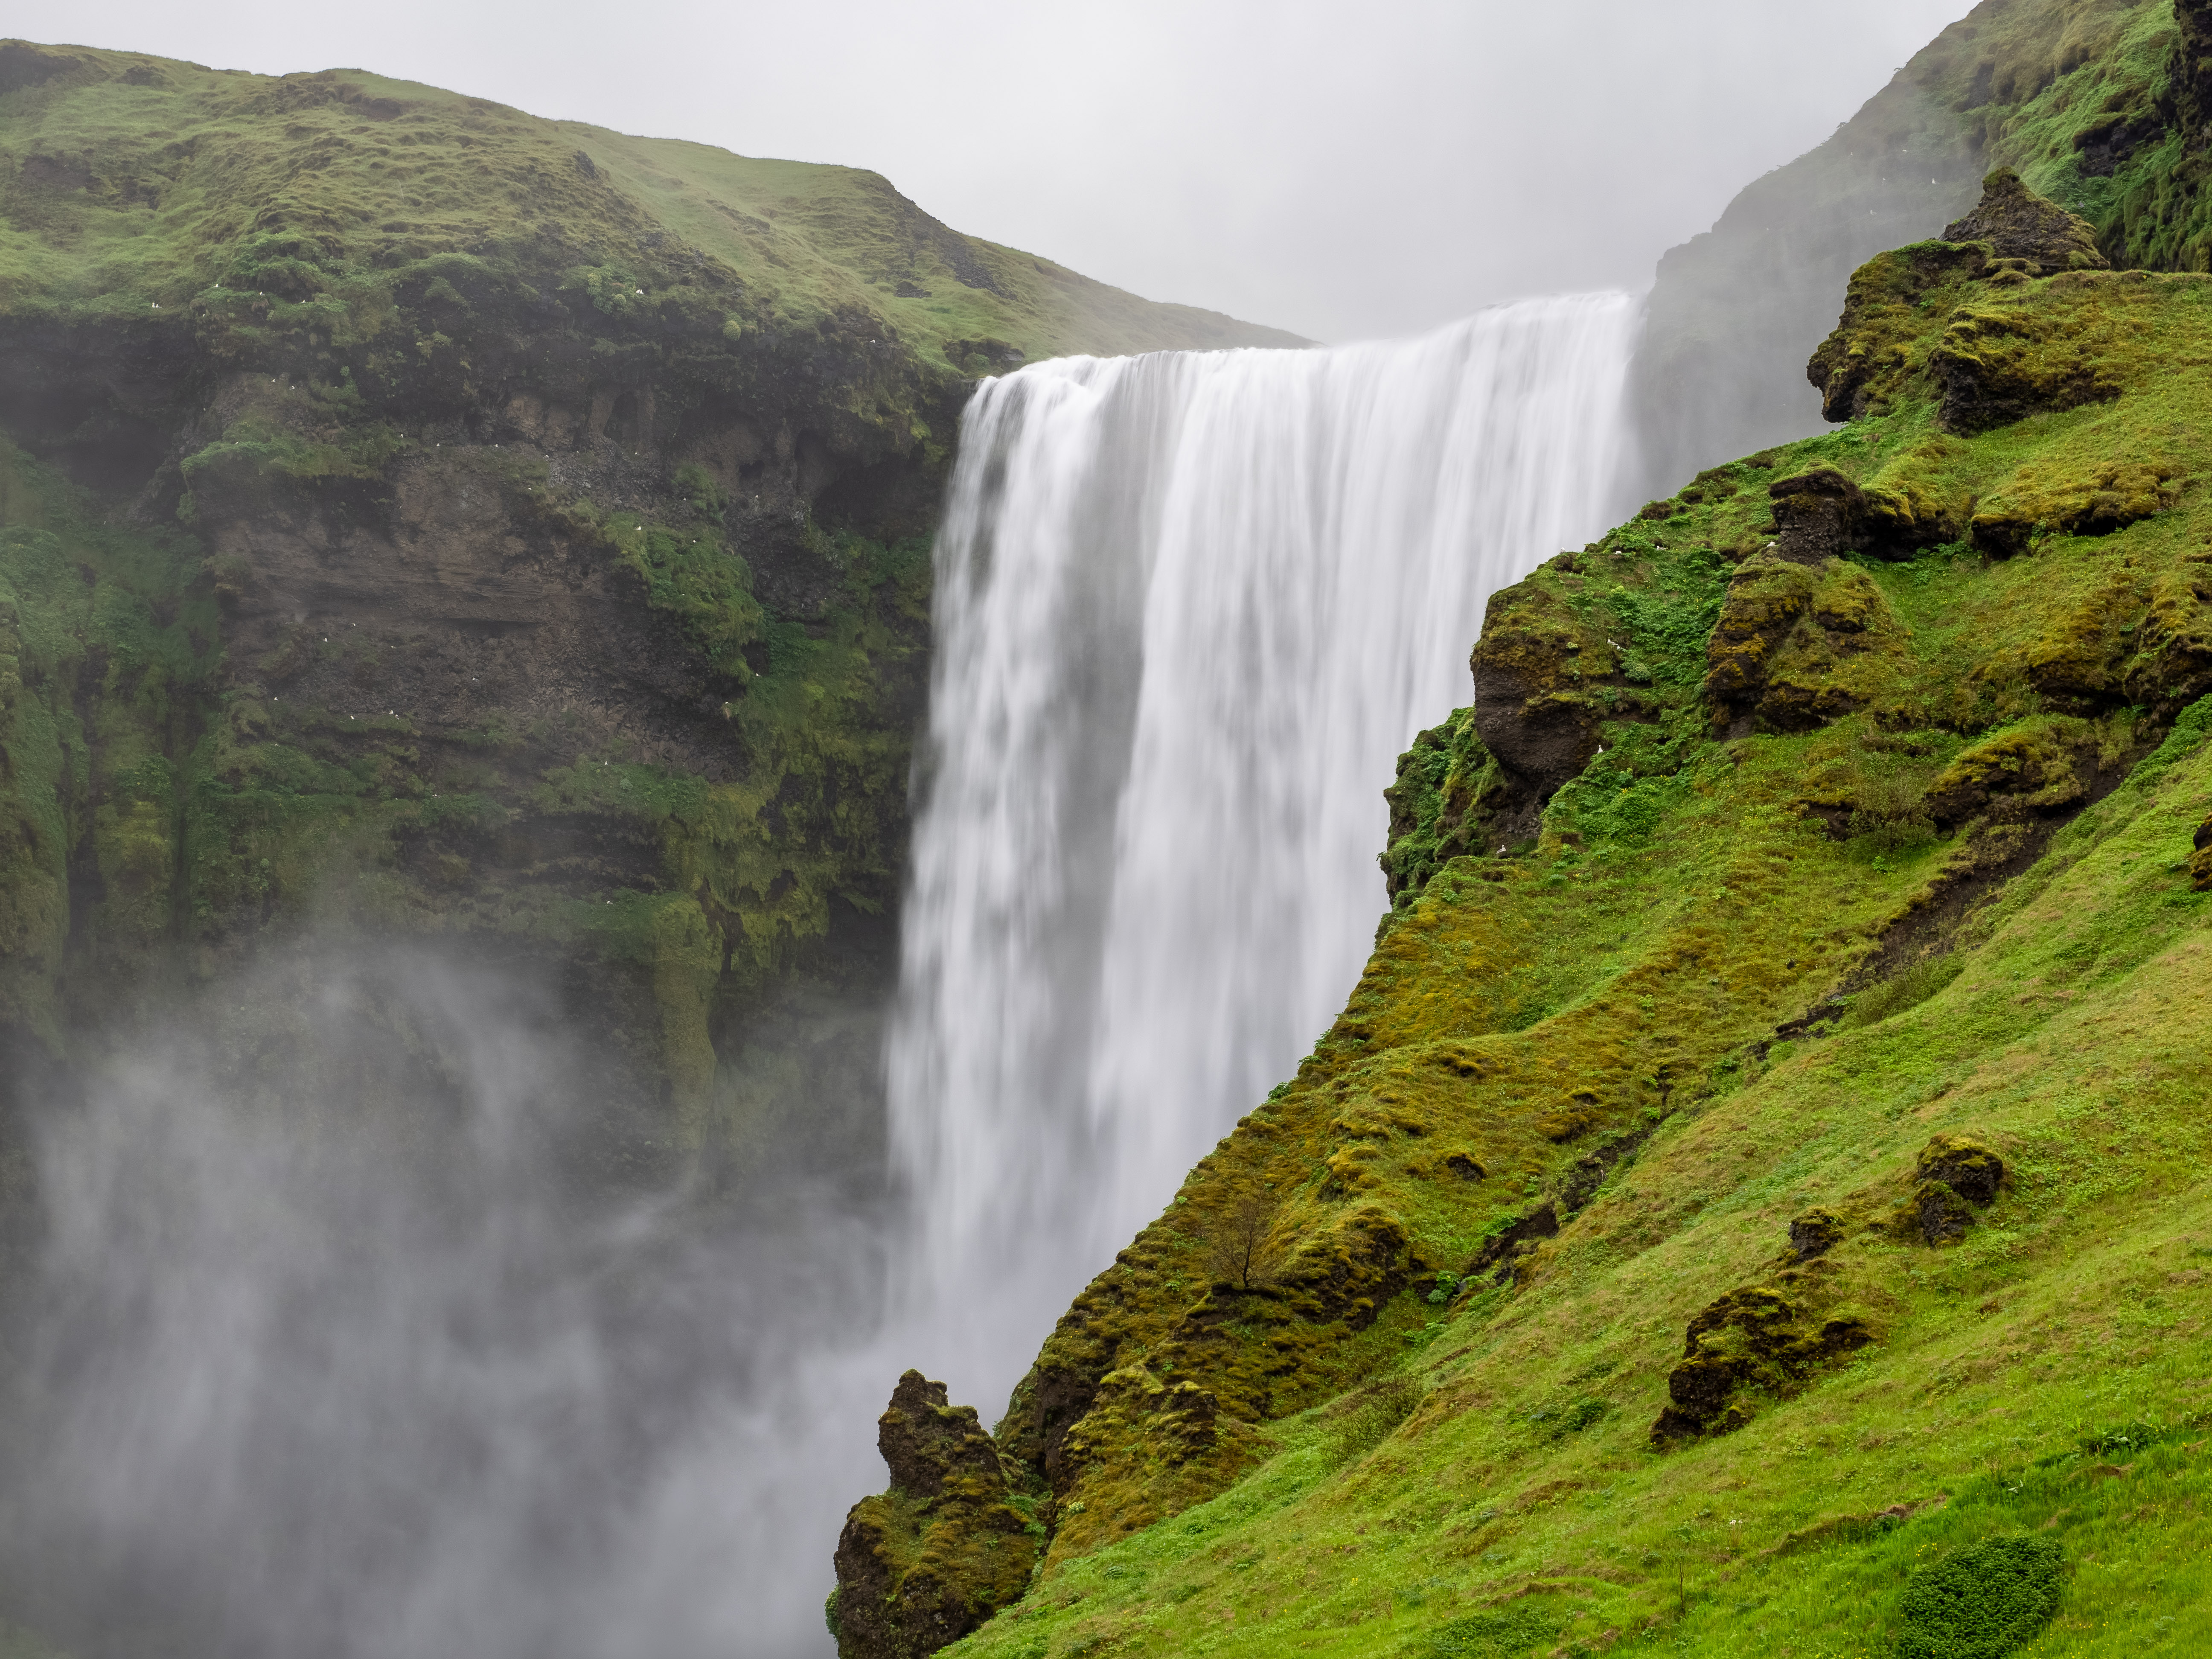
In retrospect, many of the photos included in the blog are “I was here” shots. They are technically competent depictions of the scene in front of the camera, but they don’t see beyond the obvious, which for me is the mark of an engaging and compelling photograph. For most of the photos, the word “illustrative” comes to mind. Thank goodness Iceland is so forgiving. It is so dramatic that even a “meh” photograph has visual merit and the potential to engage the viewer.
Being responsible for a group and being in a ‘coach tour’ situation has that effect on photography. Rarely did I have more than a few minutes to devote to thoughtful, more interpretive photography, hence the dearth of ‘As’. However, this was not a photography tour. My mission, to introduce a group of active and enthusiastic teens to the thrills and challenges of foreign travel in a captivating and adventurous location—and bring them all back alive and well—was a complete success.
The ‘C’ photos:
Technically competent, illustrative in nature; the kind of photo where you go “Nice”, then scroll past.
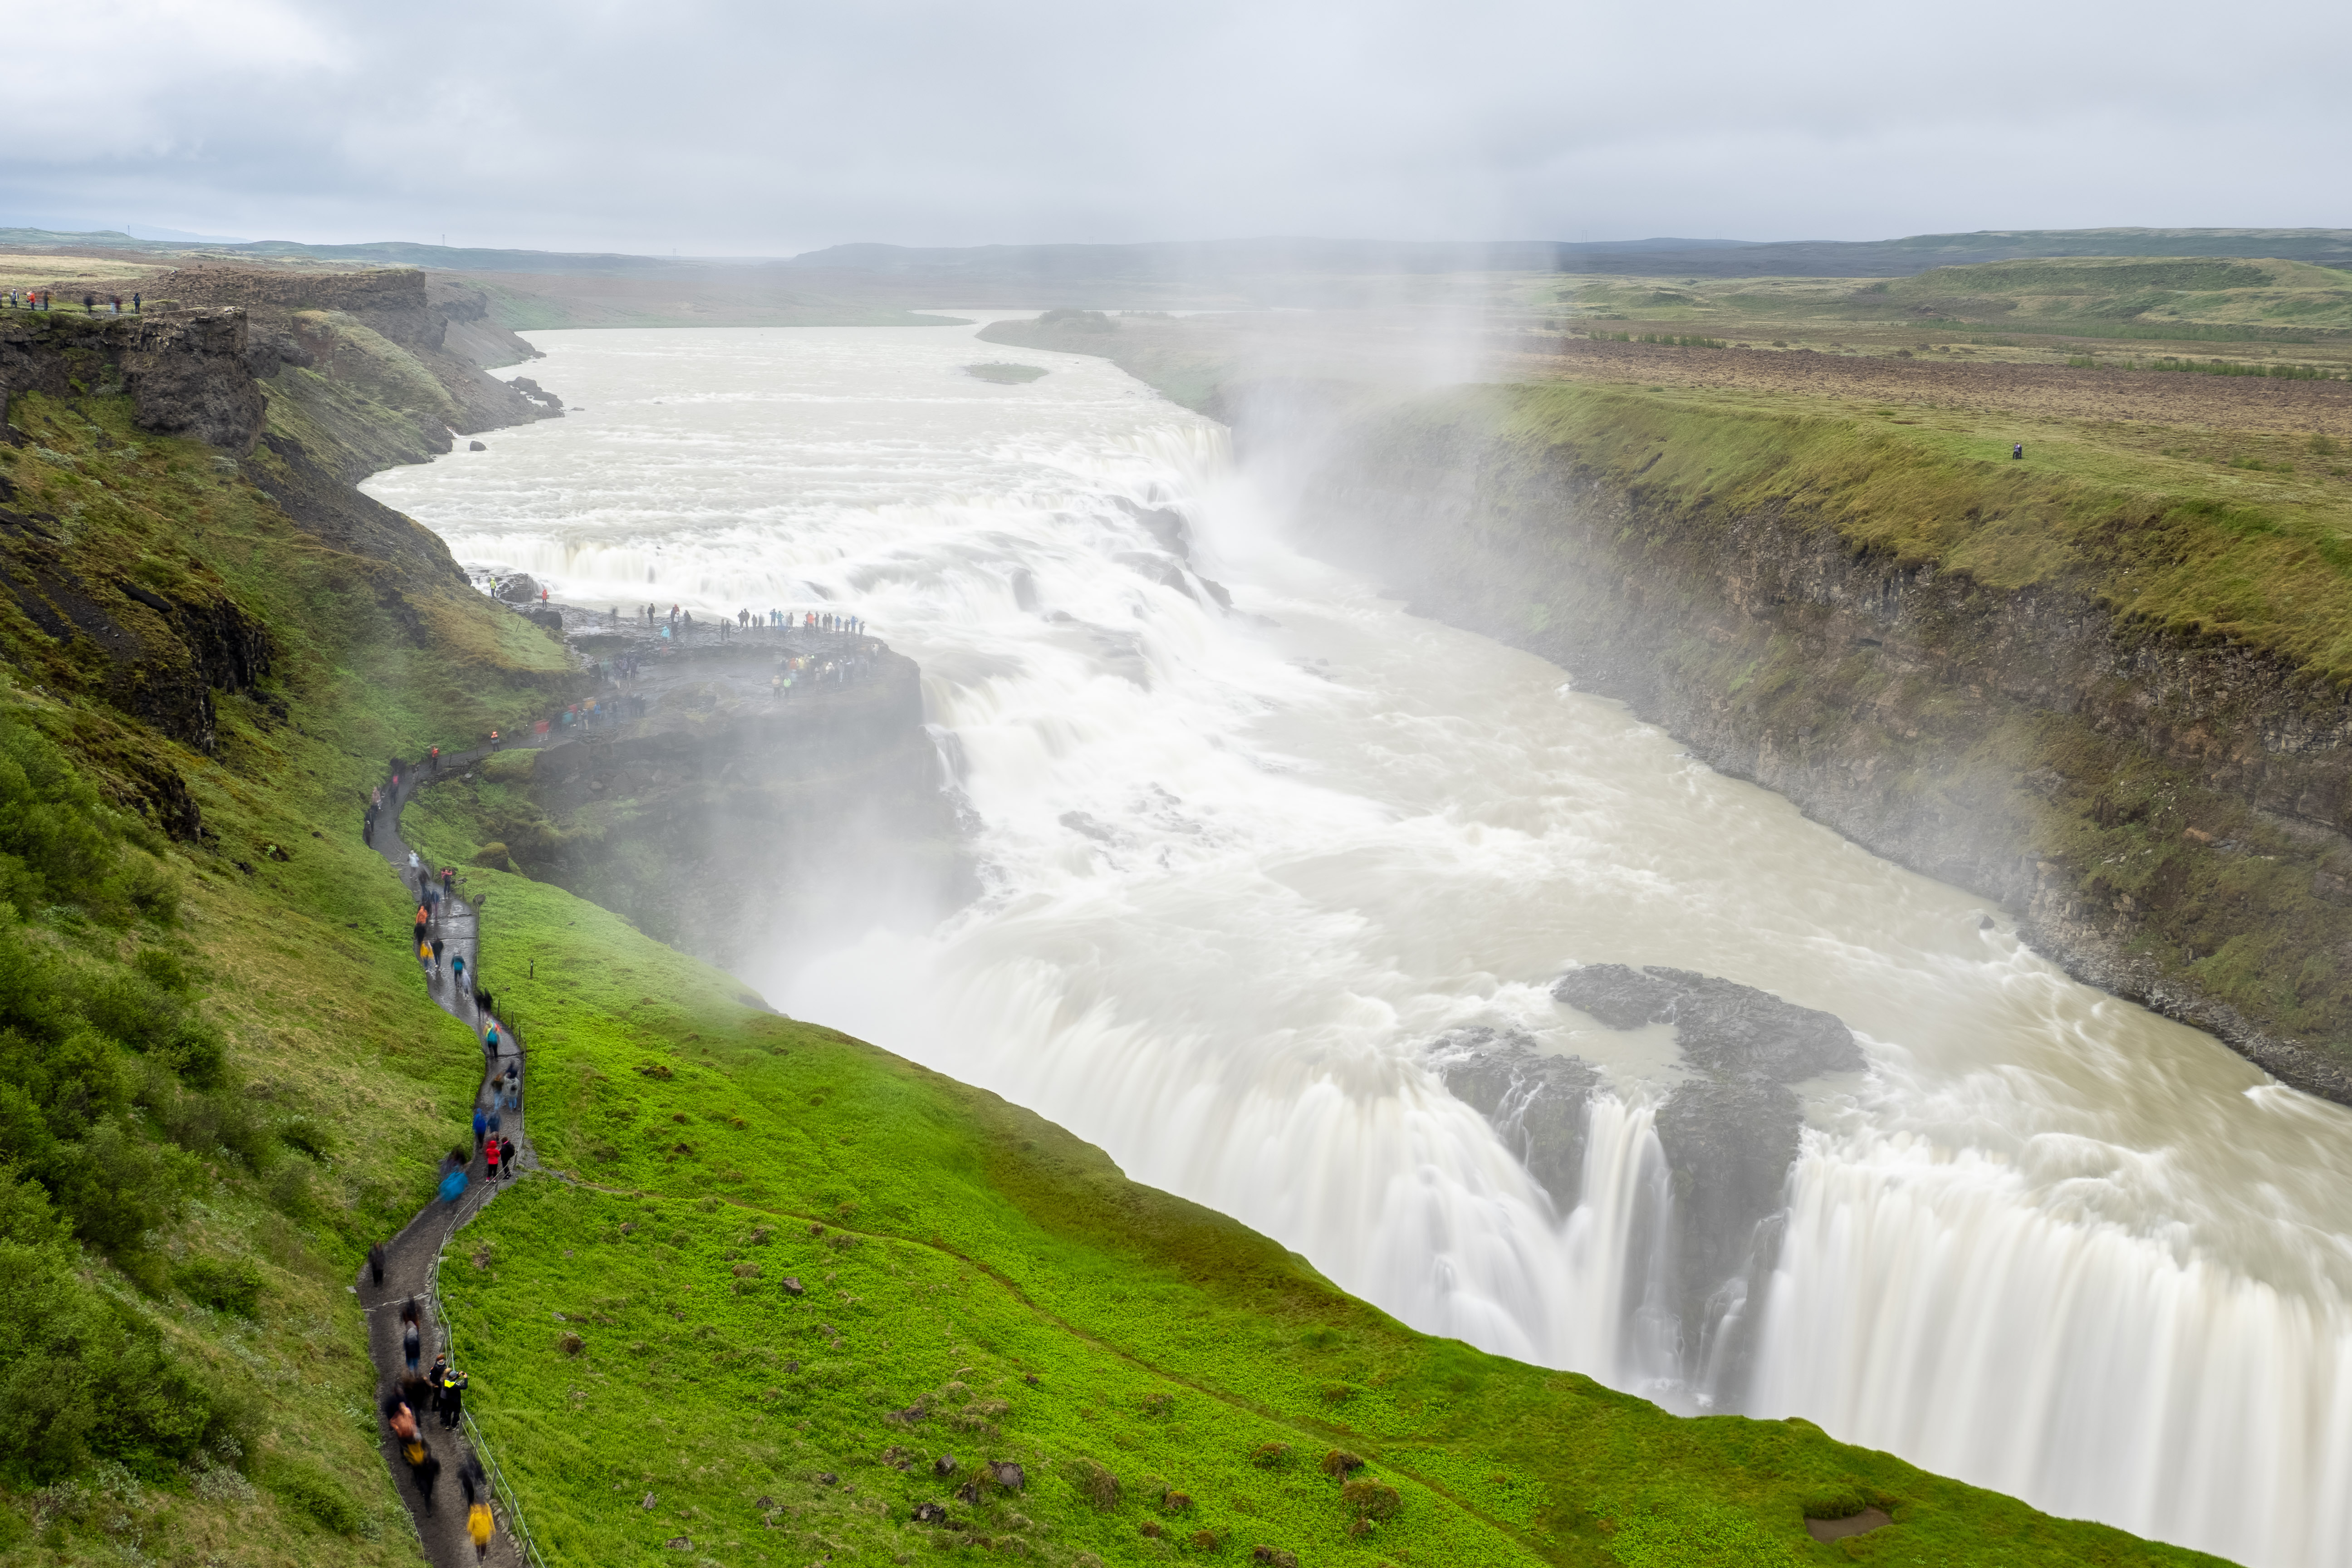

The ‘B’ photos
Technically competent, with some interpretive value. More than nice to look at, the viewer will spend a little longer with ‘B’ images, perhaps to examine details.
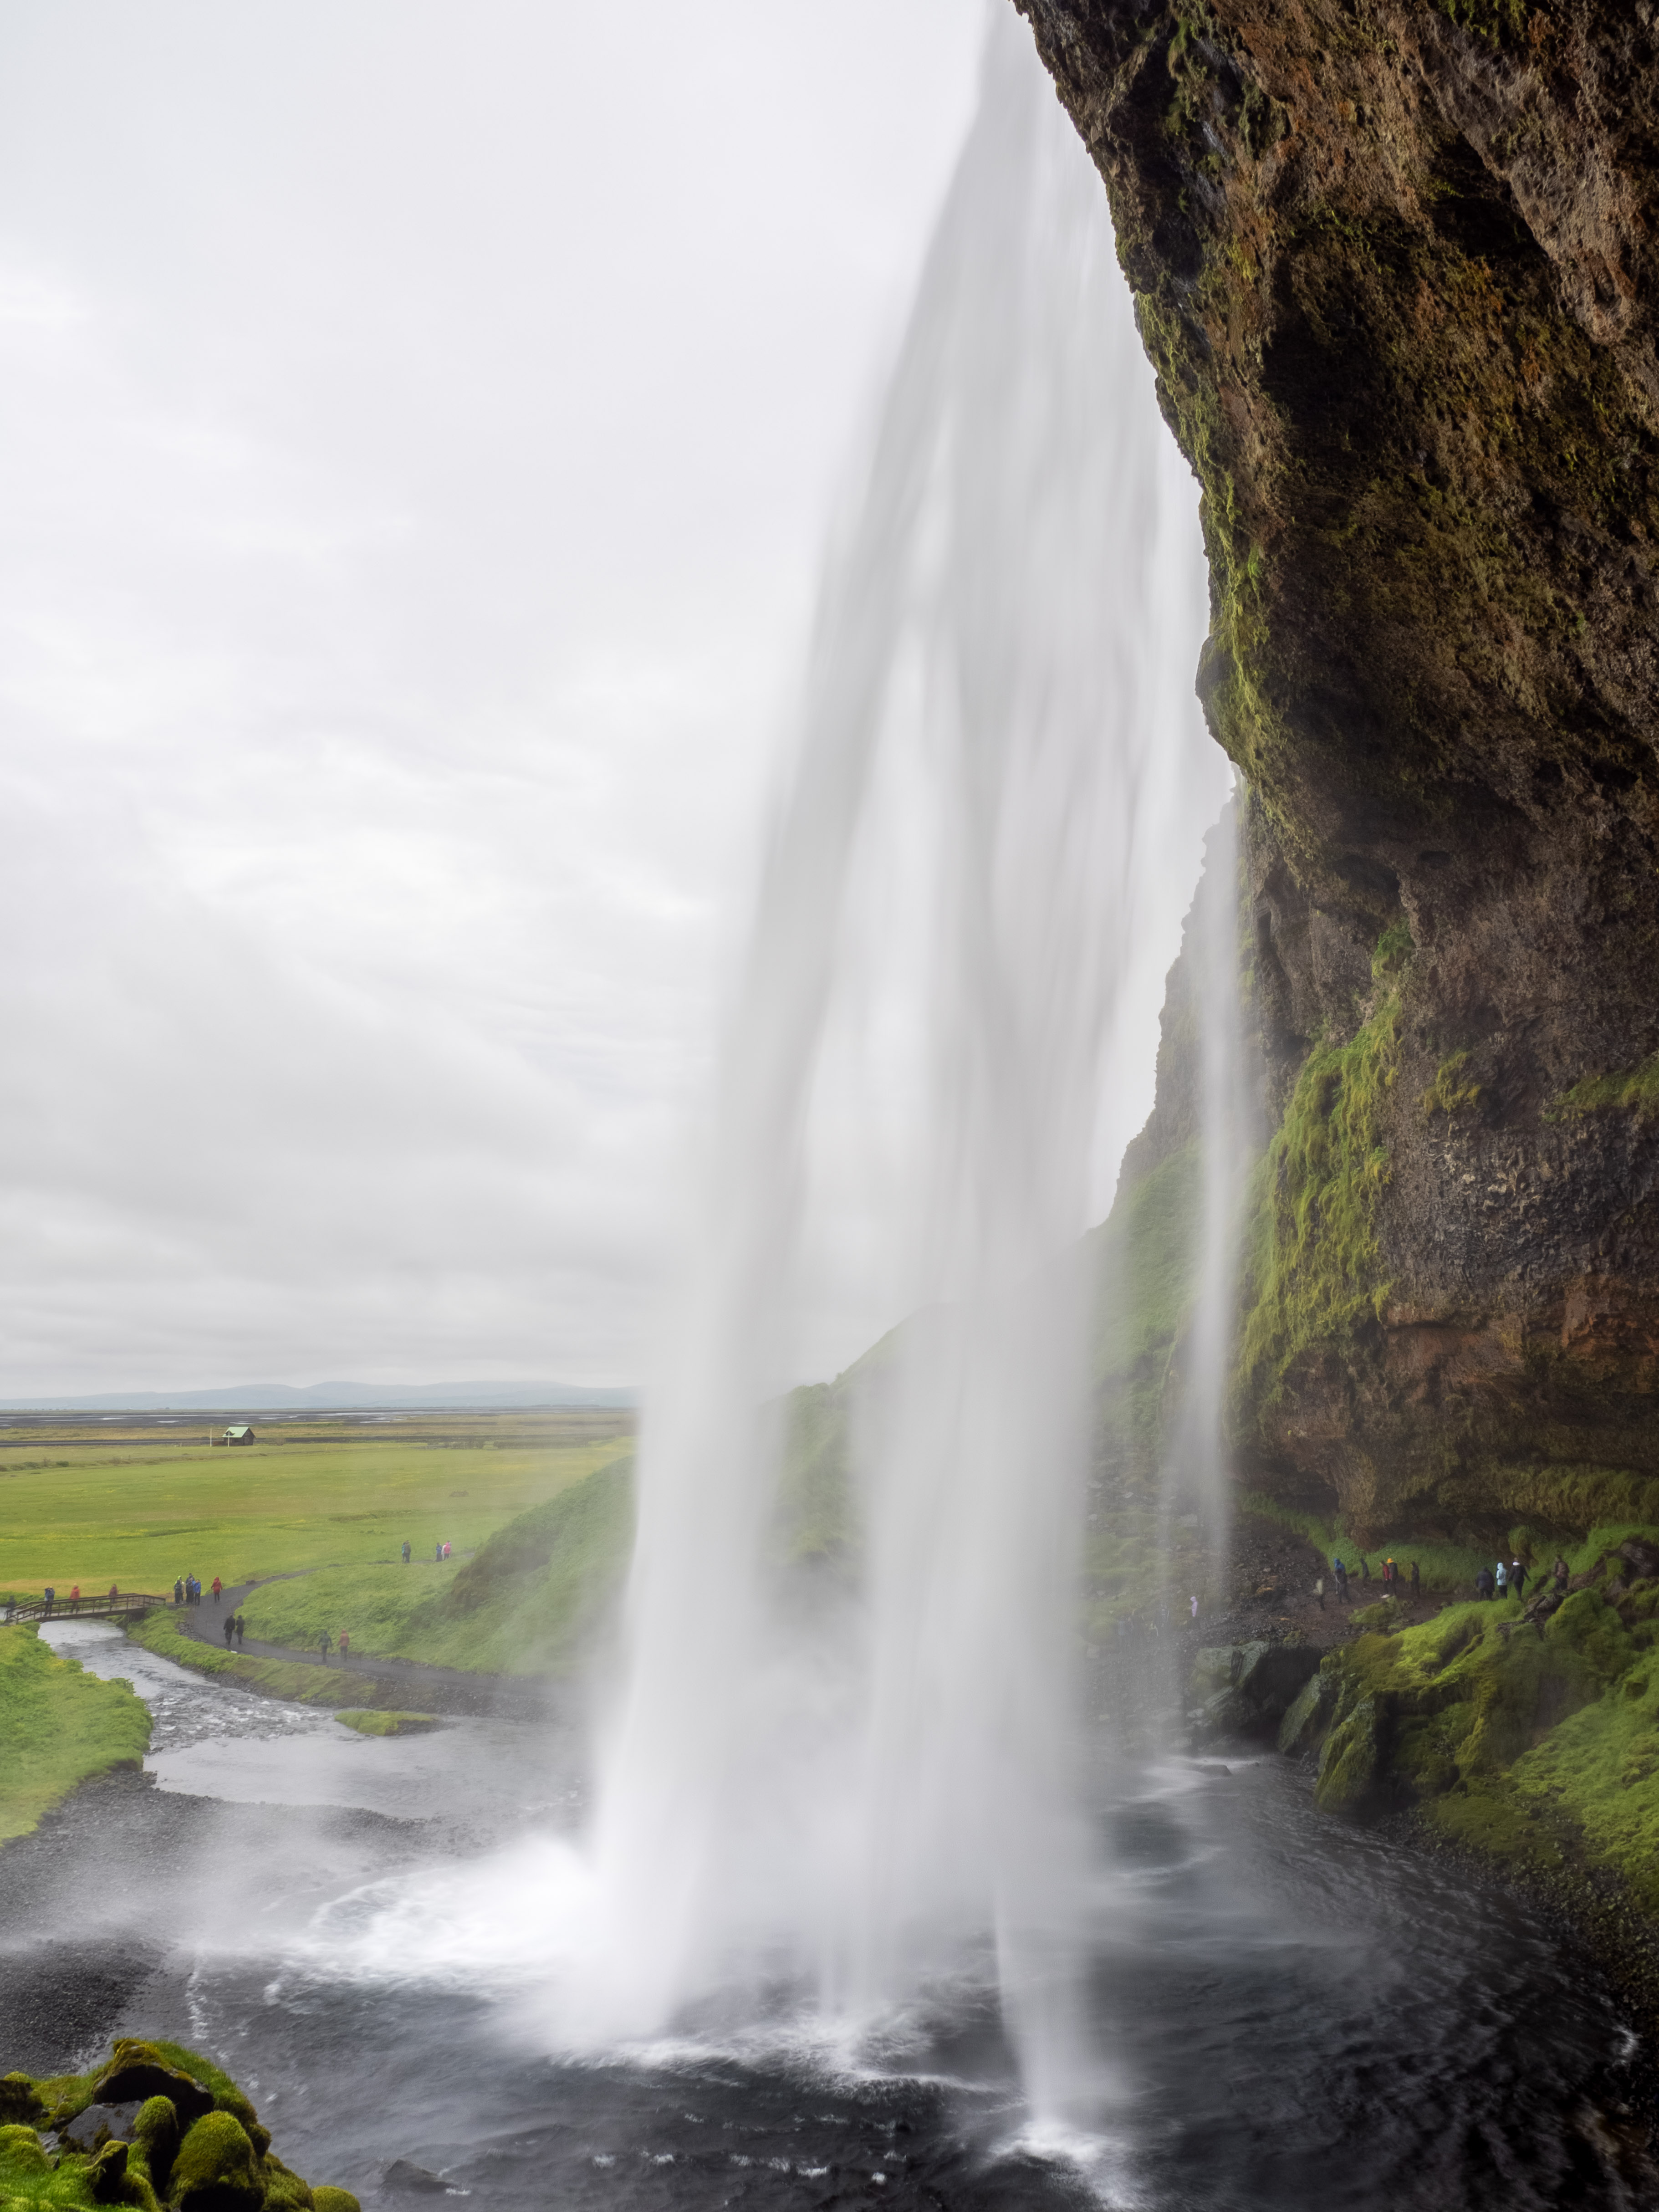
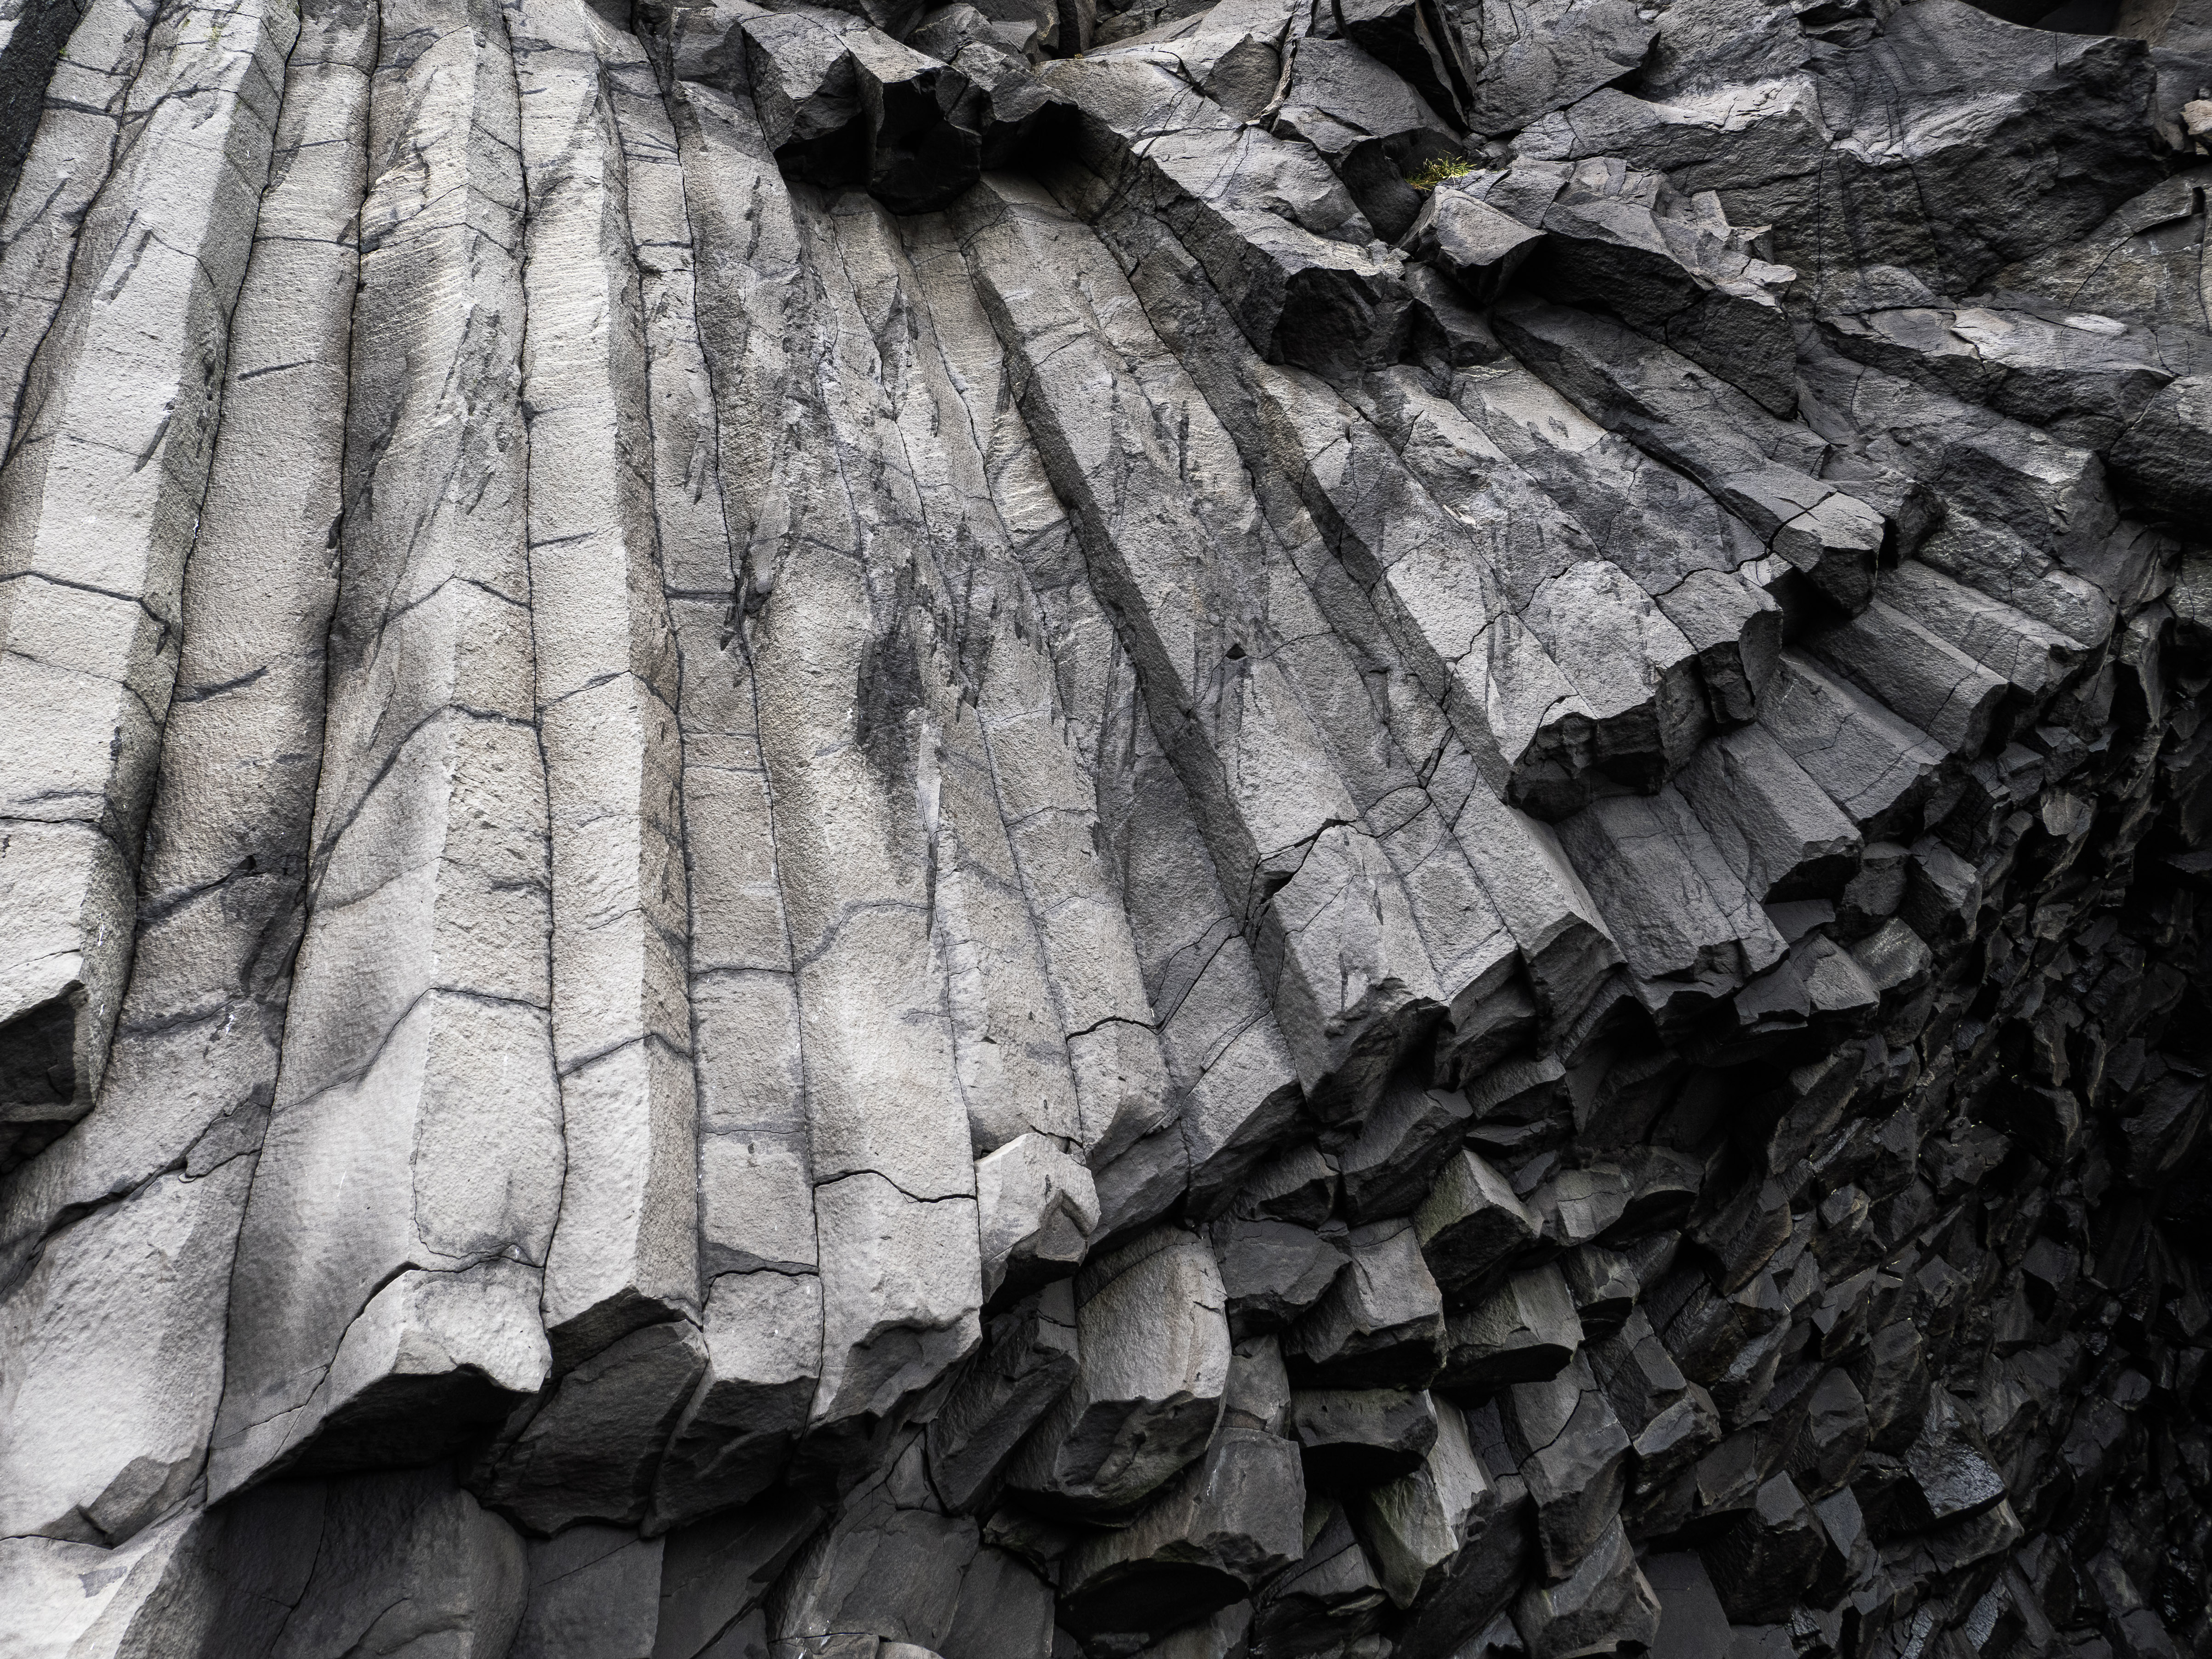
The ‘A’ photos
More interpretive than illustrative, ‘A’ images show some personality and cause viewers to stop and ponder. They engage the viewer, if only for a few moments. These would be considered for printing and framing and exhibition, more or less held in reserve
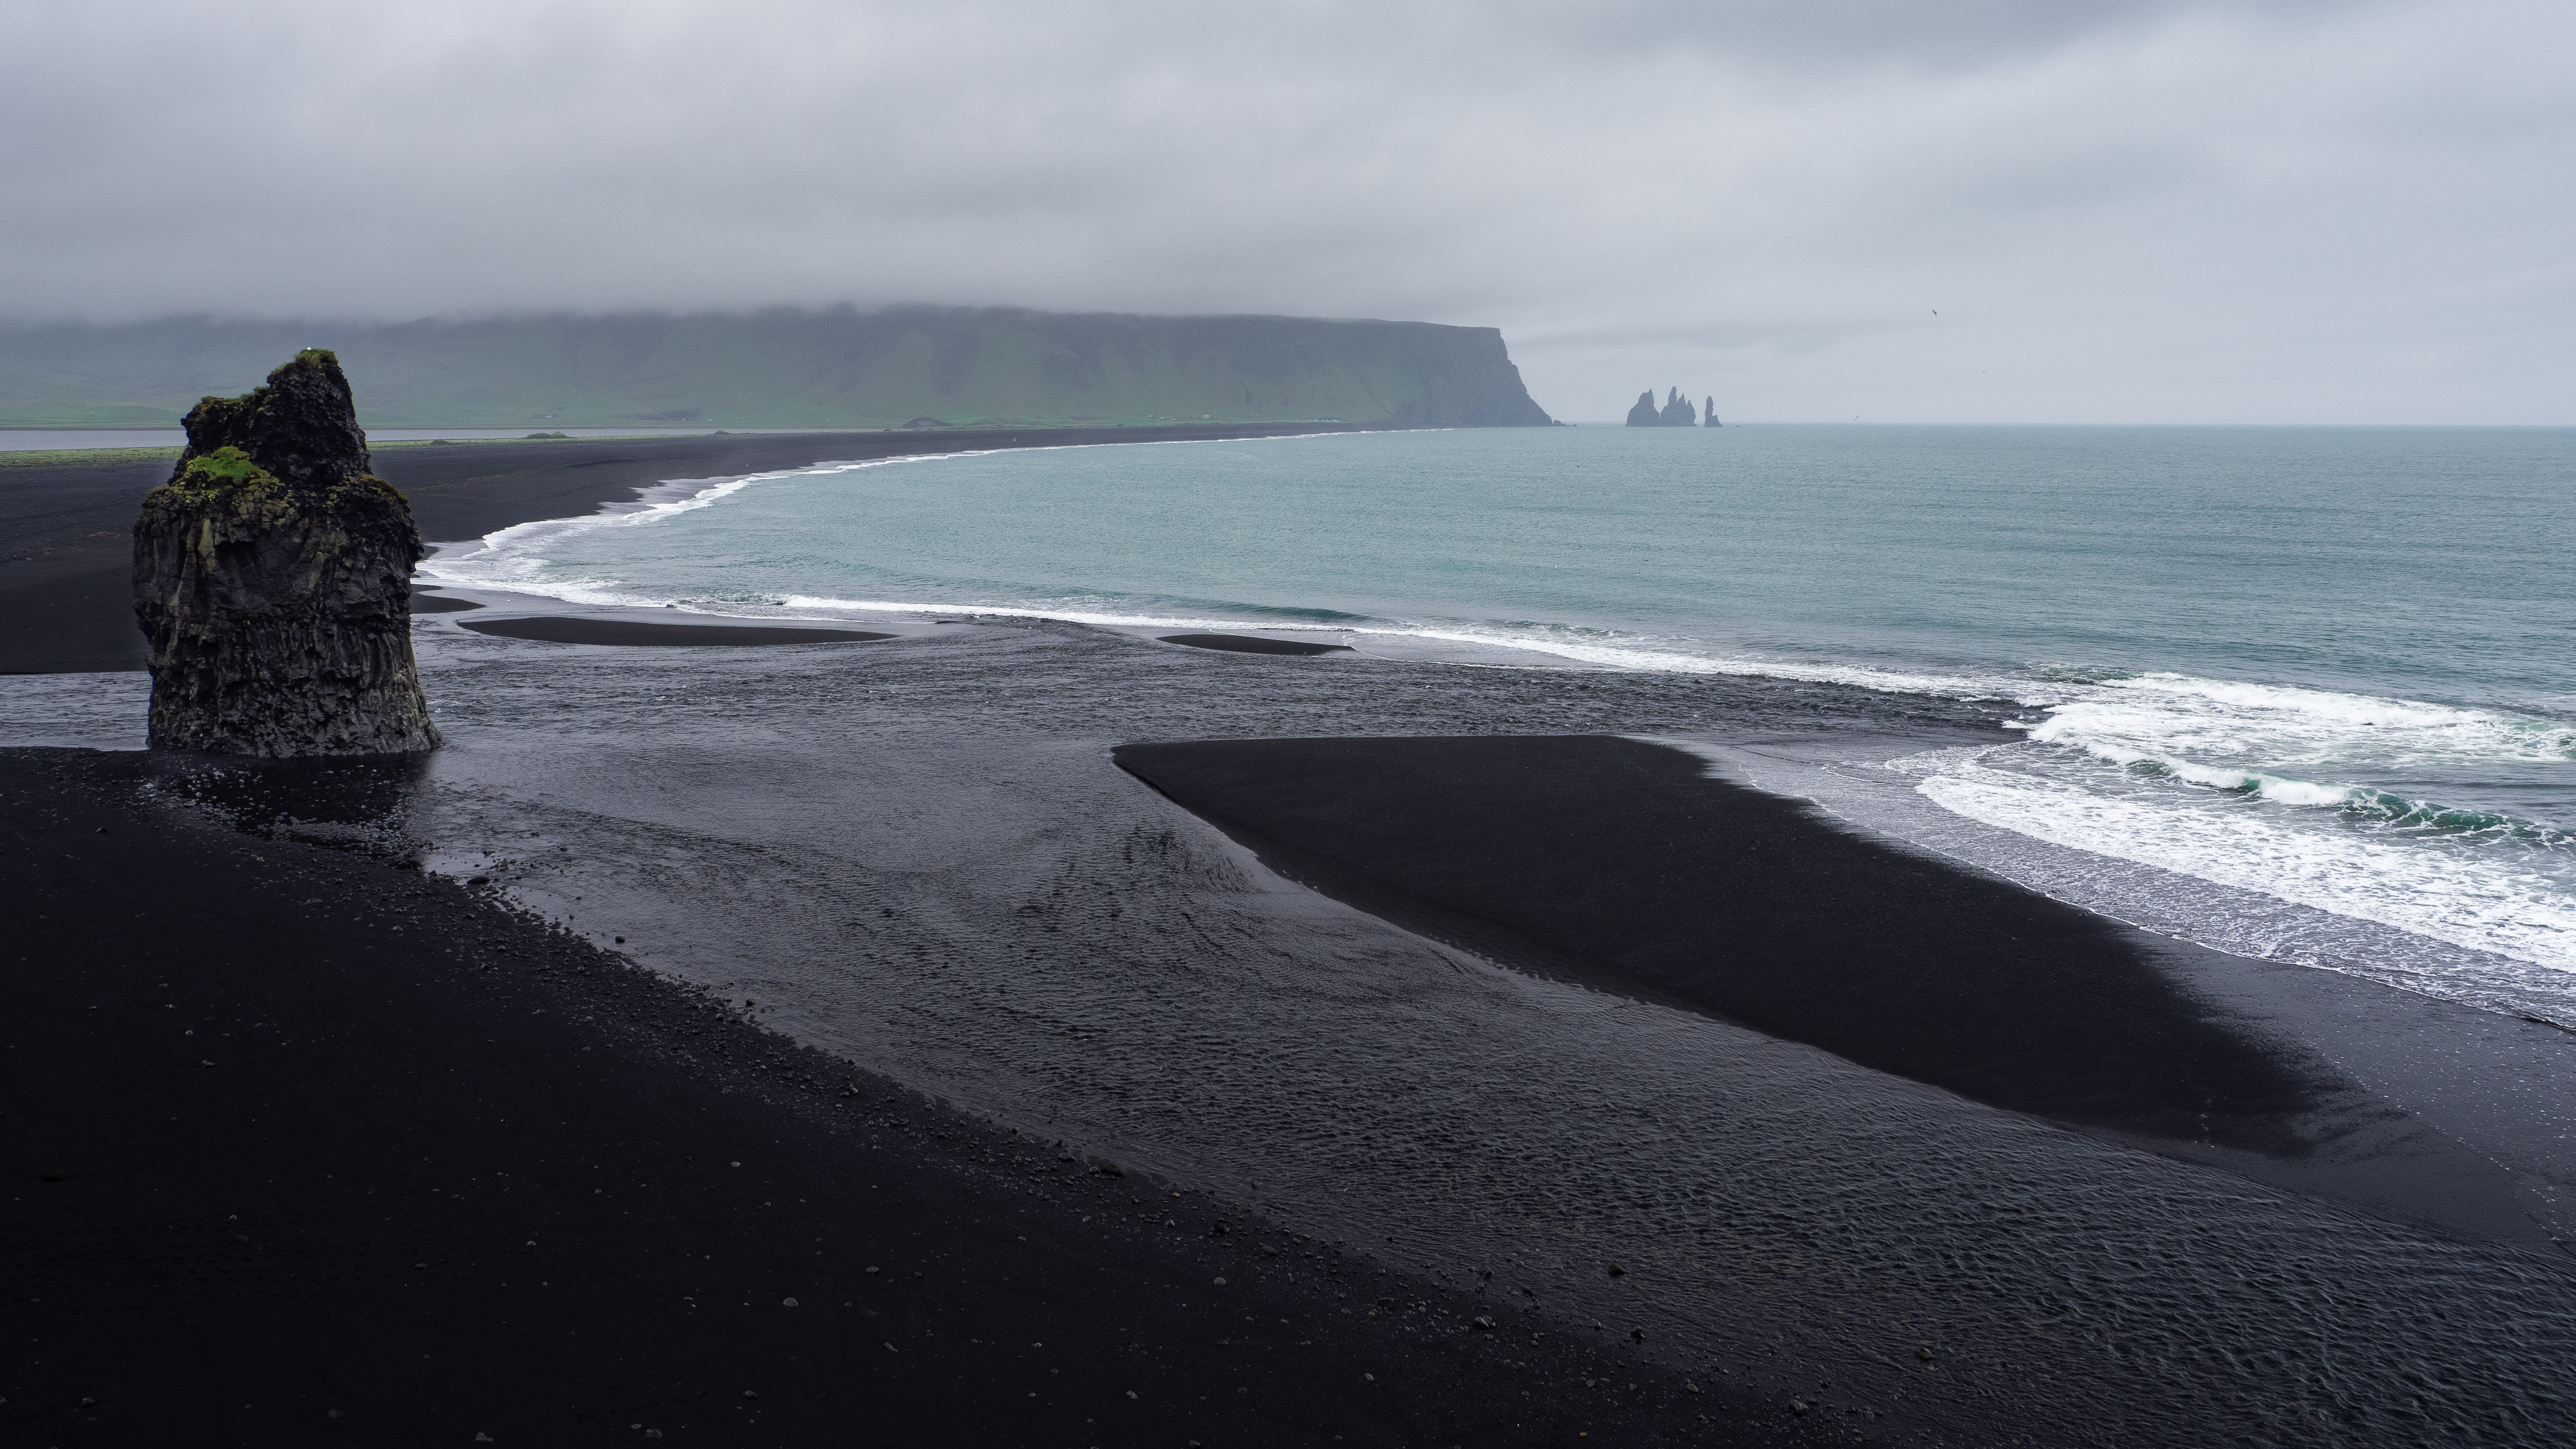
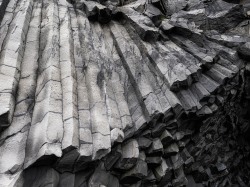
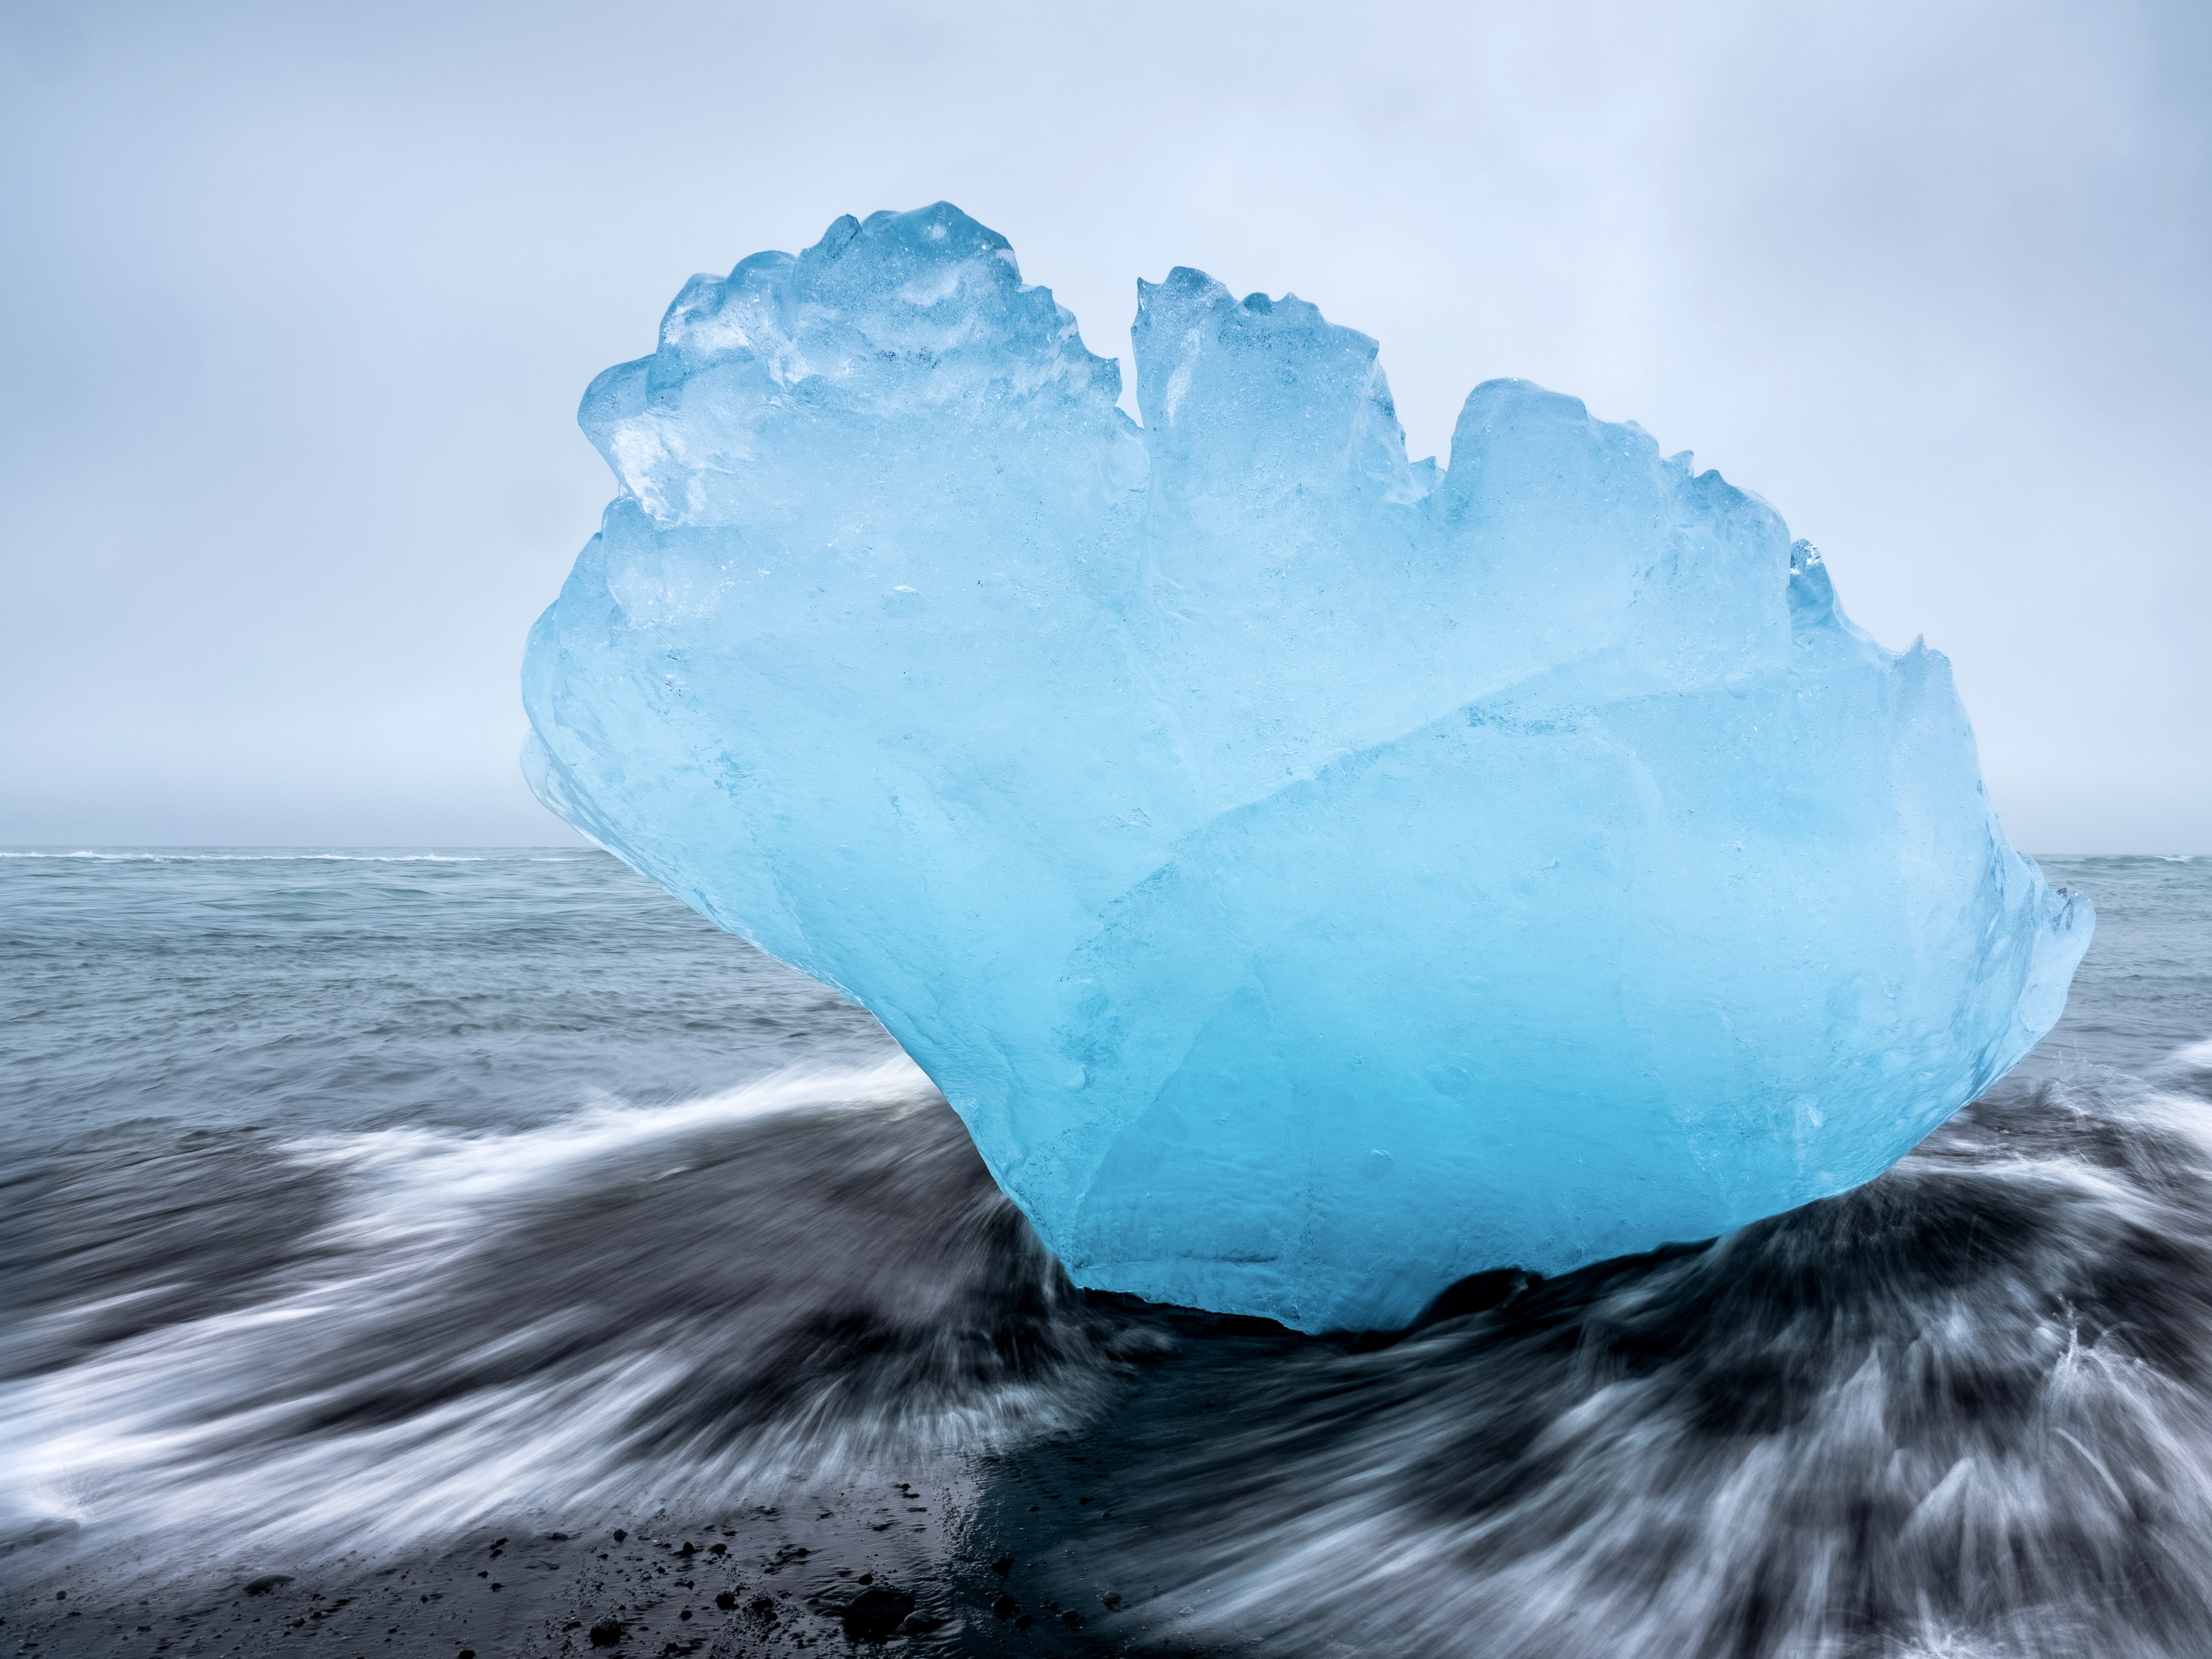
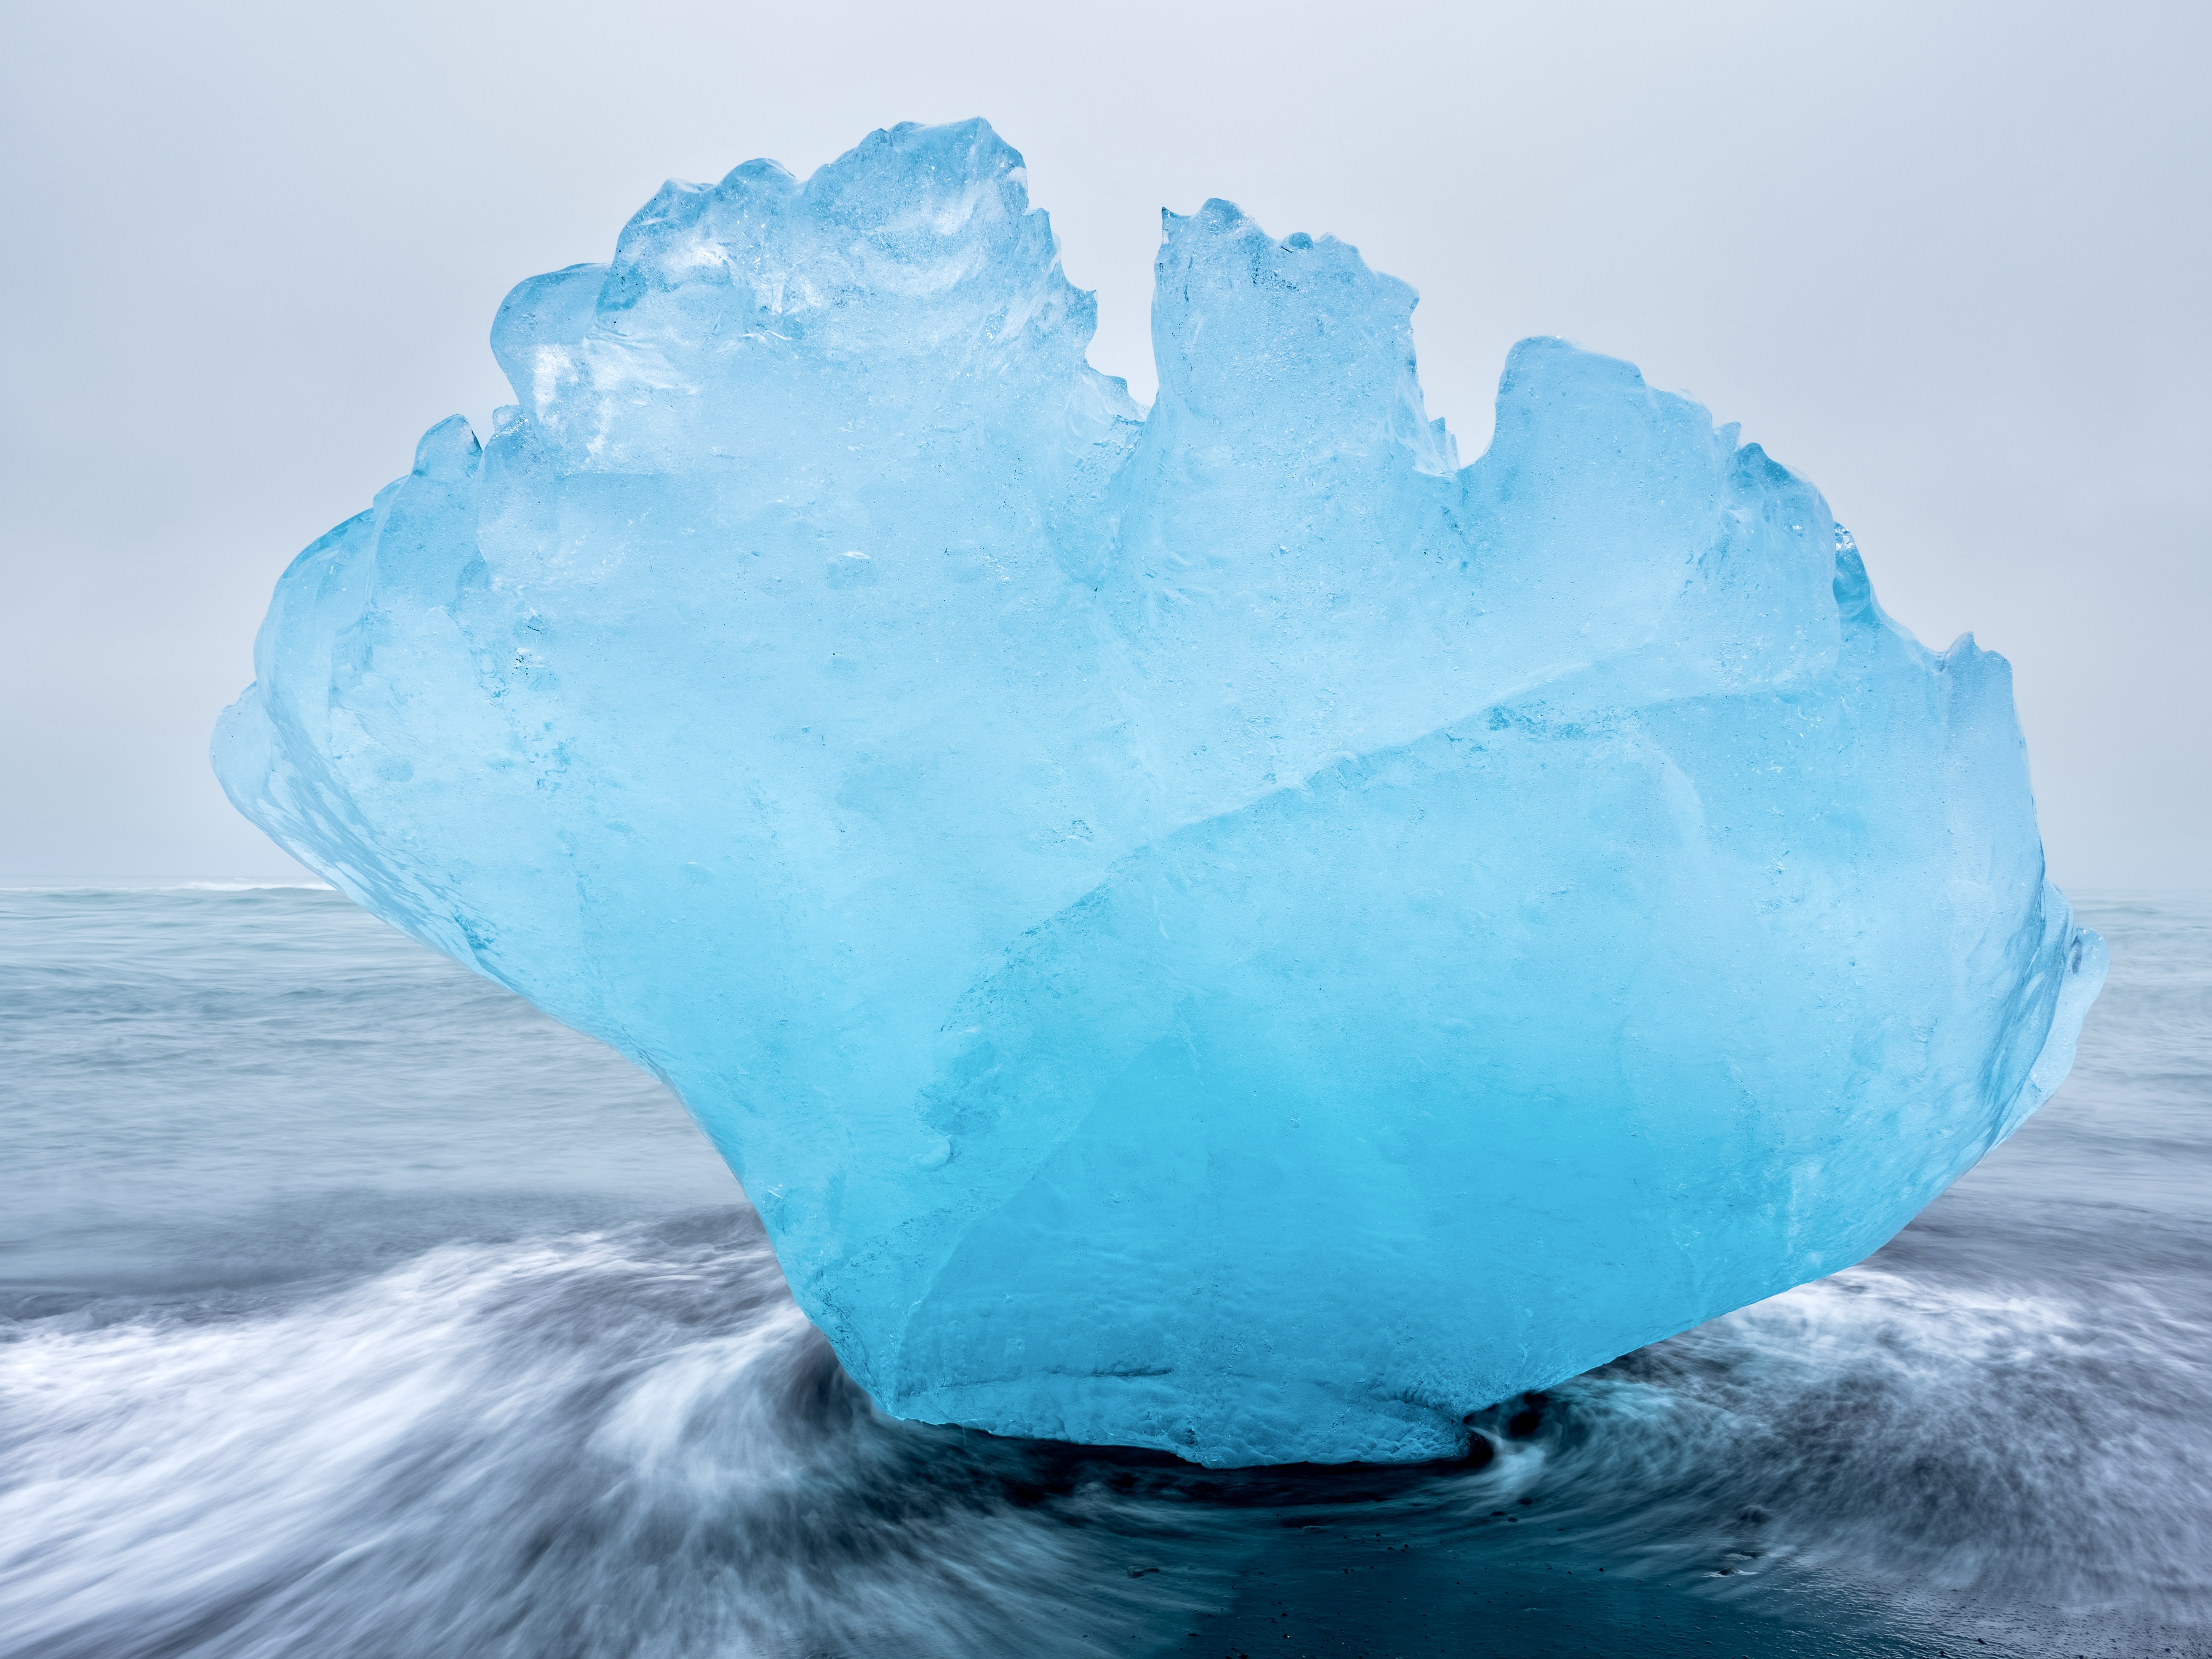
The A* / A+ photo
To me, an A* / A+ images go well beyond a textbook capture, verging on the abstract. They engage the viewer and compel them to think beyond the where? to the how? and why?, perhaps even the what? It is these images that are instantly worthy of printing and framing and exhibiting. In this case, I have two variations on the same theme.
Thanks for reading!
If you have any questions or comments about Iceland, photo techniques (the “how to”), assessing photographs, or anything else, please add it to the Comments section.
If you are not yet a subscriber, then consider adding your email so you are instantly alerted to new blog posts. And I promise not to inundate your inbox.
Have a look at my work by visiting www.luxBorealis.com and consider booking a presentation or workshop for your Photo Club or a personal field and/or screen workshop at Workshops.
 and duckweed")
")
")

